|
|
|
GREENHOUSE |
|
WHY A
GREENHOUSE...SUNROOM...POTTING SHED...STUDIO?
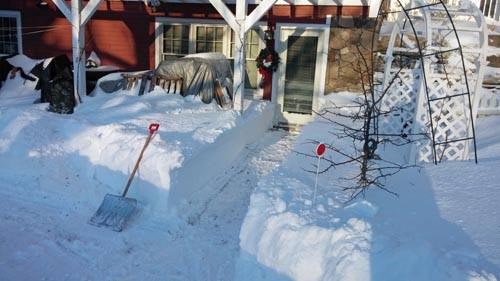
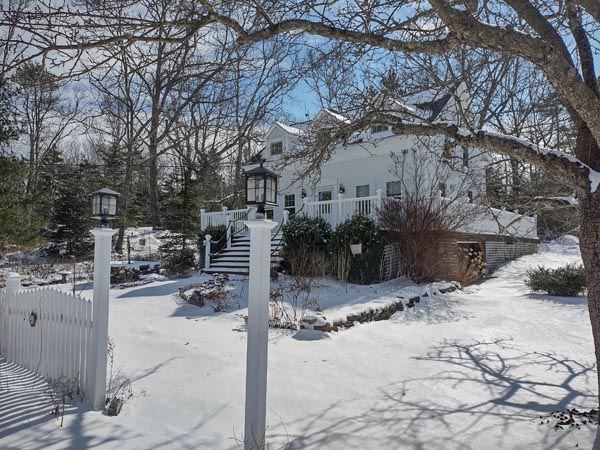
Because the harsh
part of winter lasts
too long here in Boothbay, in mid coast Maine!
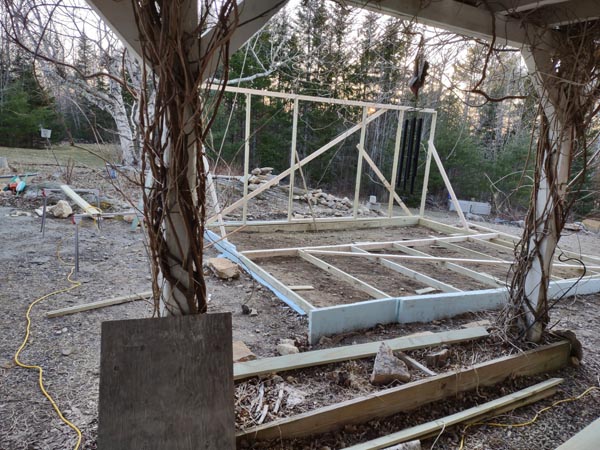
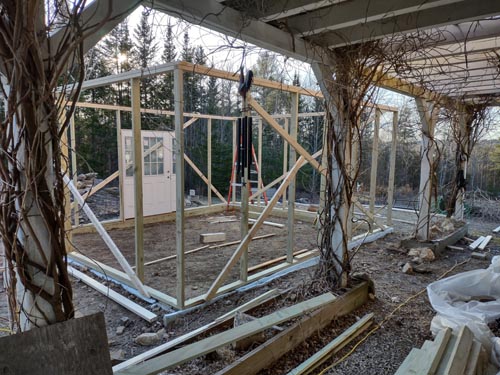
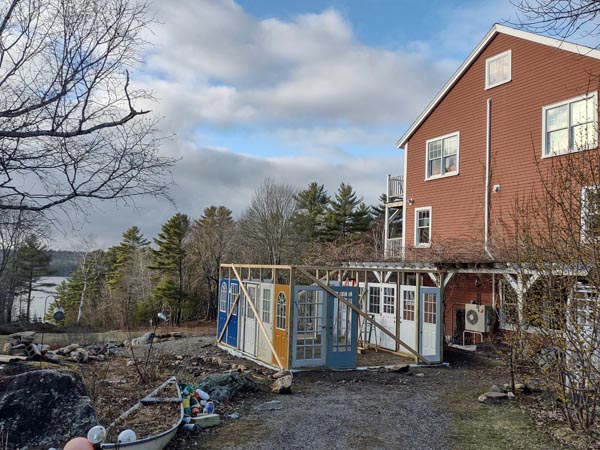
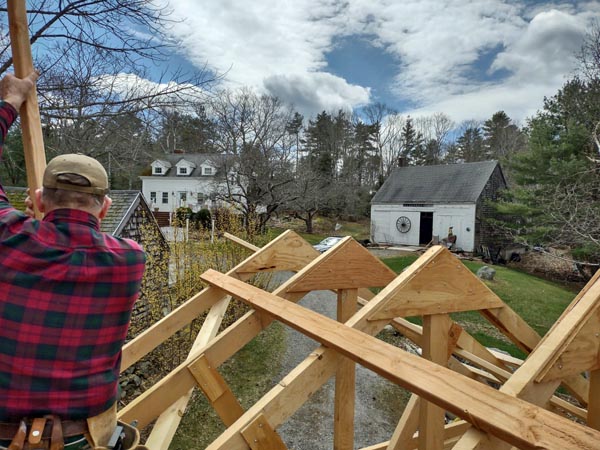
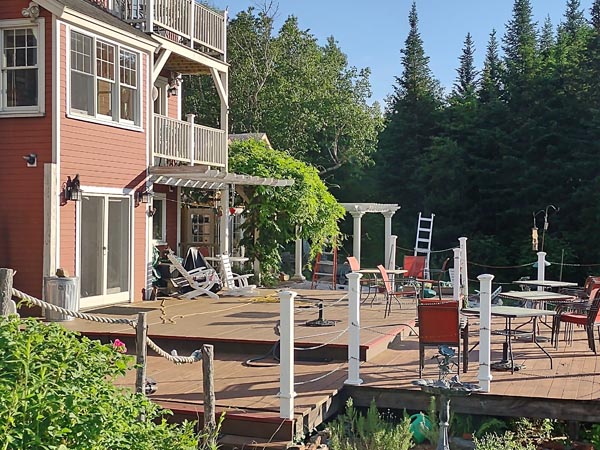
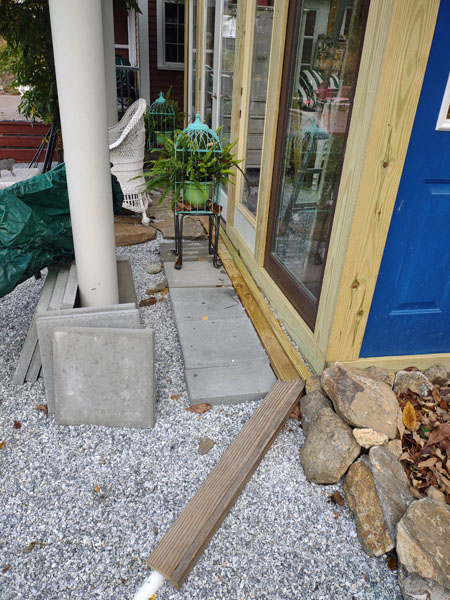
This is the very spot
where I determined to build a greenhouse...and you can see why. It's
west of the 'Owner's Quarters' on this estate...gets plenty of sun...has
enough width to lay out a building plan that will serve many important
purposes...and it's cold and forbidding for too long at this latitude!
So please join me in
the journey from this...
|
|
|
 |
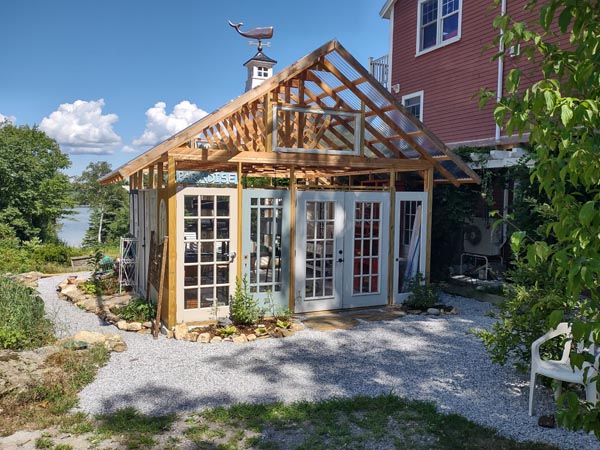
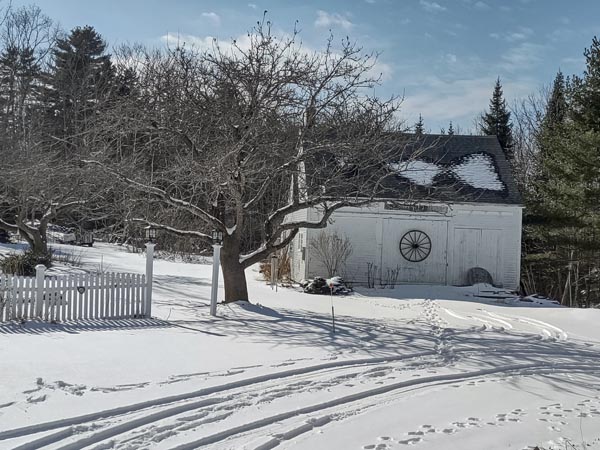
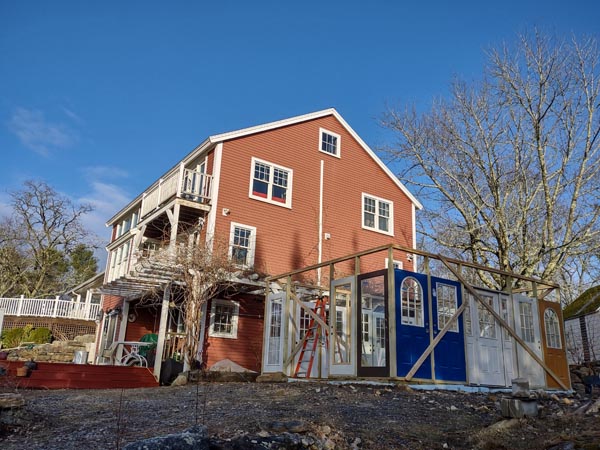
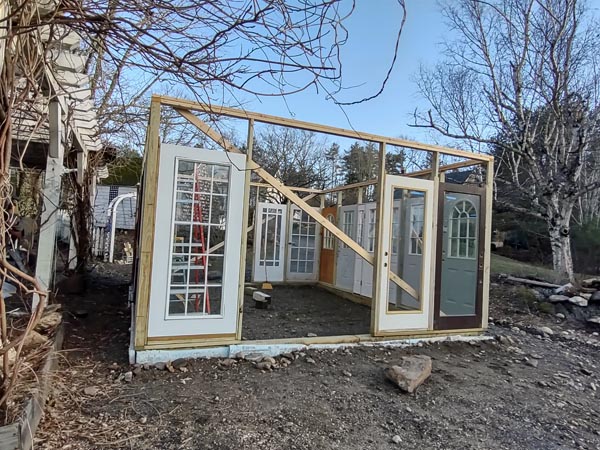
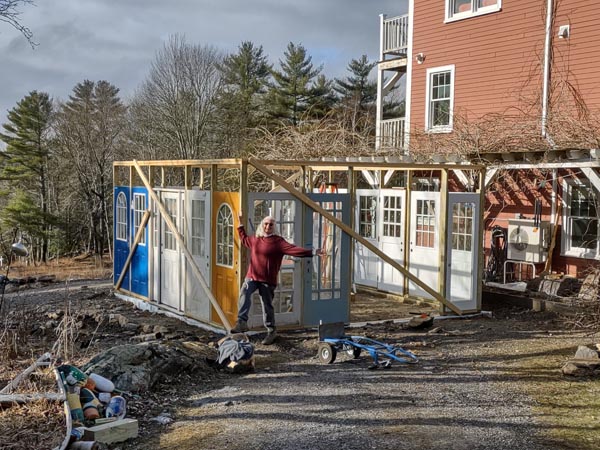
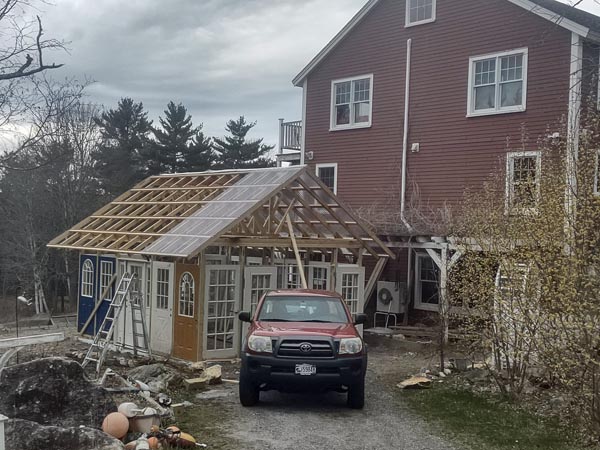
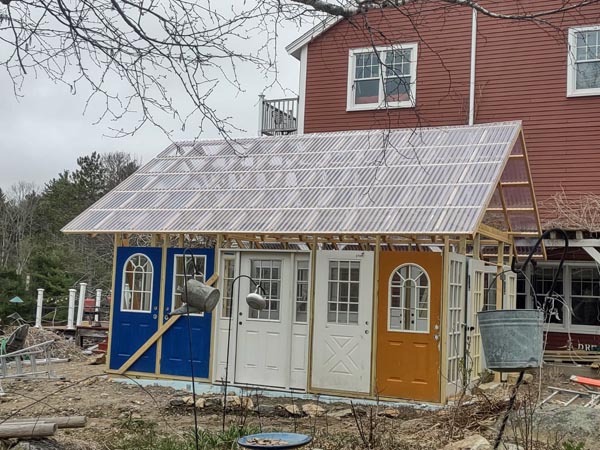
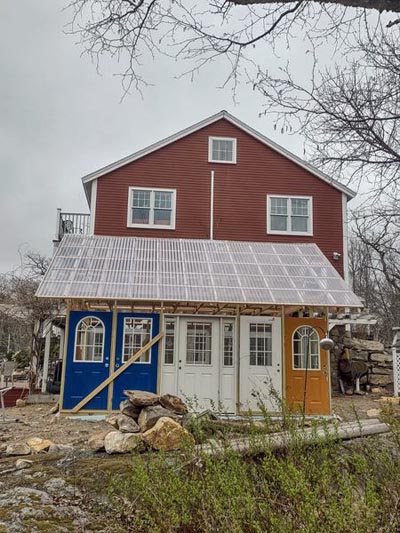
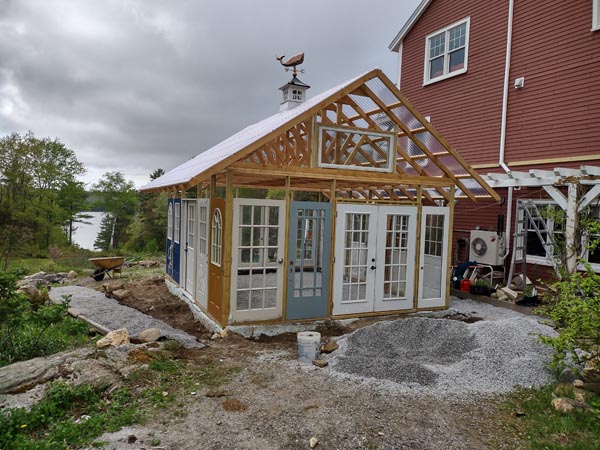
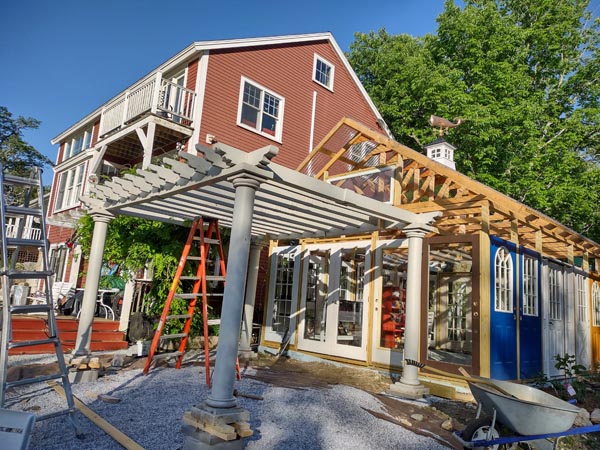
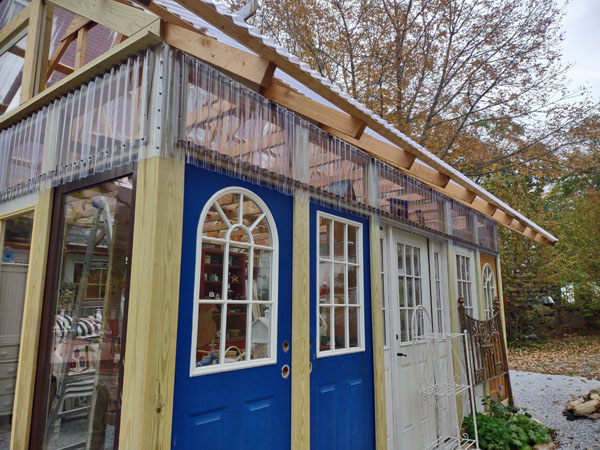
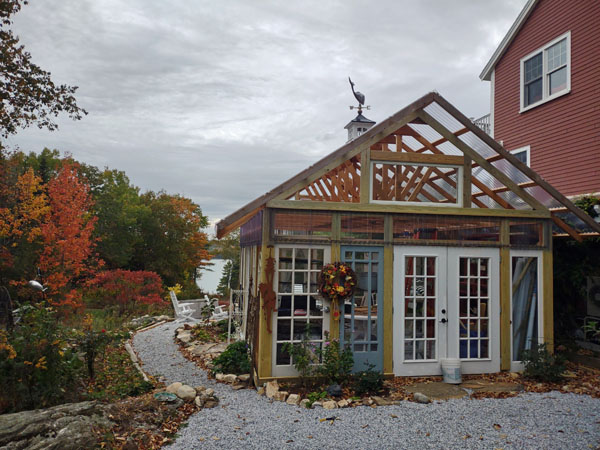
...to this...so far. (all noisy work had to stop once the vacation
rental 'season' began in June)
|
|
 |
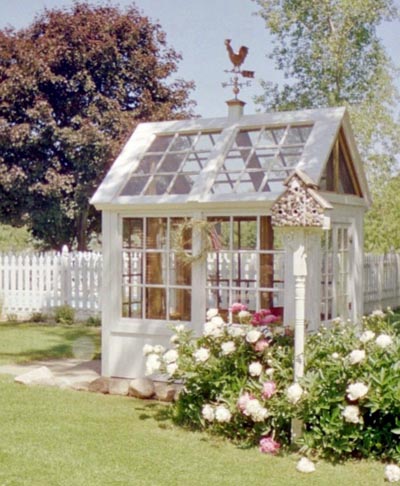
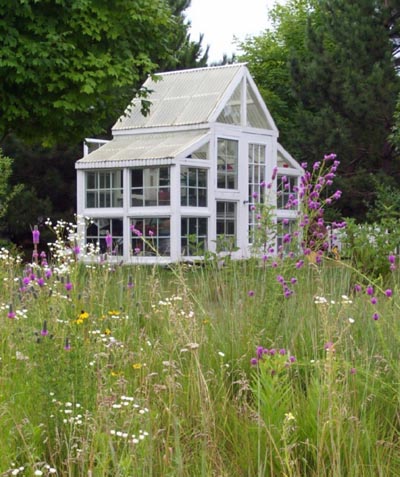
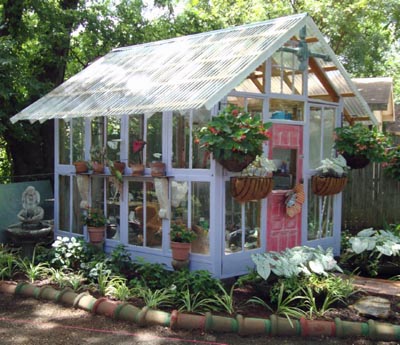
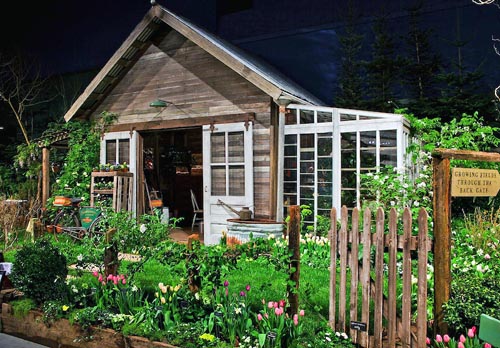
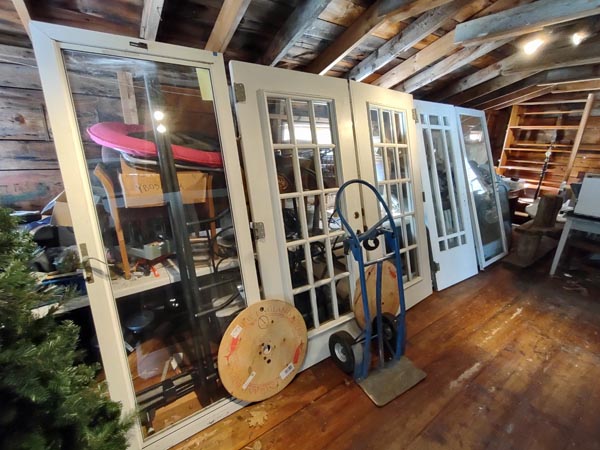
I began to search online for
attractive greenhouses, made of recycled materials, that could also be
used as a sunroom for gathering friends and having tea in comfort in
March...and November, as a potting shed and perhaps even an art studio
which would beckon me out-of-doors to create. There are lots of
attractive greenhouse pictures, but they are all made of single pane
glass windows. Here are some examples.
|
|
|
|
 |
 |
|

|
| That would NOT extend
my season enough. So I bought a book about building a greenhouse with
insulation. ... |
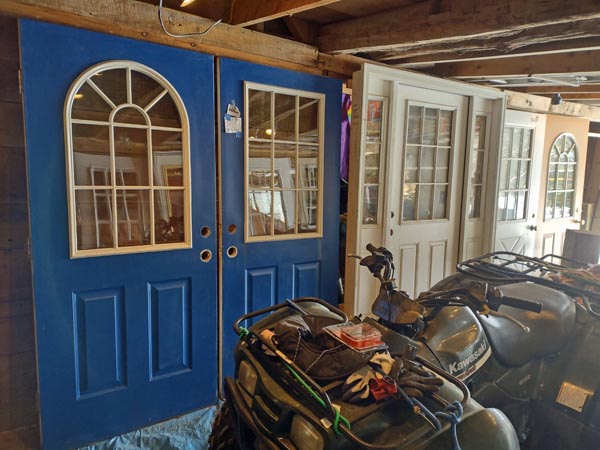
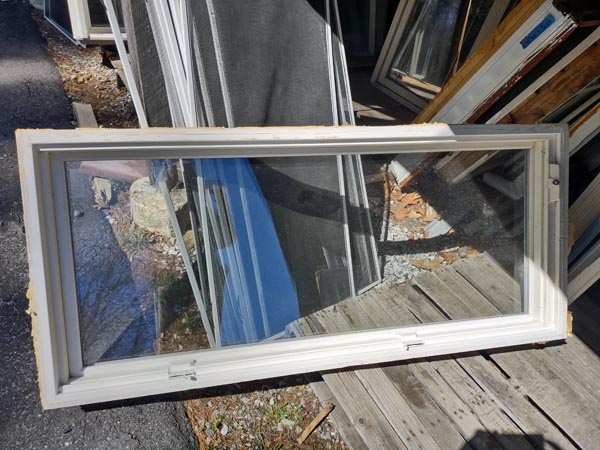
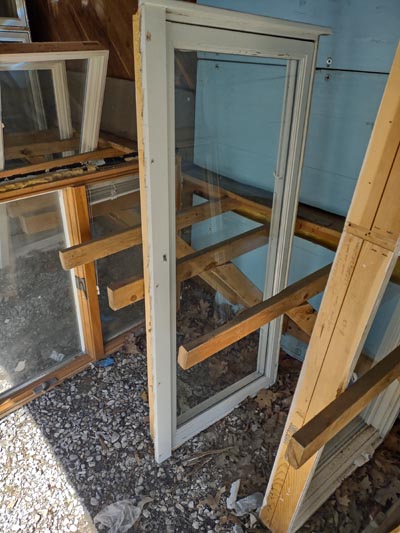
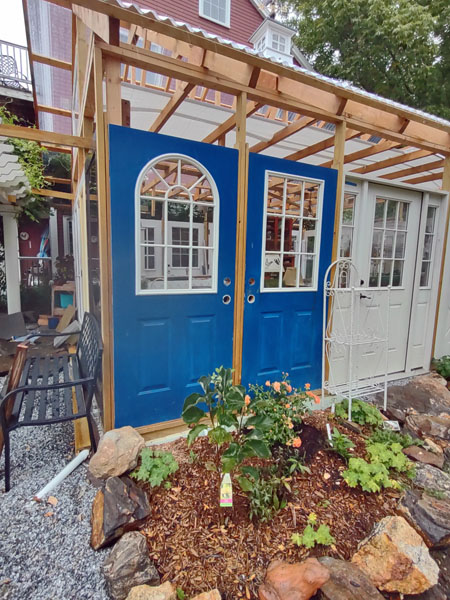
| And one day, as I was
wandering through the Waterville Restore/Habitat for Humanity outlet, I saw two adorable royal blue
exterior doors and that was that. They were double paned glass, built
strongly and absolutely captivating. The next 18 months, I spent
wandering Restore outlets throughout Maine and other recycling outlets,
including the Facebook Marketplace. Pure delight! My imagination was set
free.
|
|
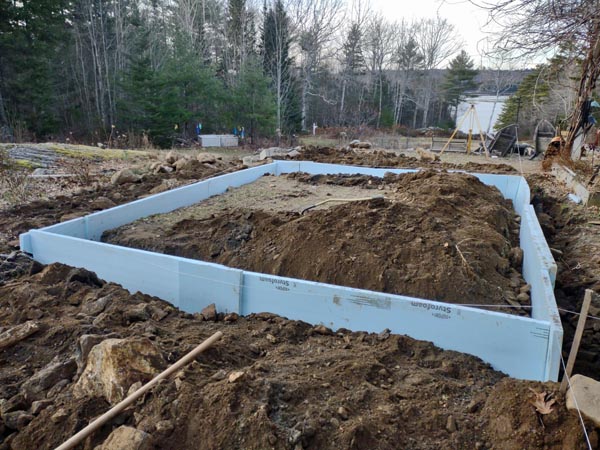
FOUNDATION |
DECEMBER 4, 2021
My 'builder mate' (as they say on the 'Escape to the Chateau'
series) Rick and I took the first step today to build my next whimsical
project at the Bold Colorful Life estate...a greenhouse/sunroom/potting
shed made out of re-purposed exterior windowed doors and looking out
over the beautiful Back River. I hope it will help me grow
vegetables...and start enjoying tea with friends in the outdoors in
comfort in...March!!!
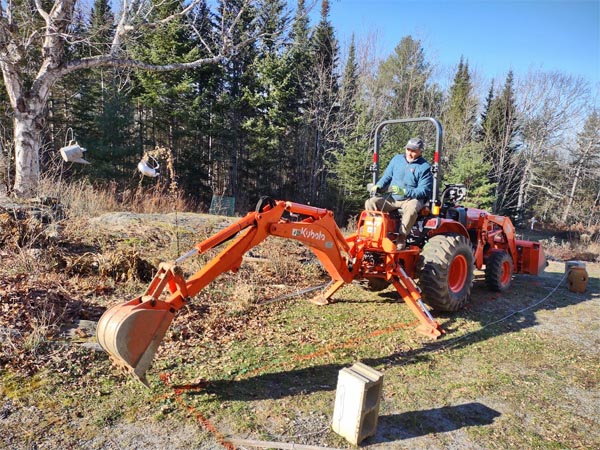
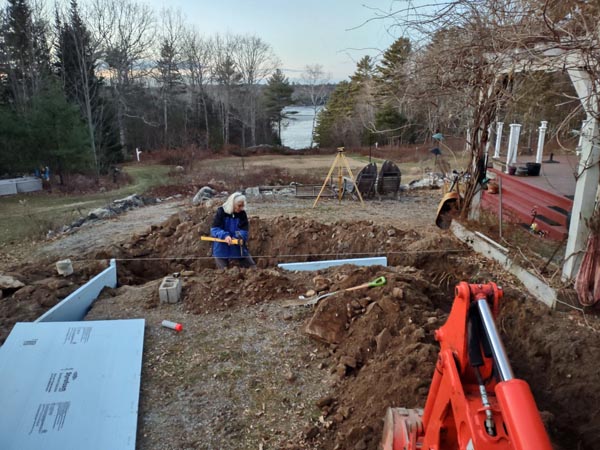
Today I rented a tractor so we could dig the trenches that will
hold the ground warming insulation around the periphery of the
greenhouse as well as the concrete footings for the walls. Wish me
luck!!!
|
|
 |
|
|
|
|
|
 |

|
|

|
|
|
 |
|
|
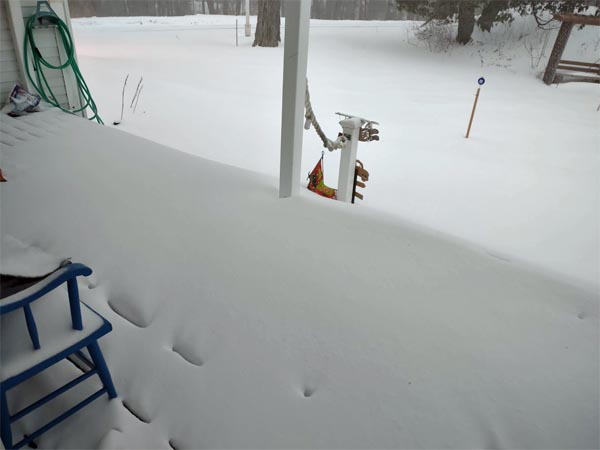
And then winter took over...
 |
|
GREENHOUSE BUILDING DESIGN |
FEBRUARY 26, 2022
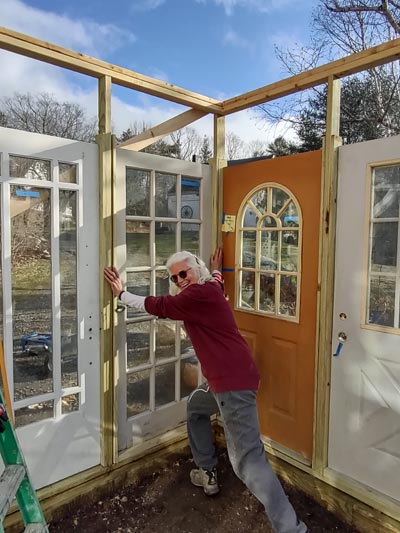
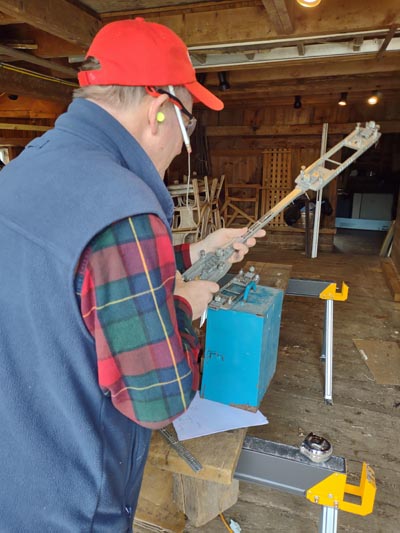
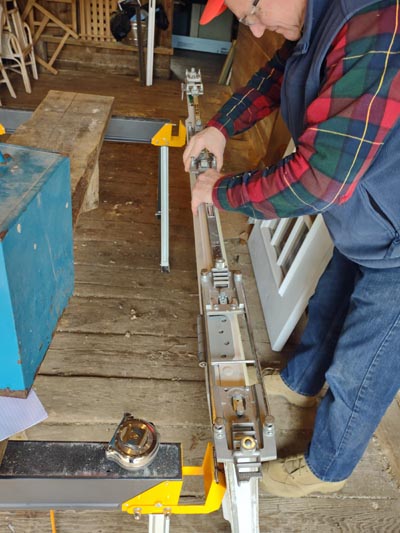
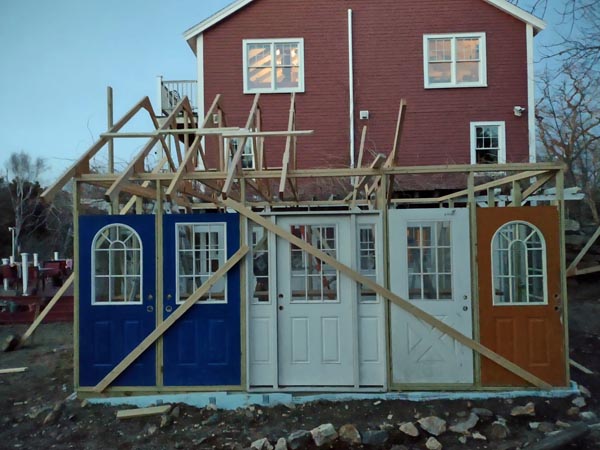
It was a glorious, quintessential winter wonderland day...the kind that Fills you with energy and drive...so I decided it would be a 'muscle'
day...and started by moving 400 #s of pellets into the house...then, all
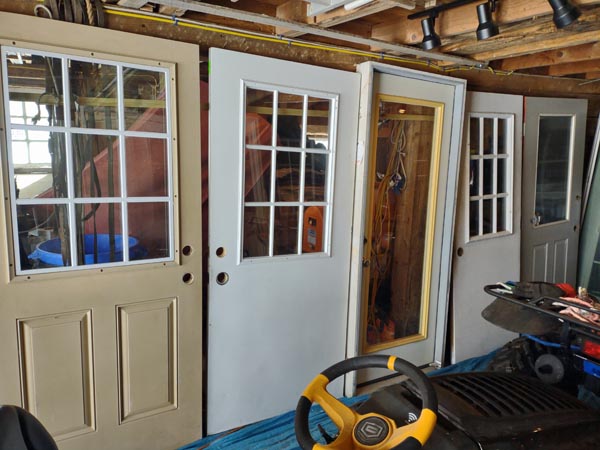
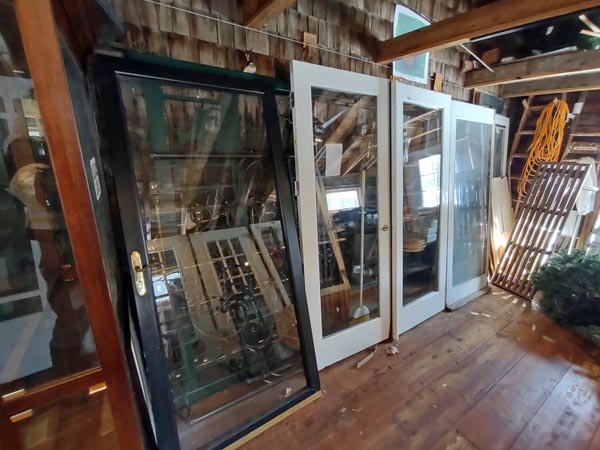
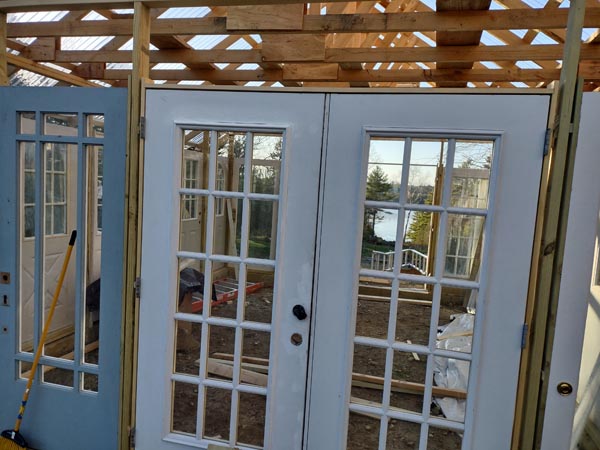
warmed up, I went out to the barn to move the exterior doors around into
line for each of the greenhouse walls. First, the long western wall
(with the cute blue doors that started me on this path) and the long
eastern wall, next to the house. Next, the southern wall which faces the
Cape cottage and finally, the northern wall which has full glass doors
because it faces the river.
|
|
|
 |
 |
|
 |
 |
|
|
|
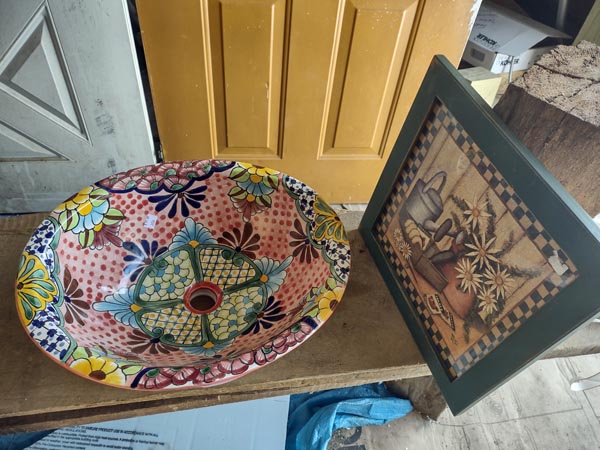
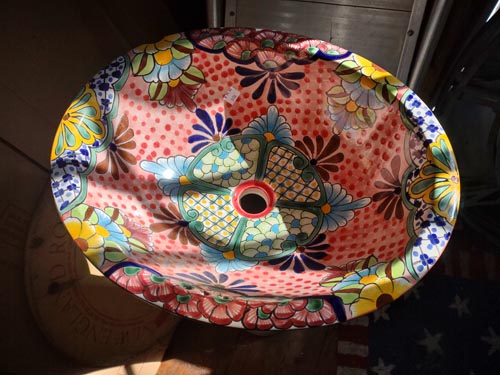
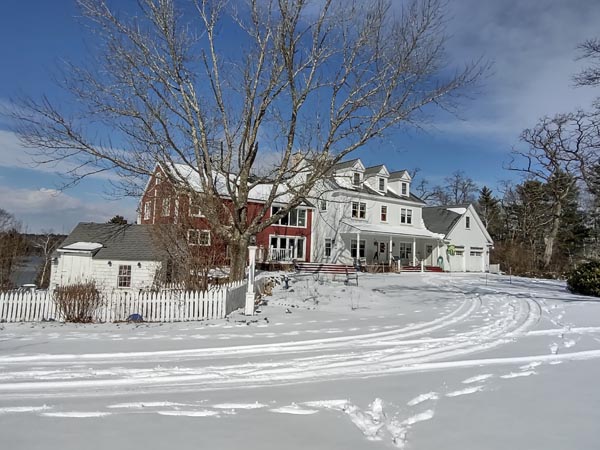
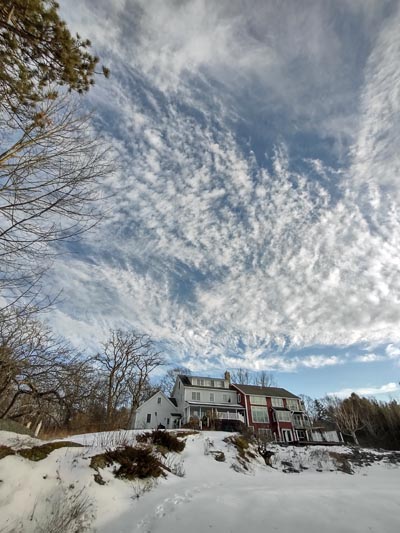
FEBRUARY 27, 2022
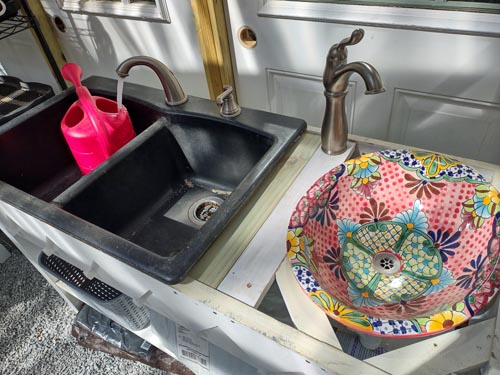
I found a fabulous sink for the greenhouse yesterday in my
wanderings...and a gardening picture for the wall...then I stepped
outside to a day filled with sunshine on clean white snow, brilliant
blue skies and white puffy clouds and fell in love with winter all over
again!
|
|
 |
 |
|
 |
 |
|
 |
|
OTHER PROJECTS |
|
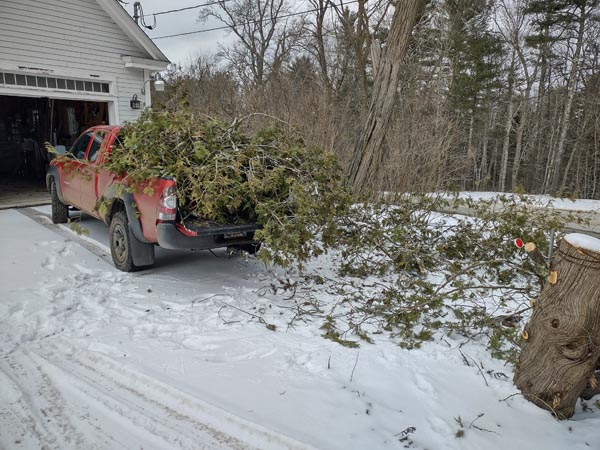
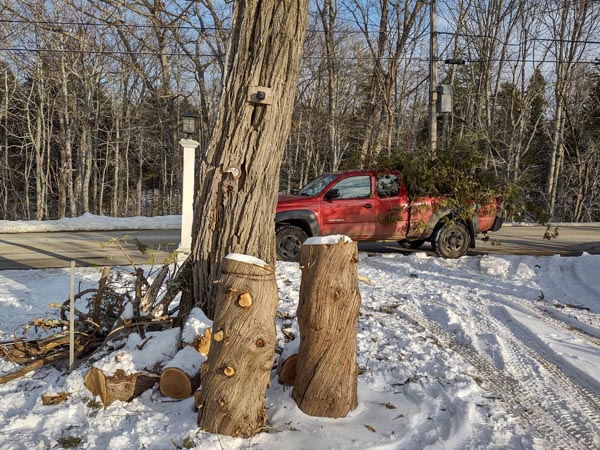
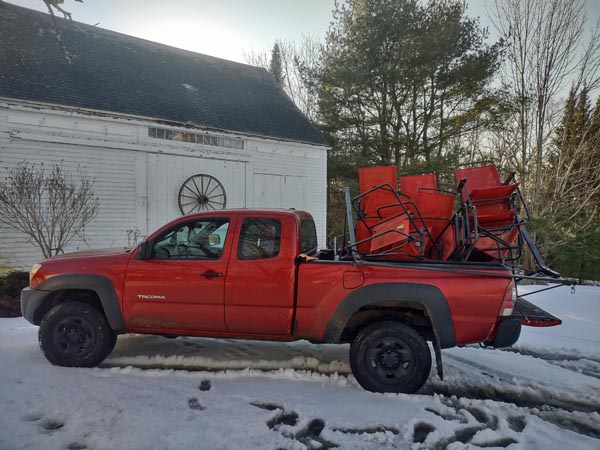
FEBRUARY to APRIL
Other weather-related projects intervened. A lovely cedar tree split in
half and needed to be sawed and tidied up...the patio chairs needed to be rescued from the tent before the
mud set in...etc. |
 |
|
|

|
|
|
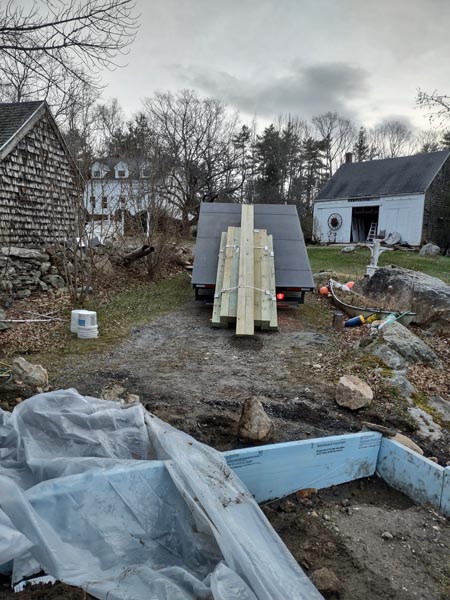
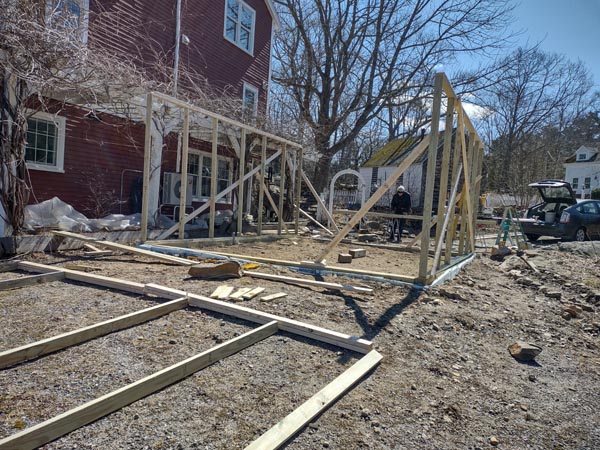
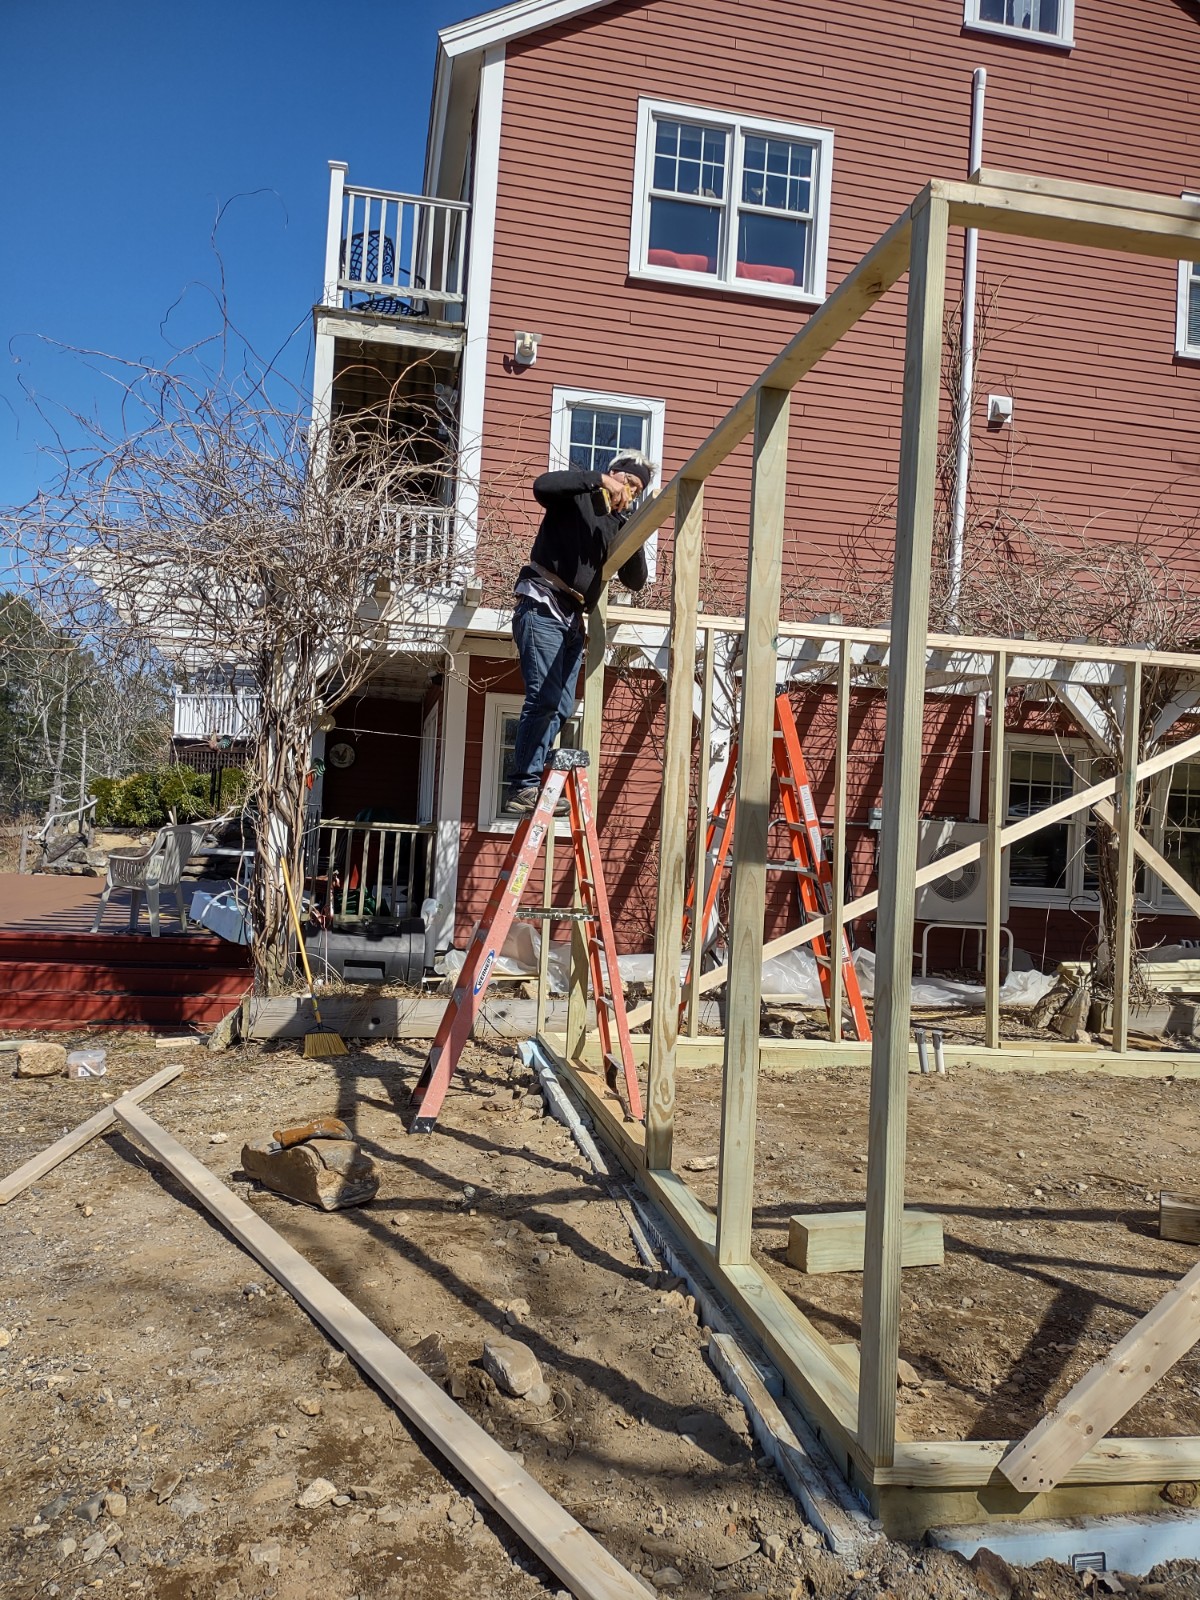
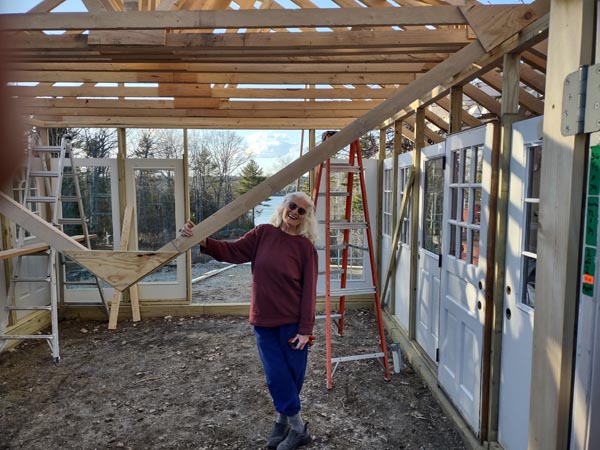
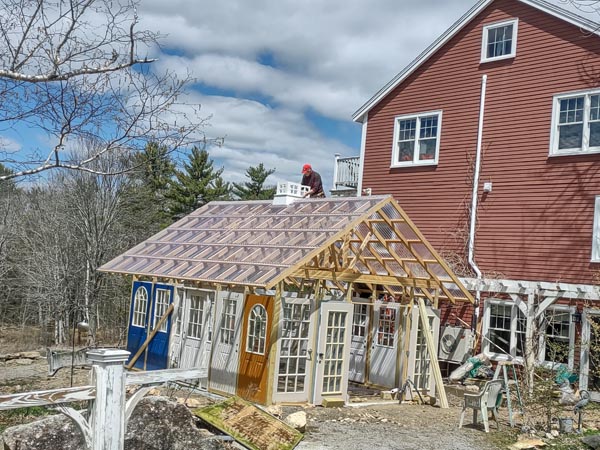
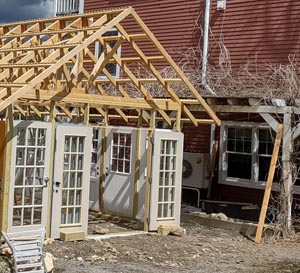
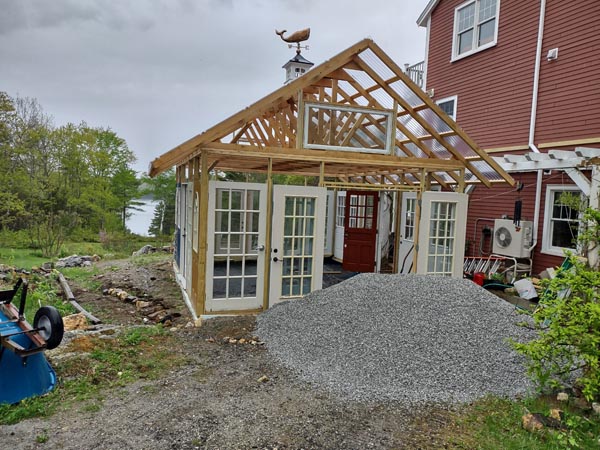
FRAMING |
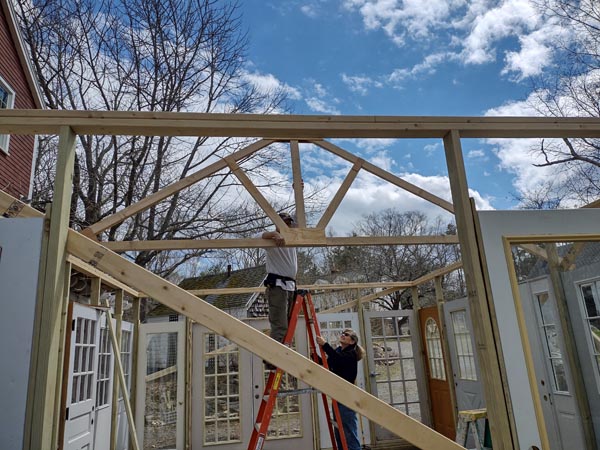
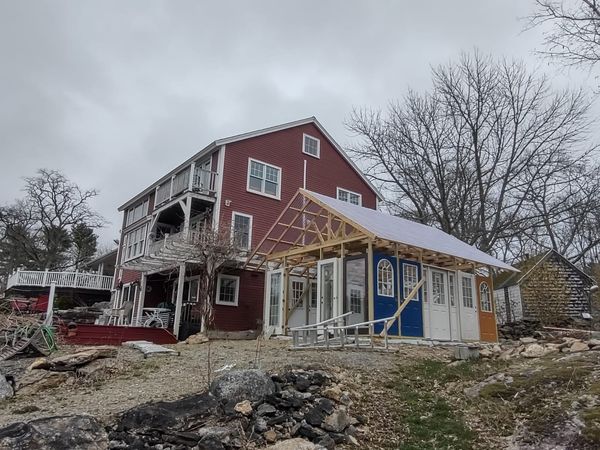
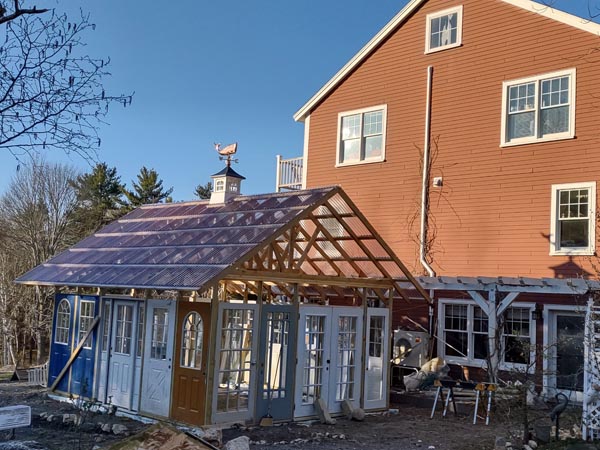
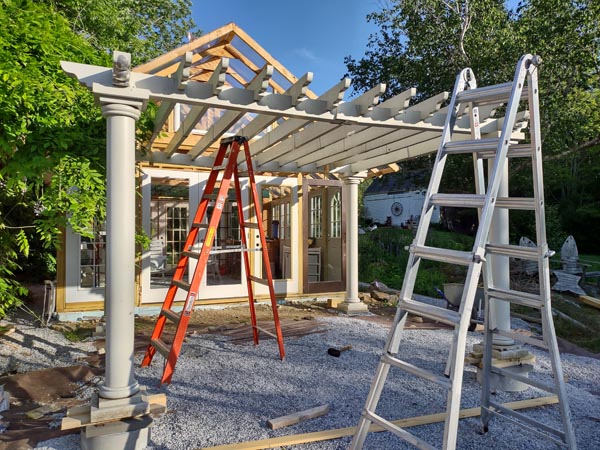
APRIL 6, 2022
At last, I had exciting news that the greenhouse
project is off the ground...literally...and on its way. It's been a
long road...18 months searching out the right second-hand exterior
doors to provide good insulation and whimsical looks...getting the
material...finding helpers, etc...all during COVID, with its MANY limitations.
|
|
|
|
|
|
 |
|
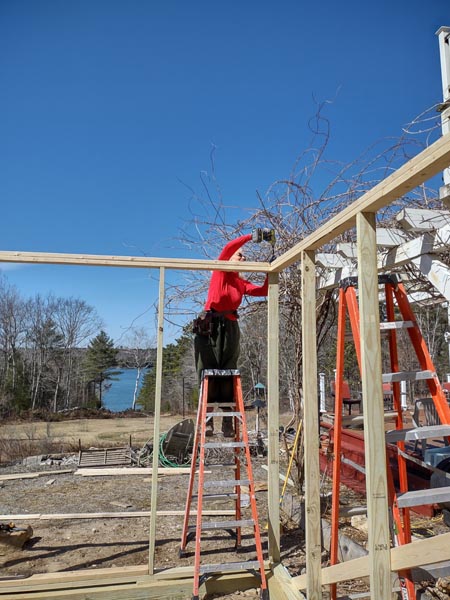
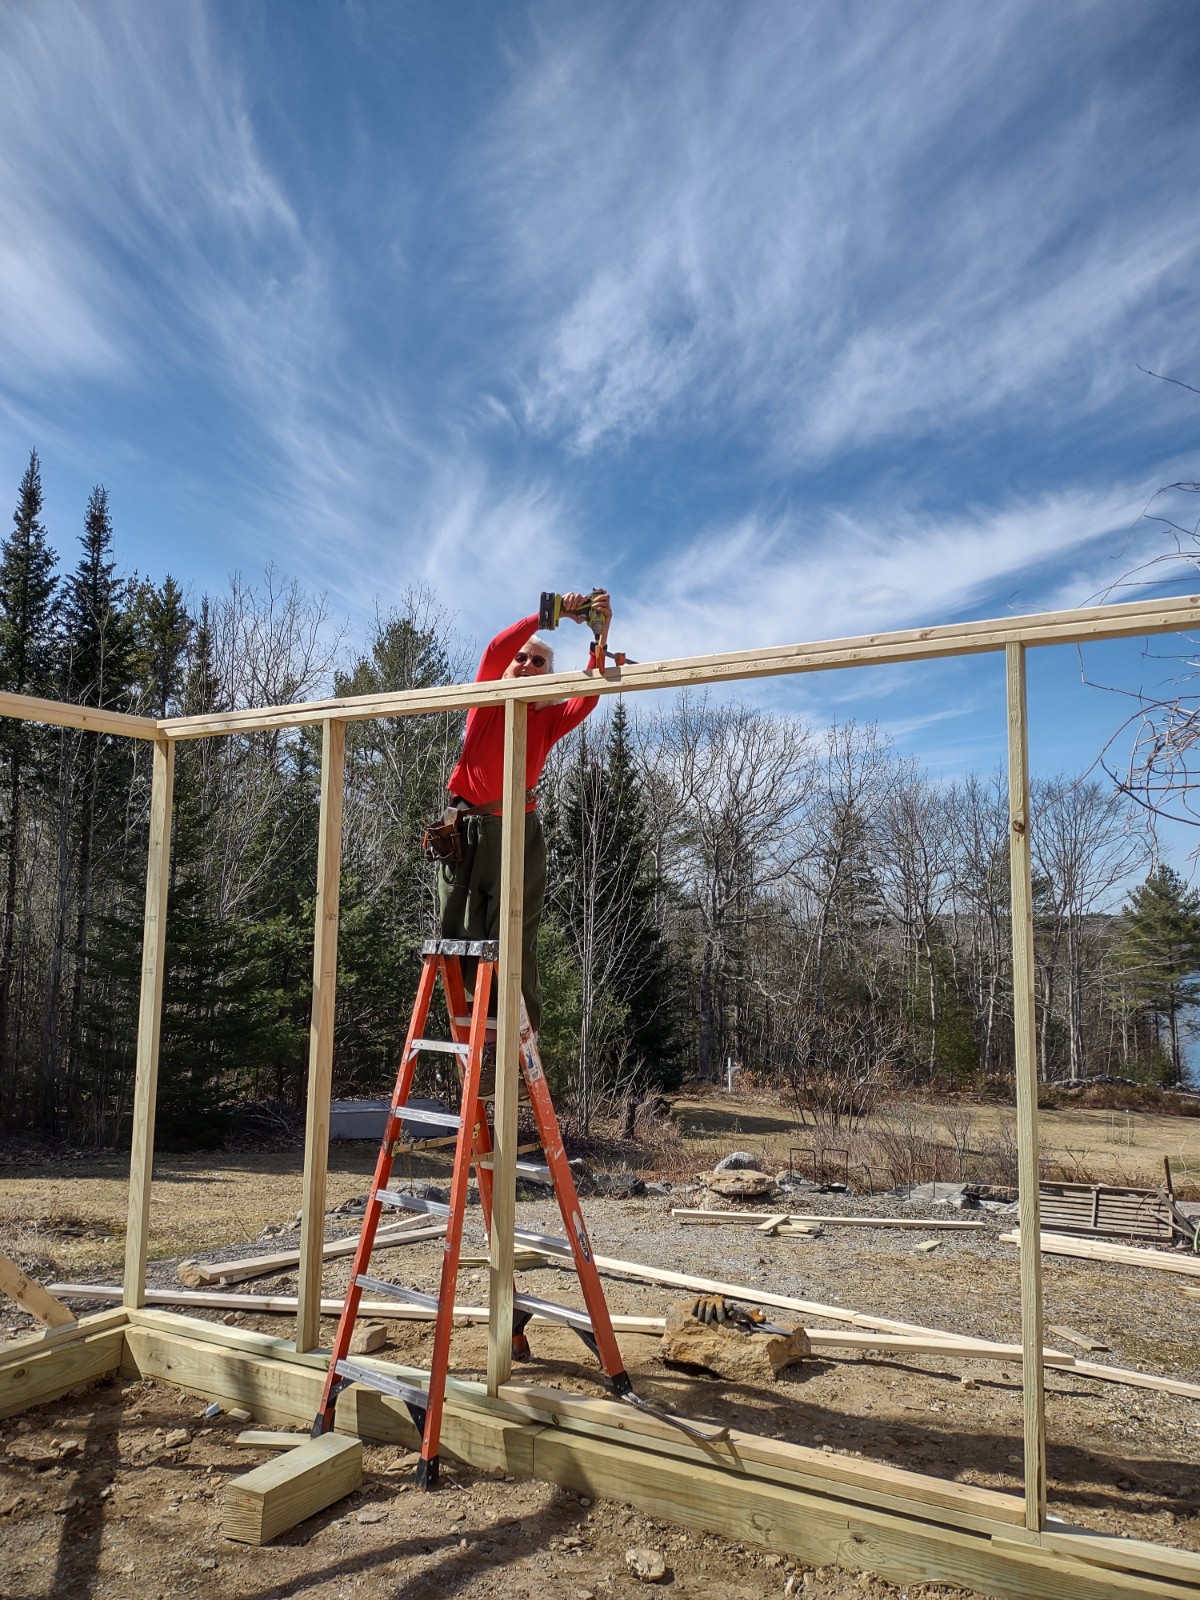
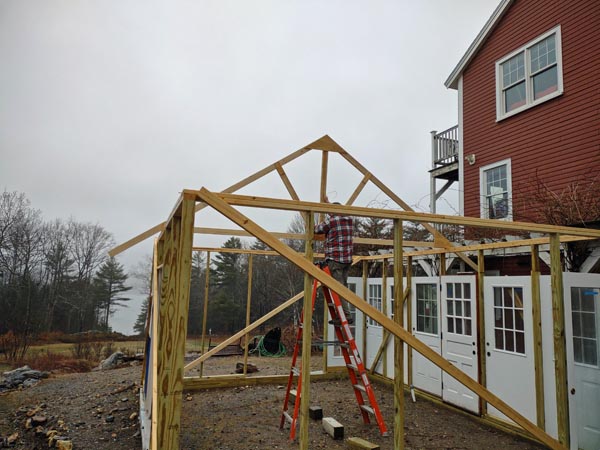
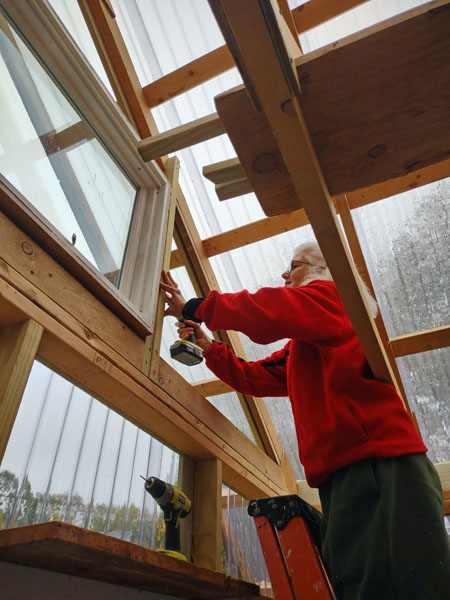
Screwing the top plate onto the framing...sort of like doing yoga on a
ladder!
|
 |
|
|
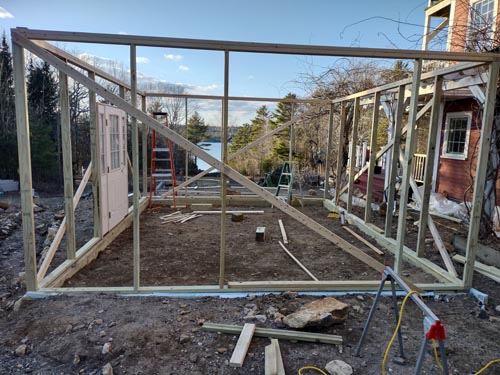
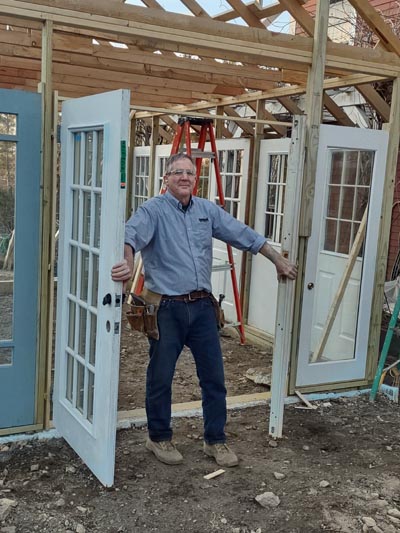
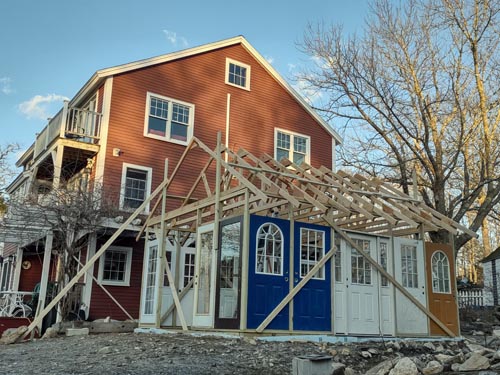
And yesterday, we raised the final three walls and put in the first
door...woo hoo!
|
|

|
 |
|
|

|
|
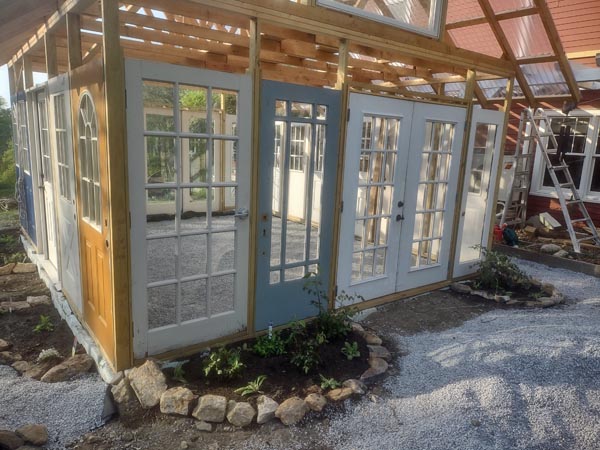
INSTALLING DOORS AS WALLS...AND
DOORS AS DOORS |
|
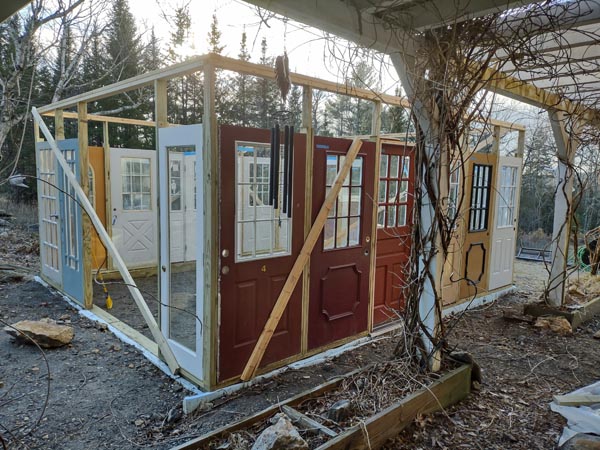
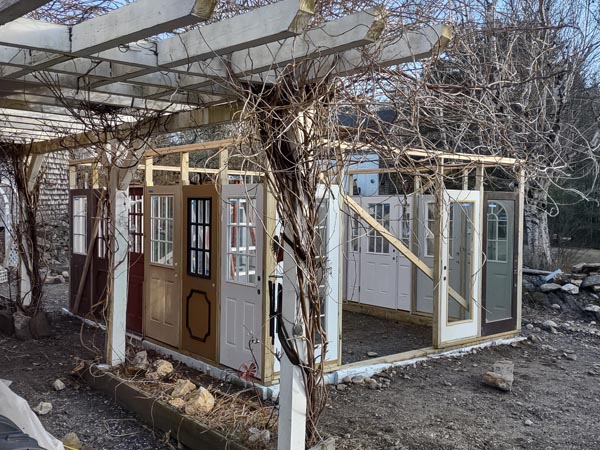
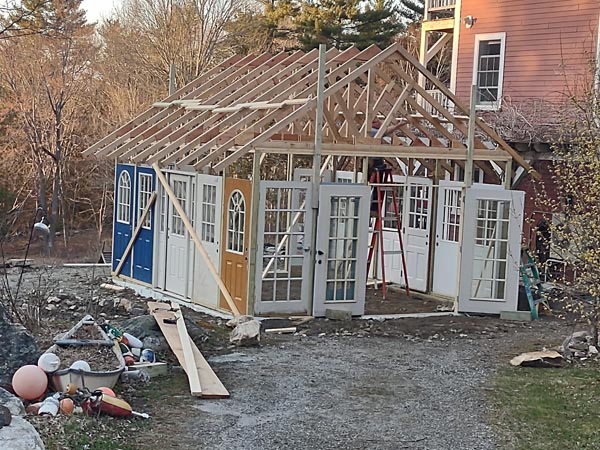
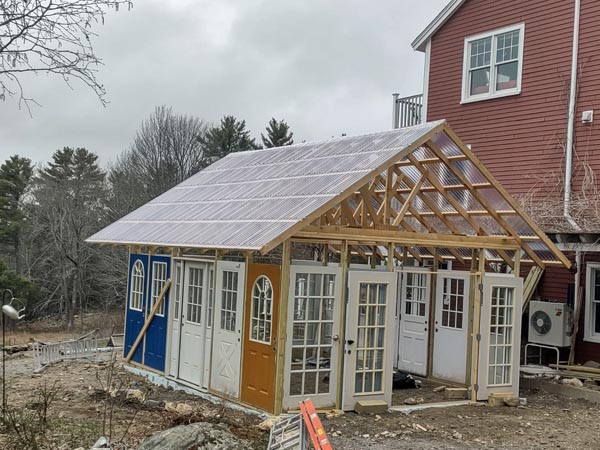
APRIL 7, 2022
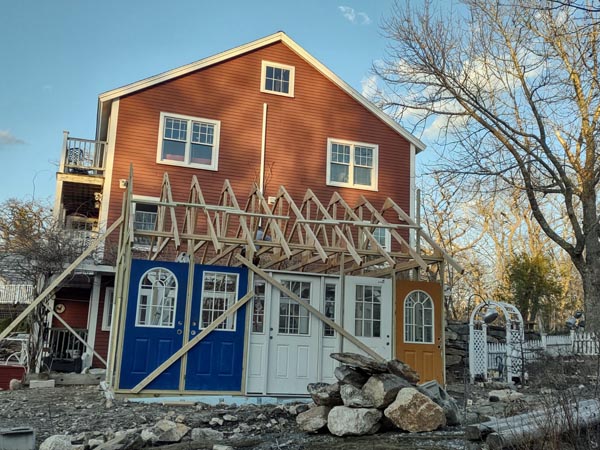
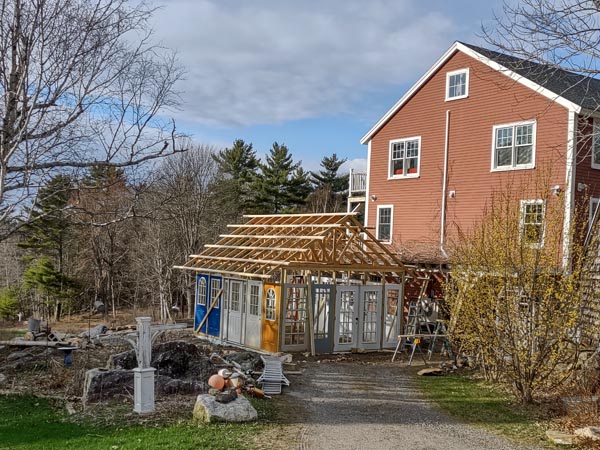
After some struggles, the greenhouse has been plumbed, shimmed and
secured...and many more of the doors have been installed. The colors
will be changing, but this will give you an idea...woo hoo!!
|
 |
 |
|
|
 |
|
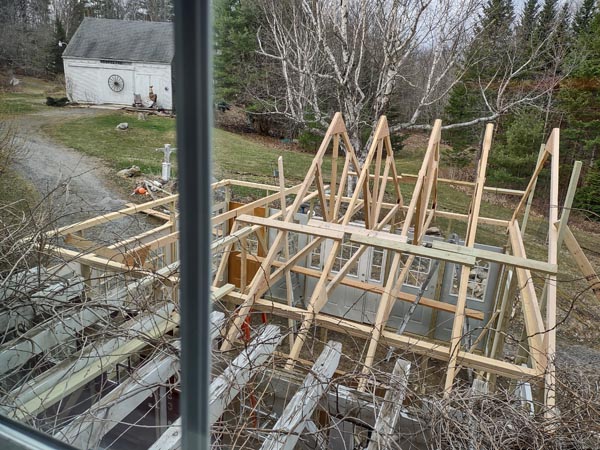
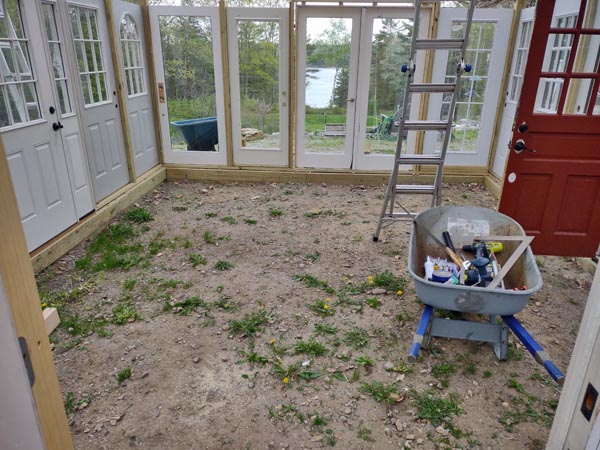
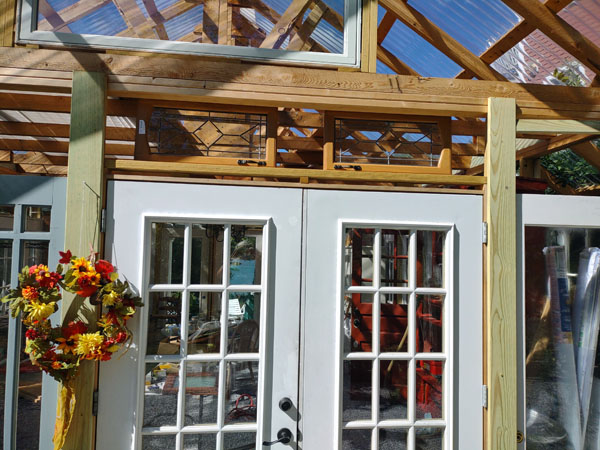
APRIL 8, 2022
More exciting progress on the greenhouse today. We finished the
first/model roof truss, tried it out in the pouring rain and IT FIT!
so we started to make more. And then it was time to install the last
8 single doors...which leaves only the two sets of active French
door pairs...one facing South to let the sun in...the other facing
North to give us a great view of the river
|
|
|
|
|
|
 |
 |
|
APRIL 10, 2022
Yesterday a new carpenter and hinge mortising expert came to hinge
and hang the two double sets of French doors.
|
|
|
|
|
HANGING THE FRENCH DOOR PAIRS SO
THEY OPEN OUT AND DON'T TAKE UP INTERIOR SPACE
|
|
 |
|
|

|
 |
|
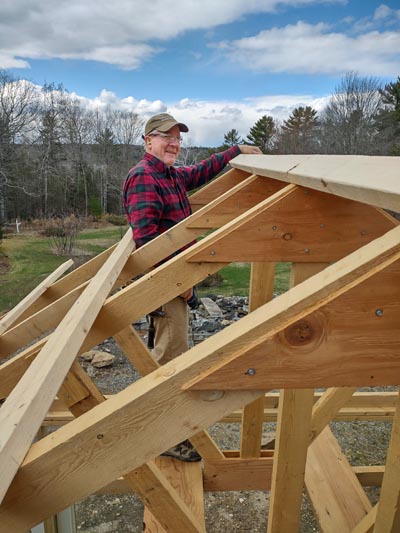
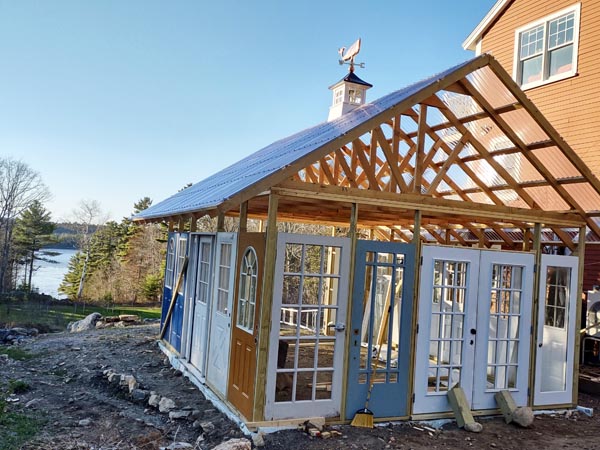
ROOF TRUSSES |
|
April 10, 2022
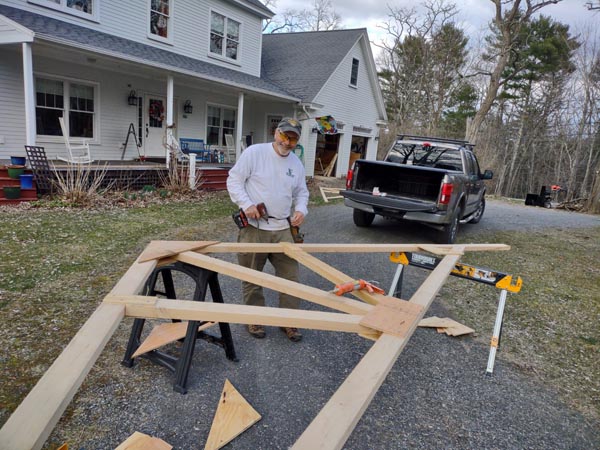
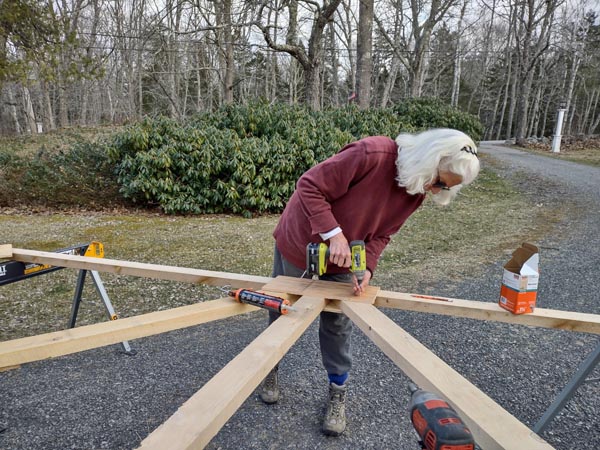
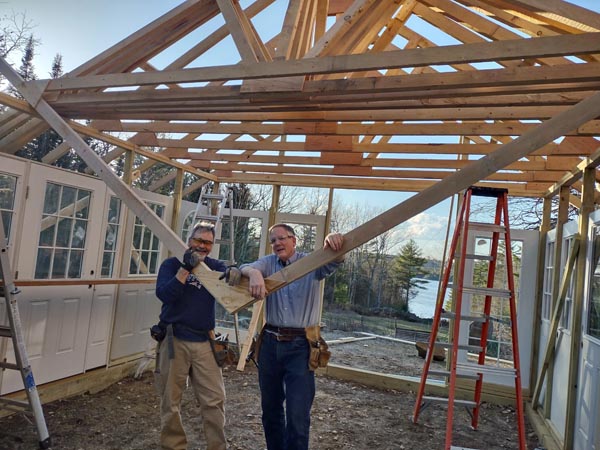
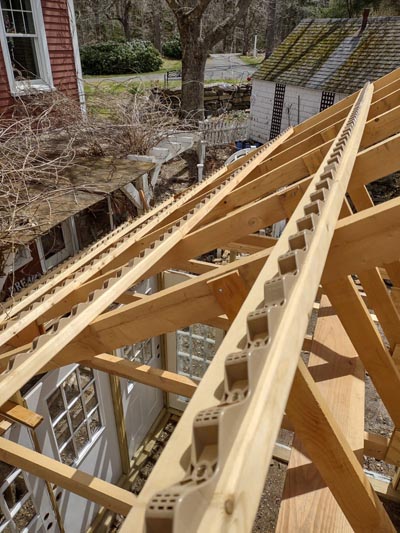
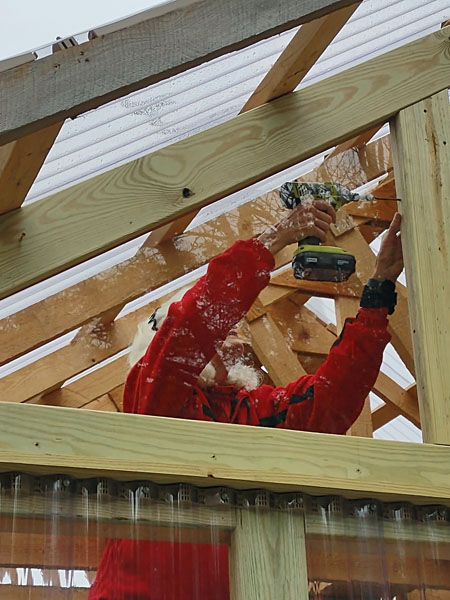
And today was the toughest physical day yet...but satisfying. I
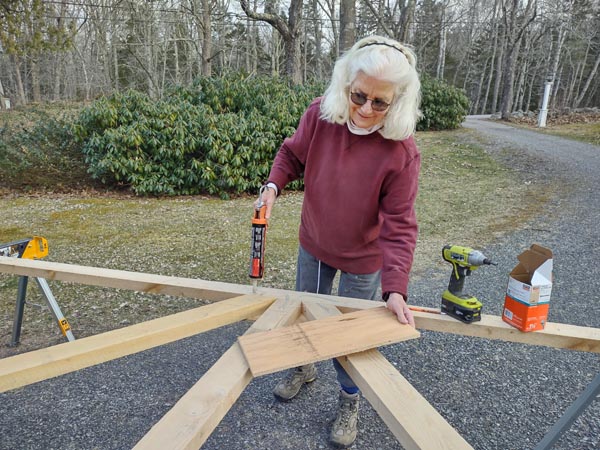
thought dragging a couple dozen exterior doors around was
rough...but building, gluing, screwing and carrying rough sawn 16
foot hemlock roof trusses proved to be the toughest yet. But they're
done and one is up on the top plates...we tried it to be sure it
fit...then just hung it upside down until we have enough muscle to
swing them all up and screw them in place. Fun!!
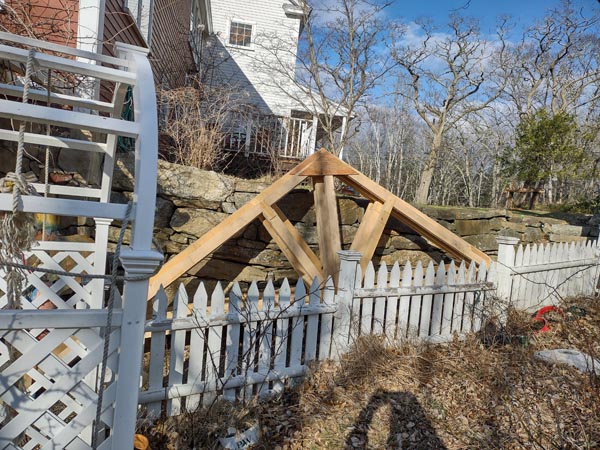
Friend/neighbors Rick and Bonnie came to help with that first
one...and you can see one of the sets of newly hung French doors
behind them.
|
 |
 |
|
|
 |
|
|
|
|
|
 |
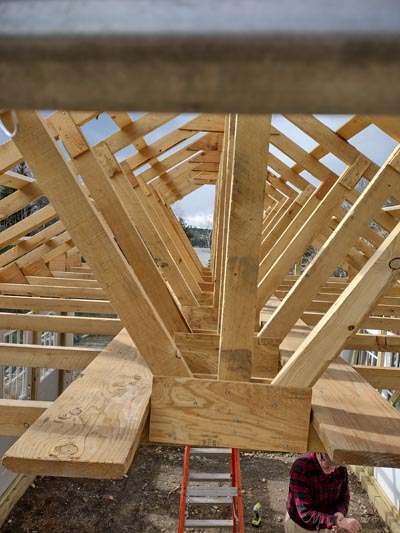
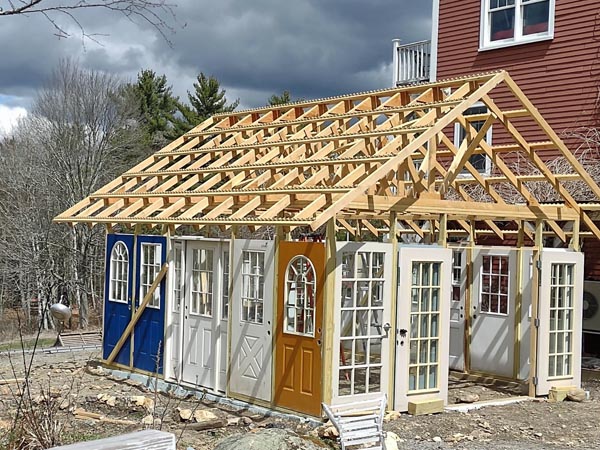
APRIL 12, 2022
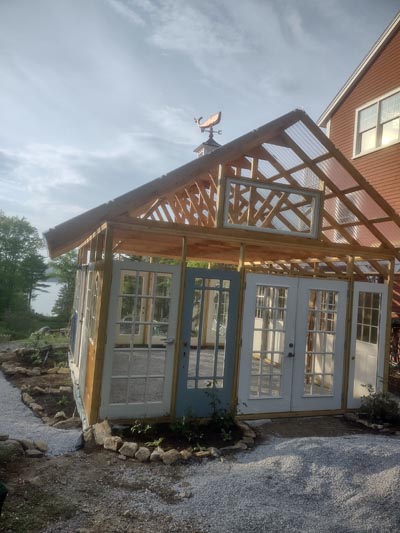
A wonderful turning-point of a day...all the trusses are complete
and all are up...ready to hold a roof. And aren't we the relieved
looking team after the last one went up safely...just as the wind
came up?! Many thanks to my awesome greenhouse team!
|
|
|
 |
 |
|
|
|
 |
|
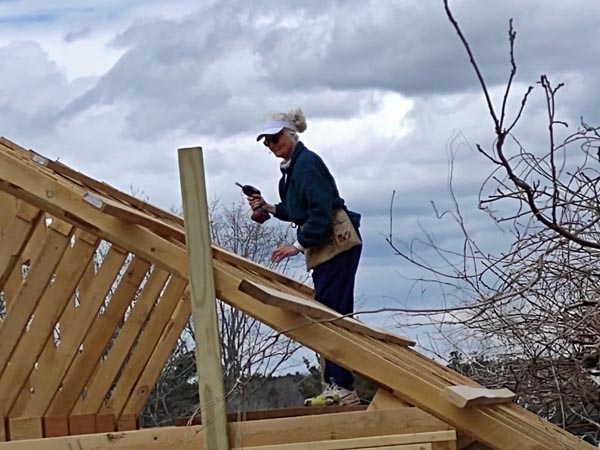
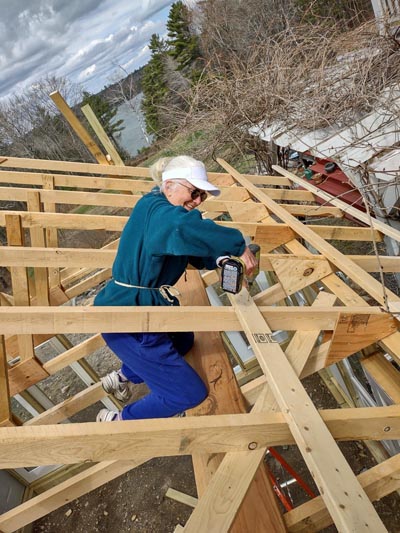
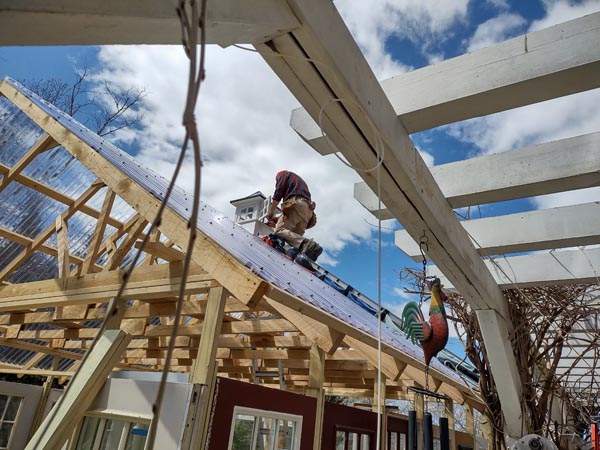
PURLINS TO HOLD THE TRUSSES TRUE |
|
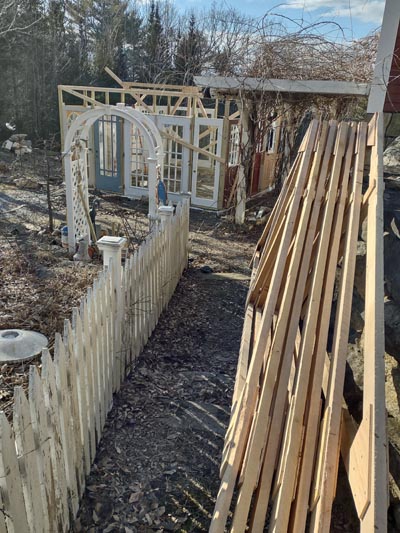
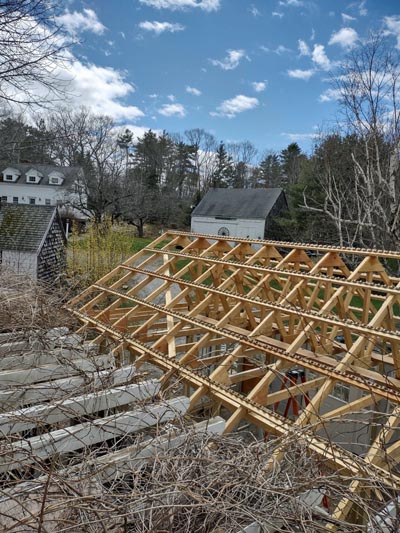
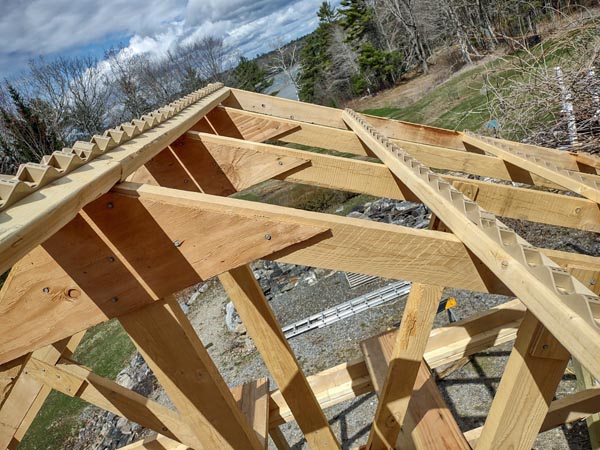
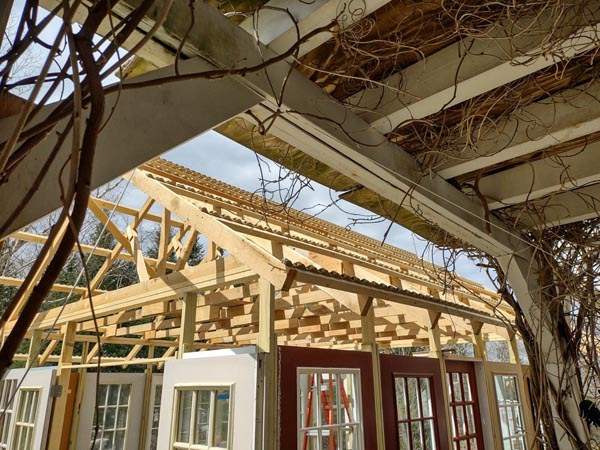
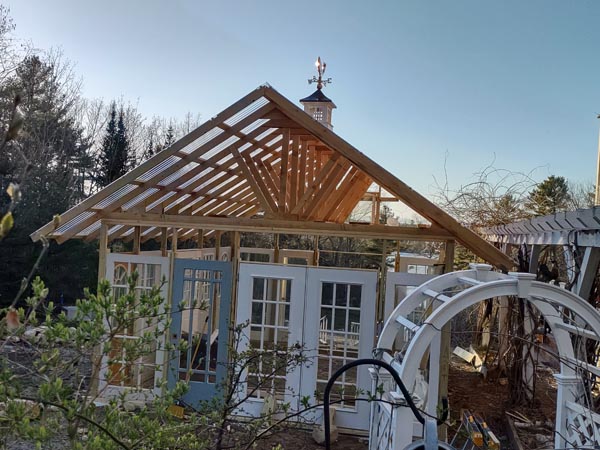
APRIL 17, 2022
Today was a beautiful, blustery day with intermittent sunshine and
hail....a perfect day to be 16 feet in the air on an open roof with
a knowledgeable carpenter!...seriously, it was a beautiful adventure
and the purlins are all in...and we straightened out the roof
trusses as we went. Next step will be to finish the extensions and
then to add the roofing panels.
|
|
|
 |
|
 |
|
 |
 |
|
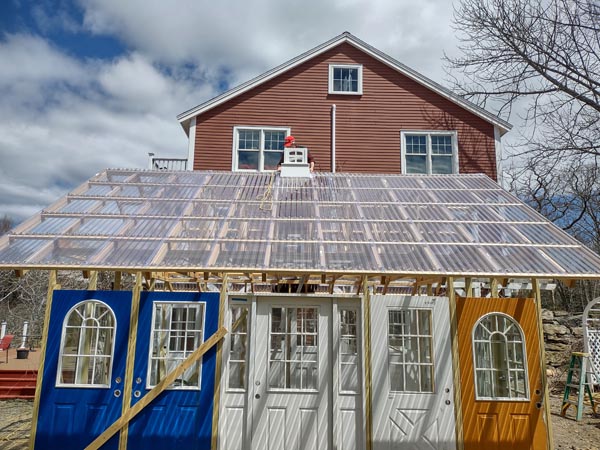
ROOFING |
|
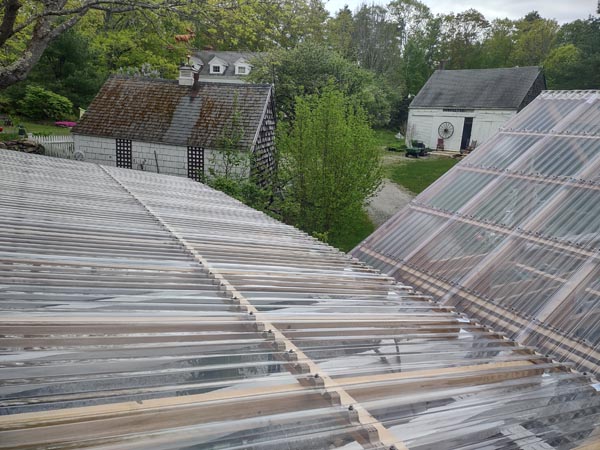
APRIL 21, 2022
Thursday was the next step in the greenhouse project...and 8 hours
of solo work on laying out the horizontal closures on each purlin.
Don't scold me about being up there alone...I was very, very careful
as the winds were strong and cold. 
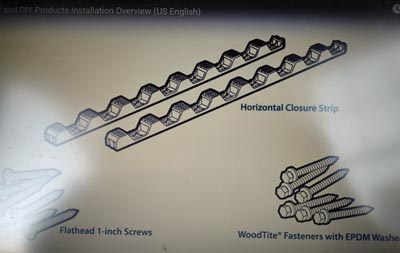
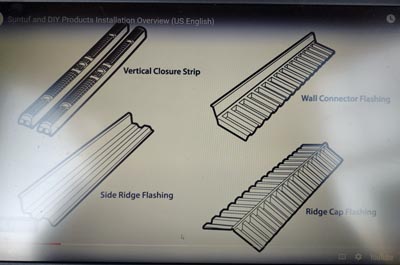
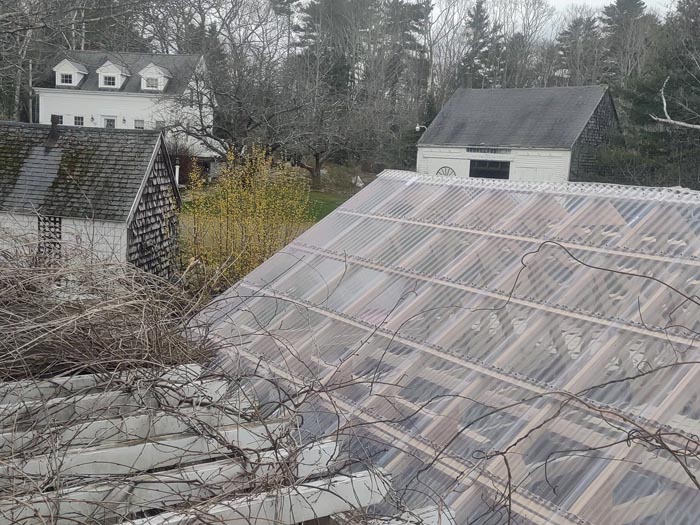
And after 1176 screws, it was done....phew!! The 12 foot long polycarbonate roof
panels will be attached to these at each of the five horizontal
purlins so that the roof holds together in
the high winds that we experience on this peninsula...pretty
brilliant design and engineering on the part of Suntuf industries.
|
|
 |
 |
|
|
 |
 |
 |
|
|
 |
|
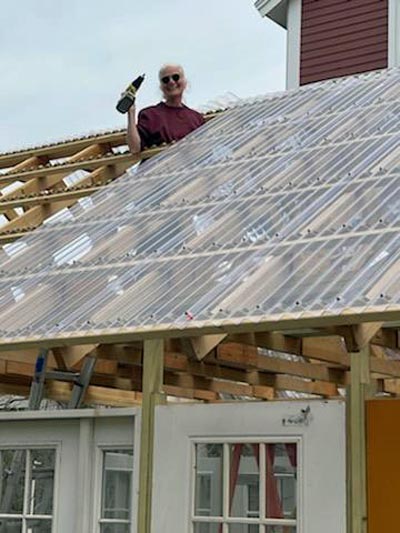
APRIL 24, 2022
Today was another solo day on the roof. Both part-time helpers are exactly
where they should be on a gorgeous April weekend...out of state
celebrating birthdays. Today was 'get the panels up'
day...breezes...not winds. Would have been much more efficient with
two of me...but it was satisfying nonetheless. And my Fitbit counted
43 times up the ladder! I figured out how to get the ridge cap
flashing shingles to complete the east side...tomorrow I hope to
complete the west, so I can take my birthday off!!
|
|
|
 |
|
 |
 |
|
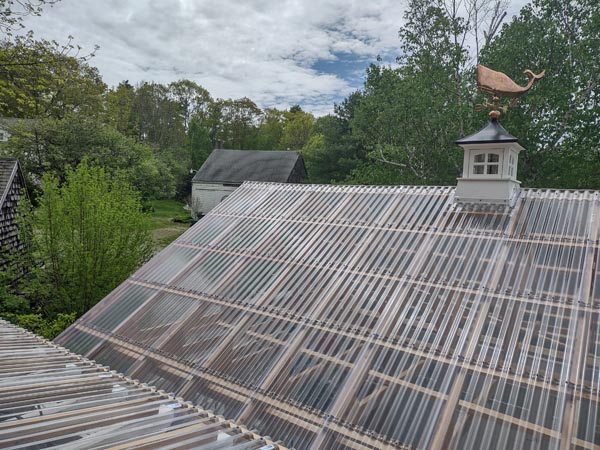
APRIL 25, 2022
Today I finished the roof panels...except for the last 4 which hang
out over thin air...then this evening, my aerialist carpenter
returned and we finished the last four roof panels! Hallelujah!
|
|
|
|
|
 |
|
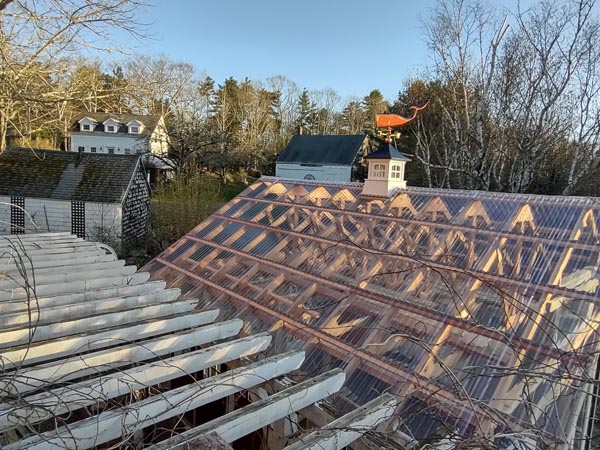
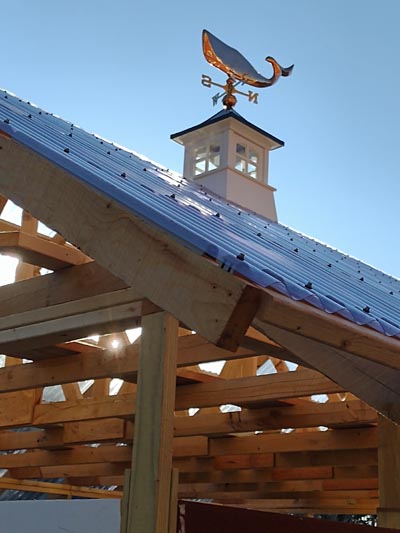
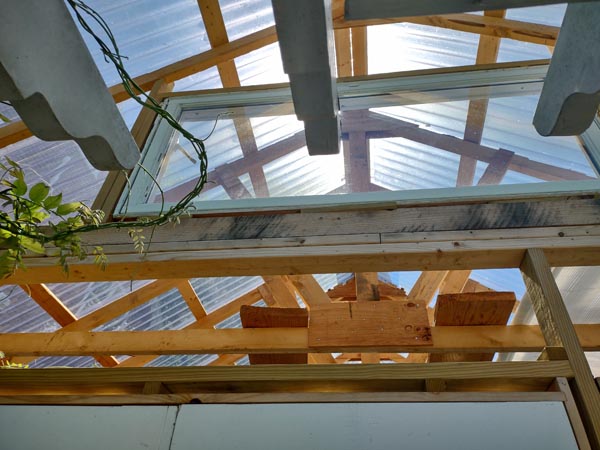
BELOW... THE ROOF BEFORE THE PANELS WERE INSTALLED...
|
...AND AFTER |
|
|
 |
|
|
|
|
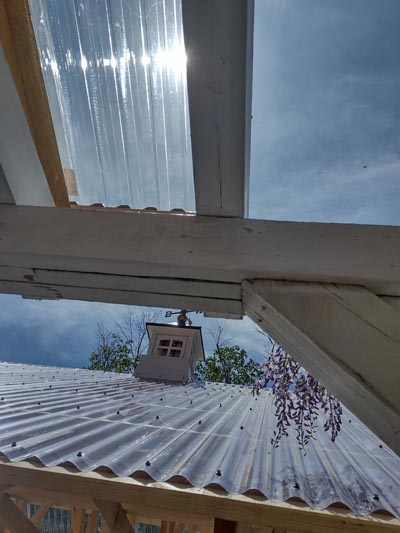
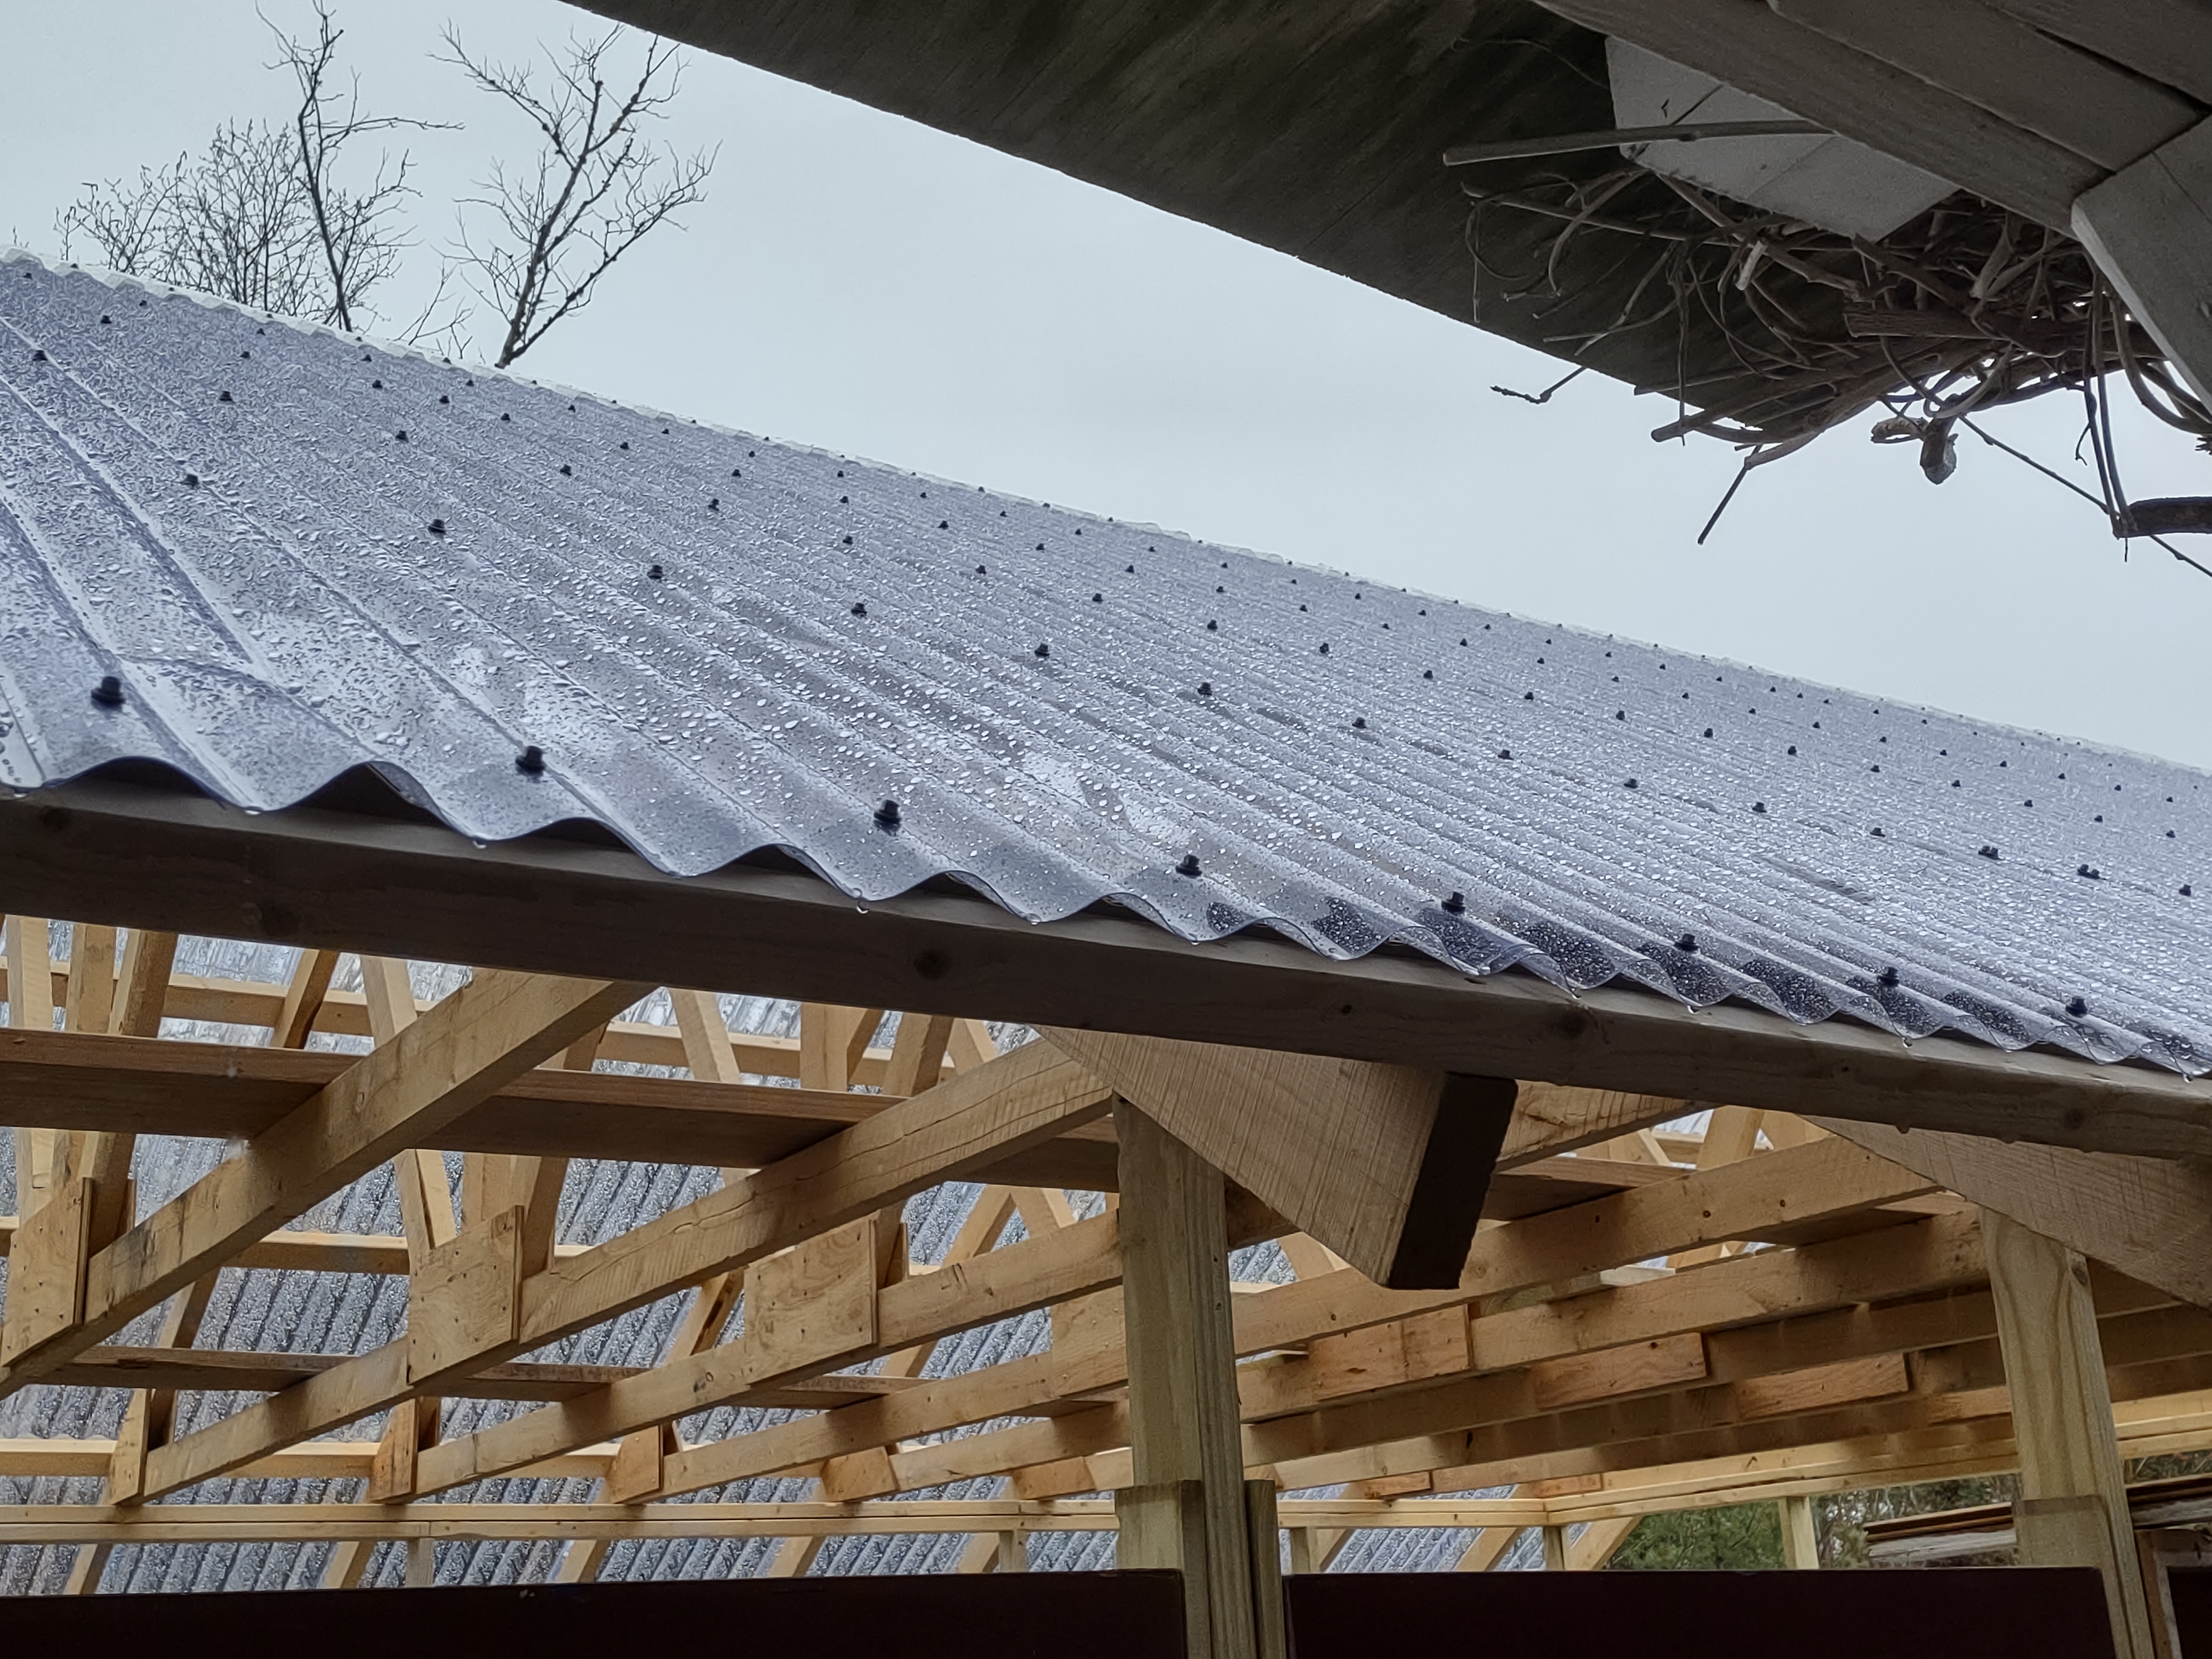
APRIL 26, 2022
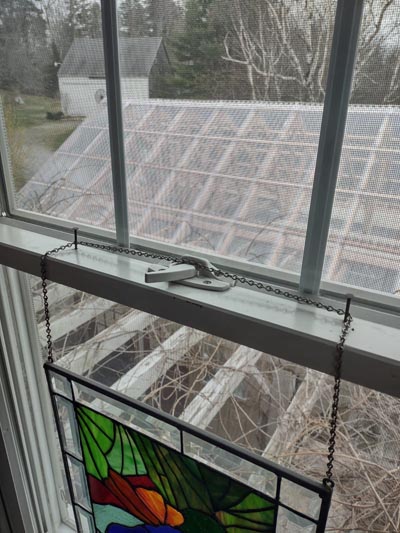
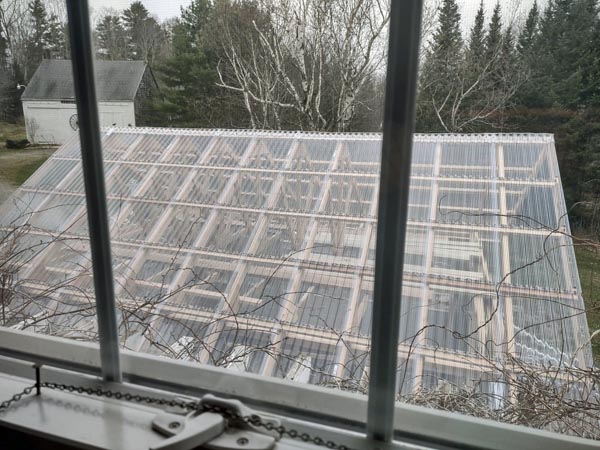
And today...happy birthday to me...not a leak can I see! Hurrah!
This morning, I had a lovely vision out my bedroom window...and
inside the greenhouse...as the rain trumpeted down on the
polycarbonate panels...
|
|
|
 |
|
What a wonderful staccato drumming the rain makes on a polycarbonate
roof.... almost like having a drum corps serenade each time it pours!
|
|
 |
Next is to finish hanging the french door pairs to the north; then
place the cupola which arrives on Friday and the weathervane;
then install the horizontal windows in the gable ends.
|
|
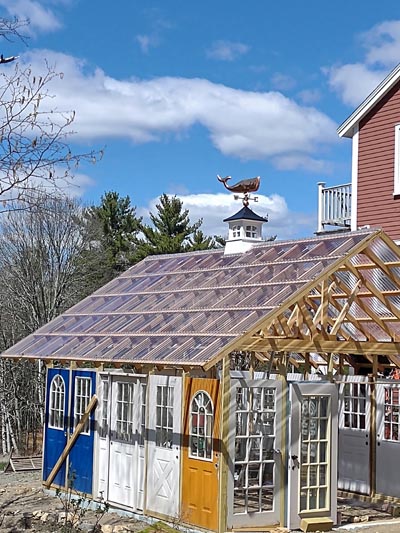
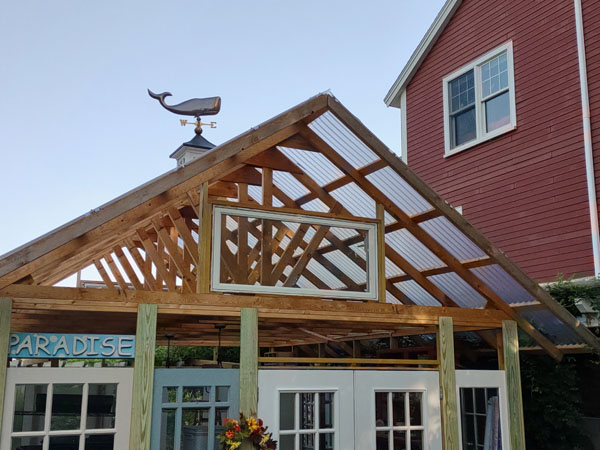
CUPOLA AND WHALE WEATHERVANE |
|
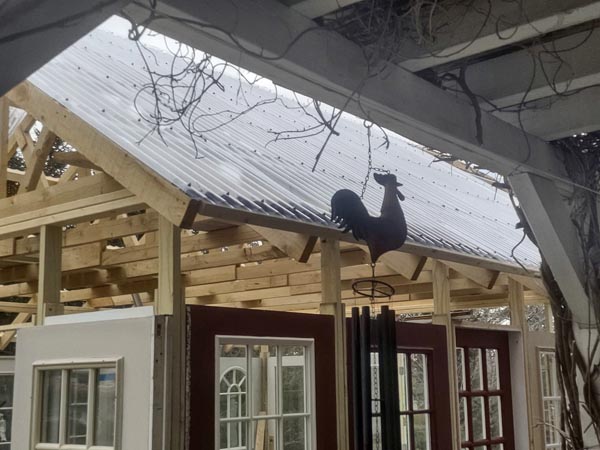
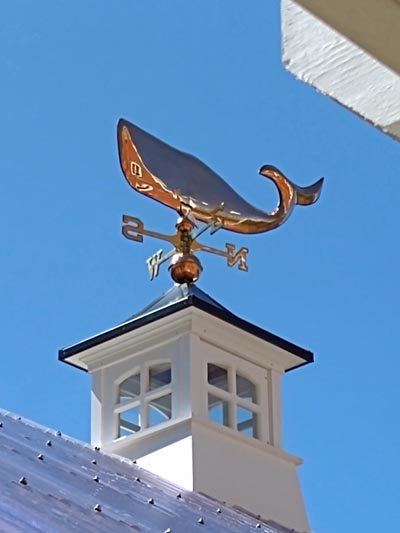
MAY 1, 2022
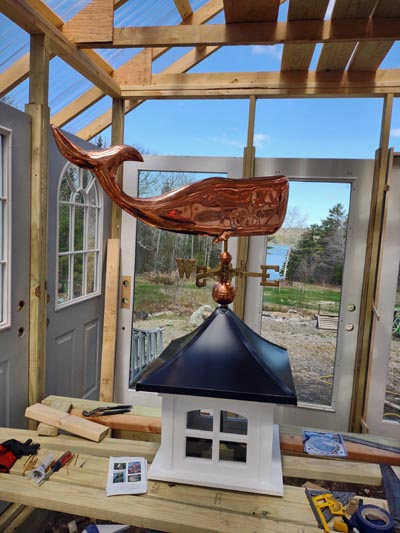
I've dreamed of having a cupola and weathervane since I put the deposit
on this property in 2006. And I bought a whale weathervane when Walpole
Outdoors had a sale in Connecticut before I moved.
|
|
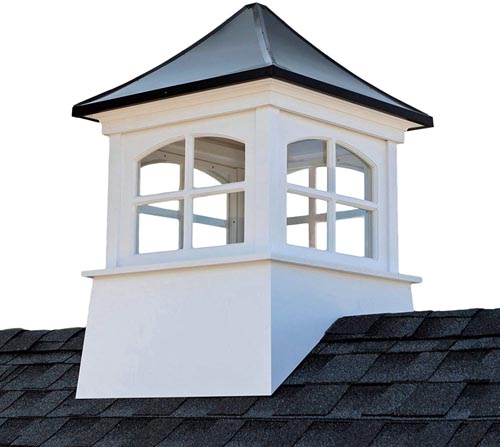 |
The
cupola kit, discovered on Amazon, was straightforward and easy to build...but that was the last
easy thing about it. Getting it to sit level...on top of a curvy
polycarbonate roof...is not something they teach in carpentry
school...or anywhere else...and attempting to make it
weatherproof...hour after hour...almost sunk the budget. It still leaks
a little bit, but thankfully, it's a greenhouse where fluid is
appreciated.
|
|
|
 |
 |
 |
|
|
|
 |
|
|
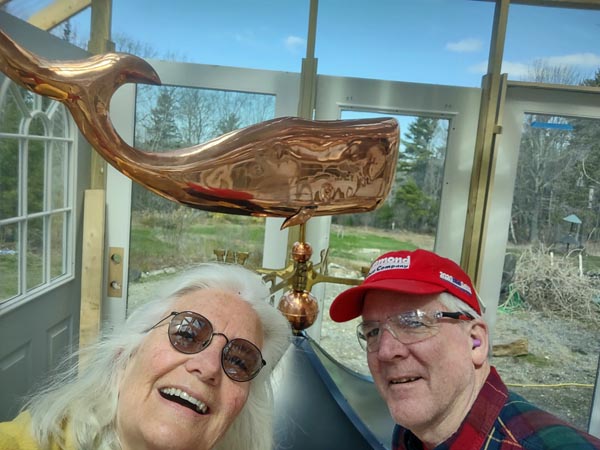
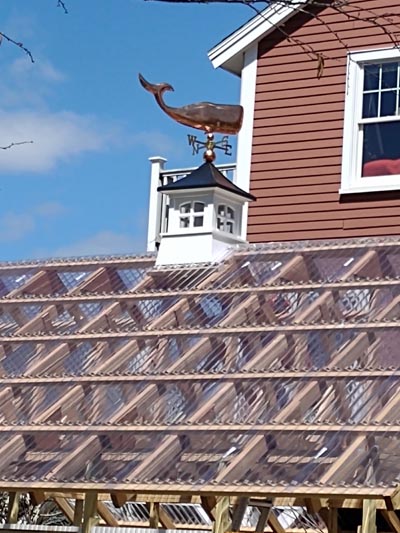
I
worried that the whale weathervane might be too light in the tail
portion, so weighted in one
direction....and might not turn fully with the wind...but the worry was
for naught...as you can see.
|
|
 |
 |
 |
|
 |
|
|
|
|
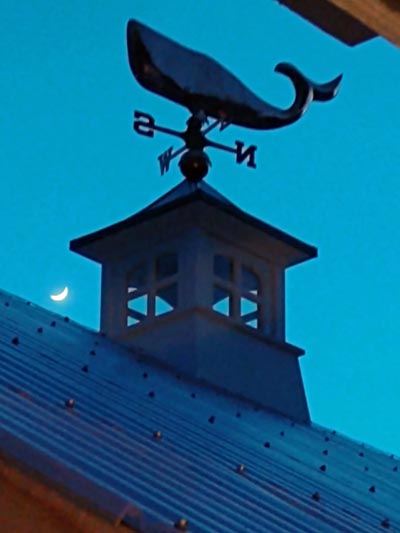
I LOVE my whale weathervane on top of my new
windowed cupola!!
|
|
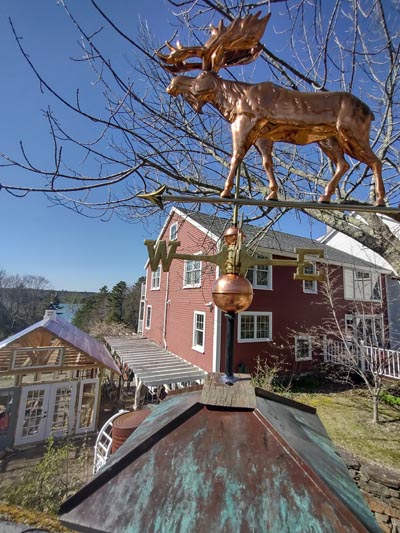
ANOTHER CUPOLA WITH A MOOSE WEATHERVANE
|
|
MAY
9, 2022
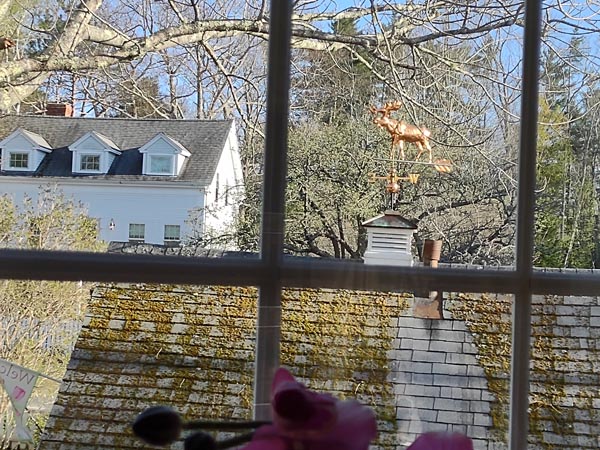
So much so...that the next week, I
determined to install my second weathervane...a lovely copper moose
which I bought in Boothbay Harbor on 'Early Bird/Jammie Day' at a great
discounted price in about 2007-8. And serendipitously, this week I found
a wonderful antique cupola, with beautiful weathered copper patina, at the Rotary Barn Saturday sale and snapped
it up! It's the perfect size for the smaller building, the garden shed,
and the smaller weathervane, the moose.
This solo
project was a pure delight.
|
|
|
|
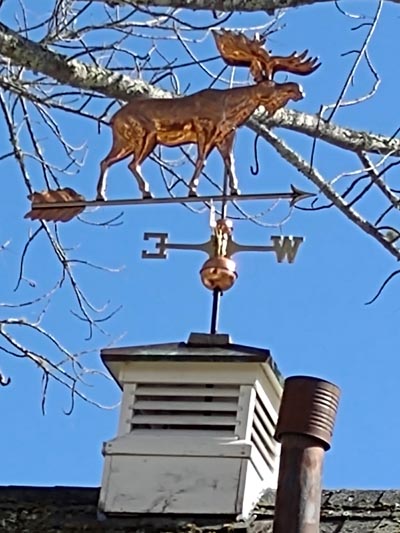
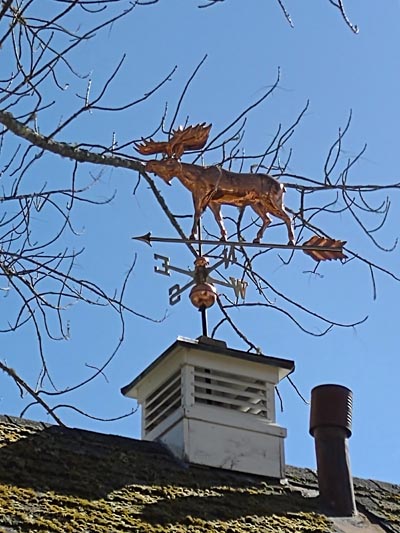
And the moose also swings all the way
around, with the wind...such fun to watch!
|
 |
 |
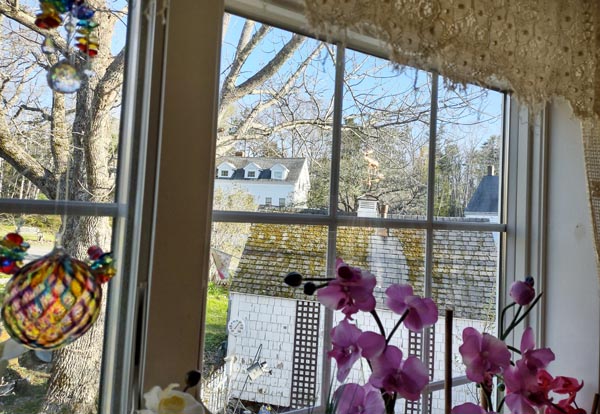
I love to look out my dressing room
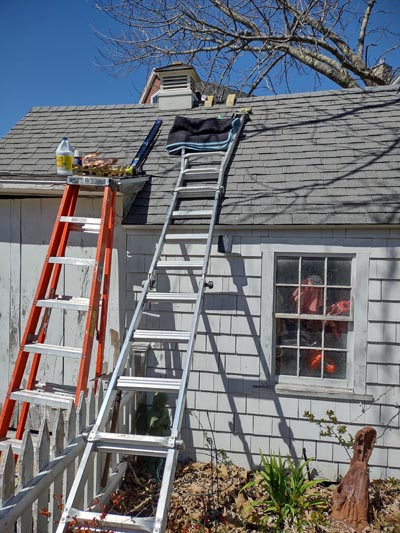
window and see how Mr. Moose is doing in all weather. And I get great
satisfaction seeing that the bleach I poured over the North side of the
garden shed roof has successfully killed the moss that was eating away
at the roof shingles!
|
 |
 |
|
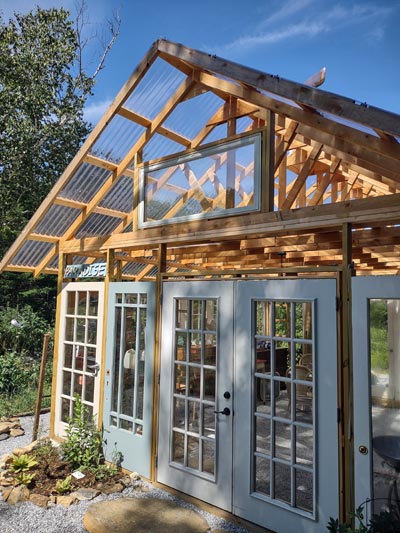
INSTALLING THE GABLE END WINDOWS |
As I experienced the greenhouse in the
hotter summer days, I realized that I'd need several options to move
excess heat out...the two sets of french doors and the two single doors
will help a good deal. I'll install a 'chicken house' fan in the gable
ends too. And I lucked out to find these crank windows at my favorite
Restore/Habitat for Humanity outlet in Rockport, Maine!
|
 |
 |
|
|
 |
|
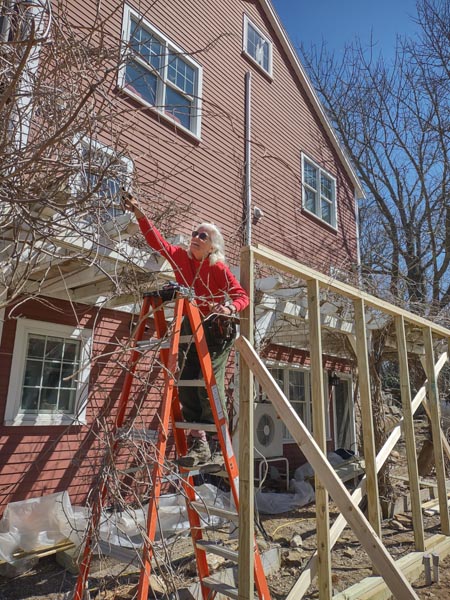
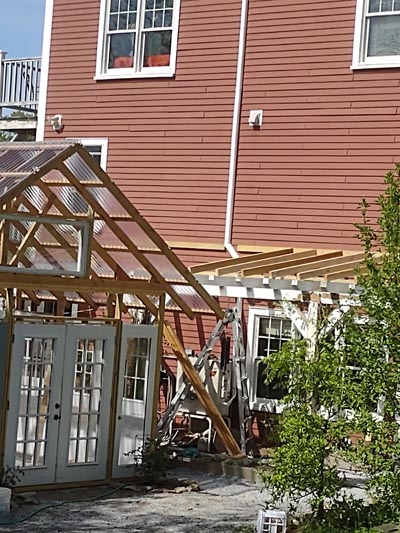
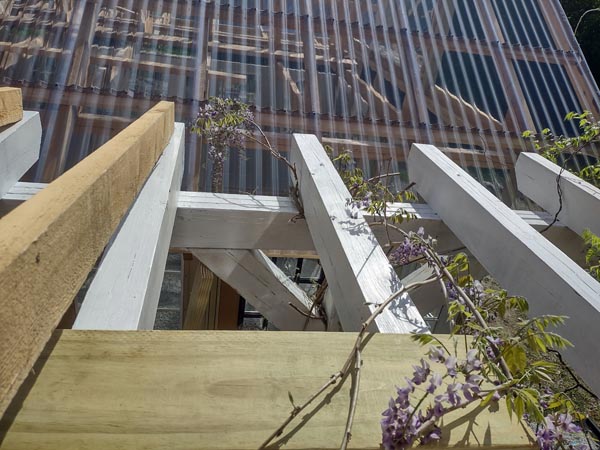
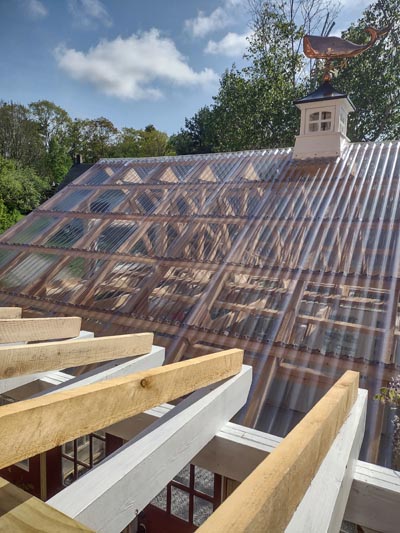
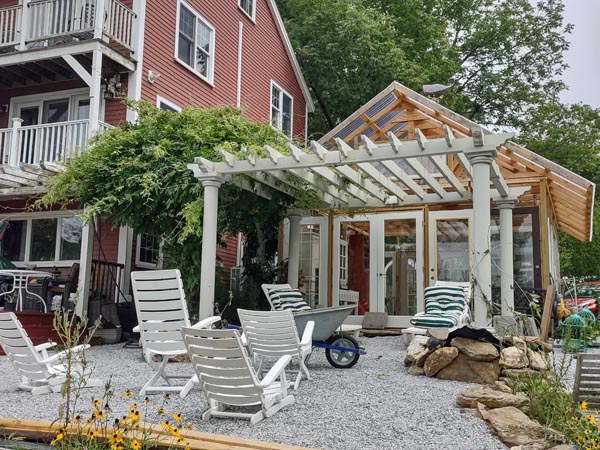
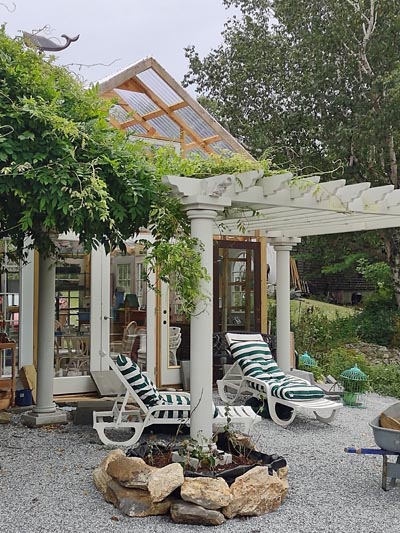
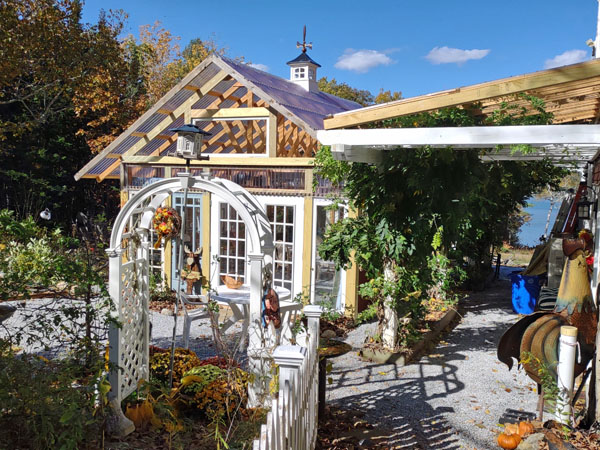
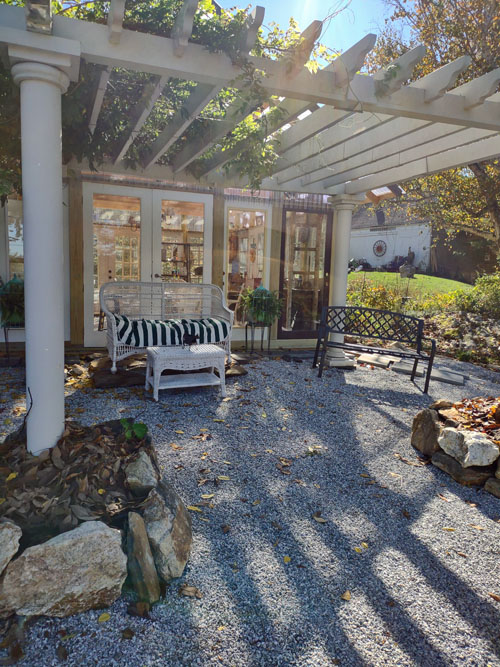
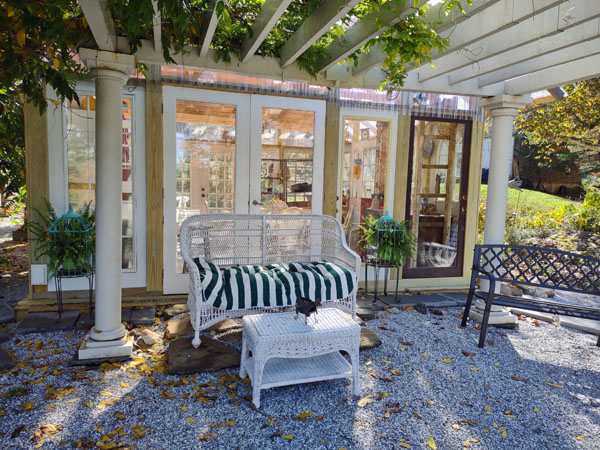
ROOFING THE PERGOLA AFTER GIVING IT NEW
LIFE |
MAY 24, 2022
After experiencing sun and
rain beating down on the polycarbonate greenhouse roof and seeing how
well it stood up to rather extreme wind and weather, I decided to cover
the pergola with a similar roof to ensure that I and my guests could
walk from the house to the greenhouse in the pouring rain and snow,
totally dry and comfortably.
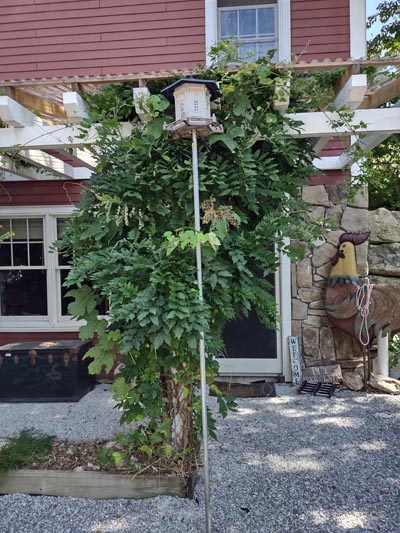
But first, I had to deal with the wisteria which had taken control over
the entire area. After a full day of cutting and yanking, this is the
last of it on this stretch. I left the wisteria at the northern end
because I'm going to train it to grow over the gazebo once I've moved
that from its current home in the old paddock to the northern end of the
greenhouse.
|
|
|
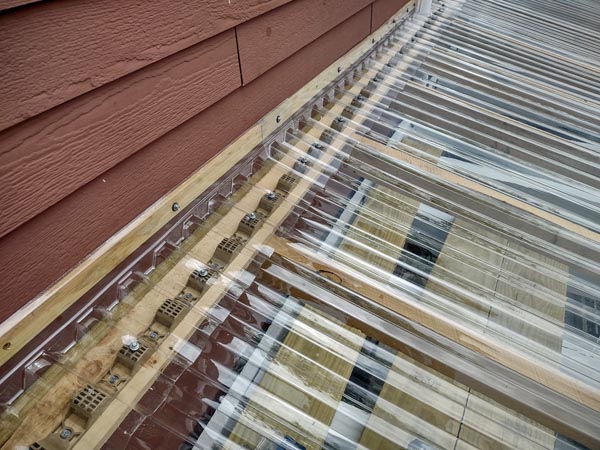
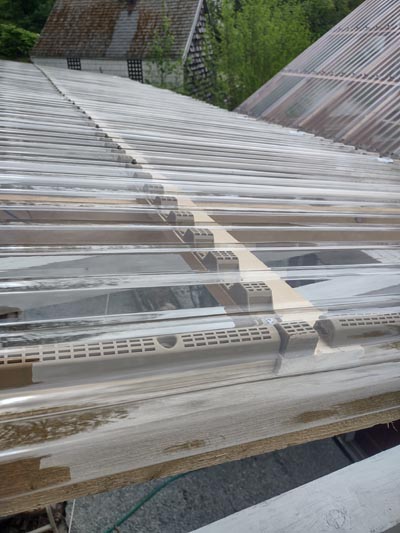
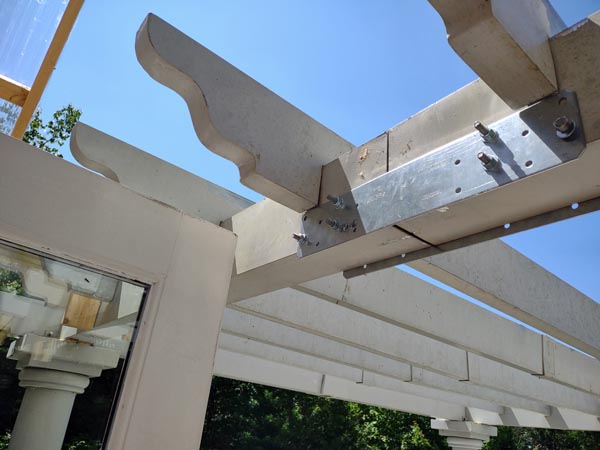
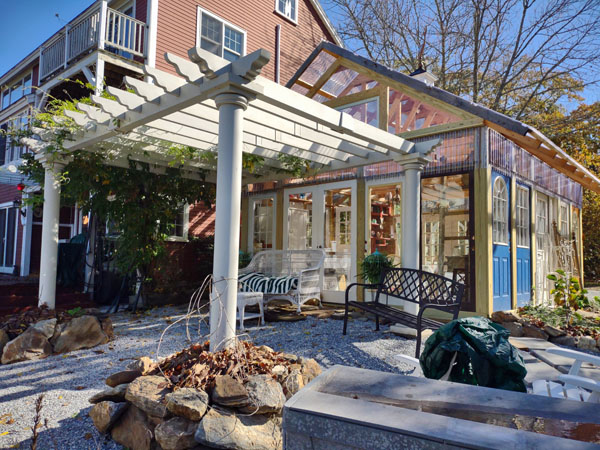
Next the pergola had to be scraped and painted...and then I installed
the roof structure down 2/3 of the length of the pergola...installed the
wall connector flashing shingles...and roofed it over with the eight
foot version of the polycarbonate roofing shingles.
|
|
|
 |
 |
 |
|
|
 |
 |
|
 |
 |
|
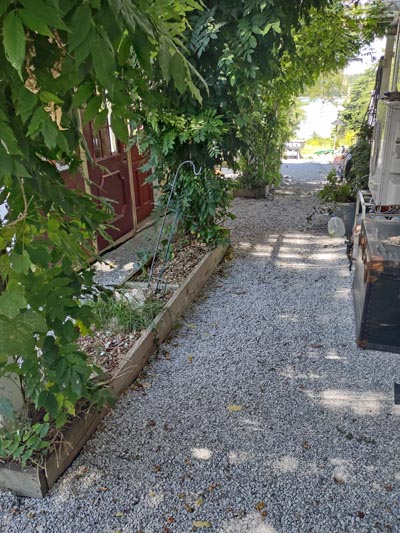
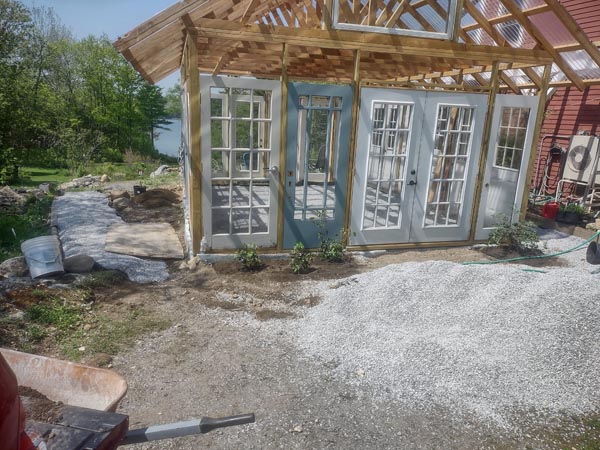
GRAVEL BASE |
The month of JUNE, 2022
The construction dirt
which covers this area is neither good for flooring, nor good for
gardens. So...after long thought, I decided to install a gravel base for
both the greenhouse and the surrounding area, except for the gardens
which border the south and west sides of the greenhouse.
|
|
|
 |
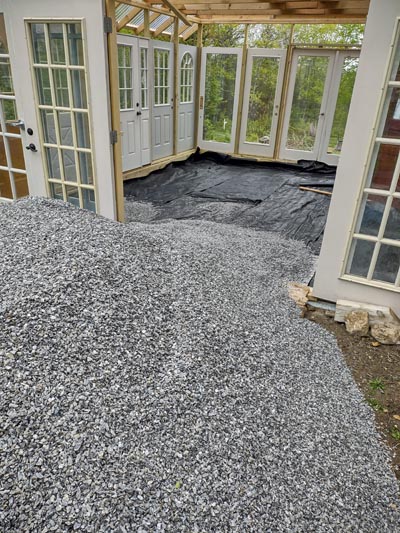 |
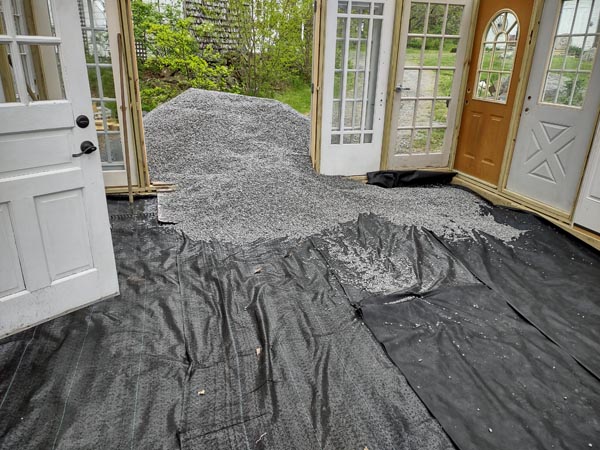
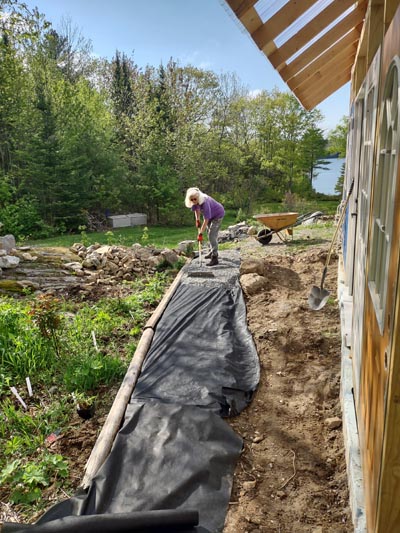
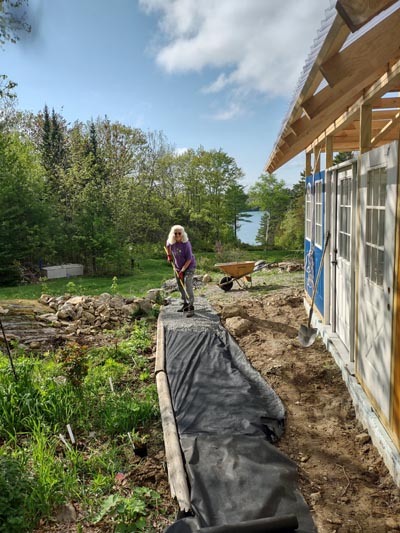
First, I installed thick, tough landscape fabric throughout the
greenhouse...and all the way around the area. This led to landscaping
walkways throughout the property, but that's another story...
|
 |
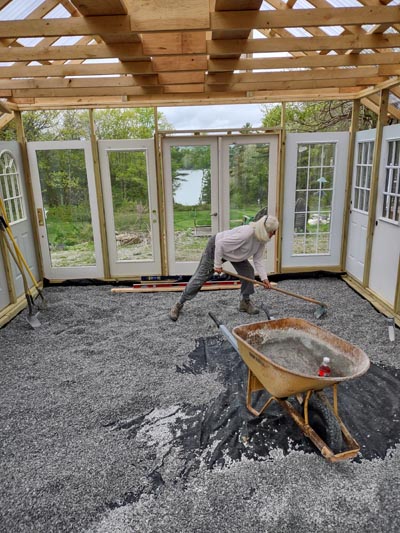 |
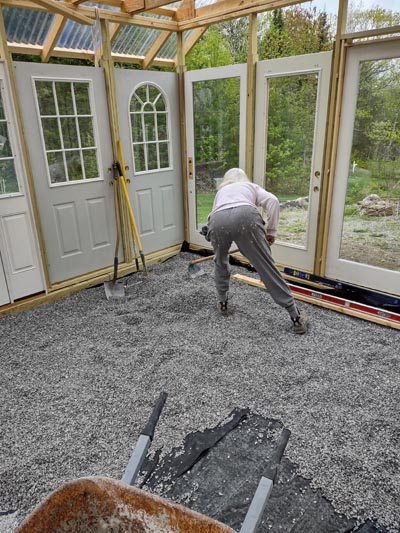
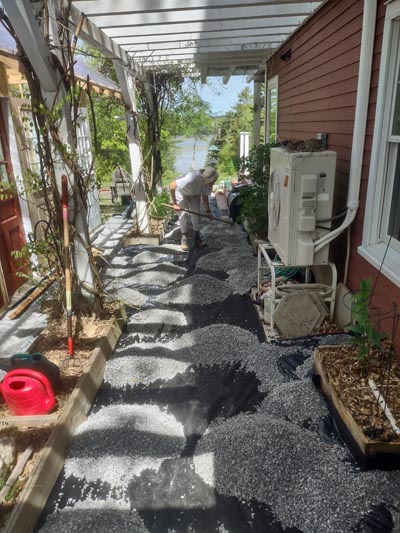
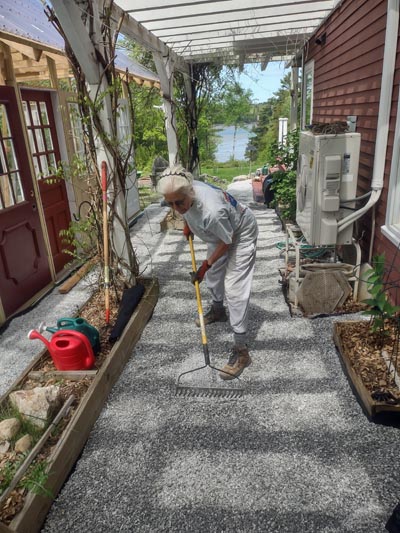
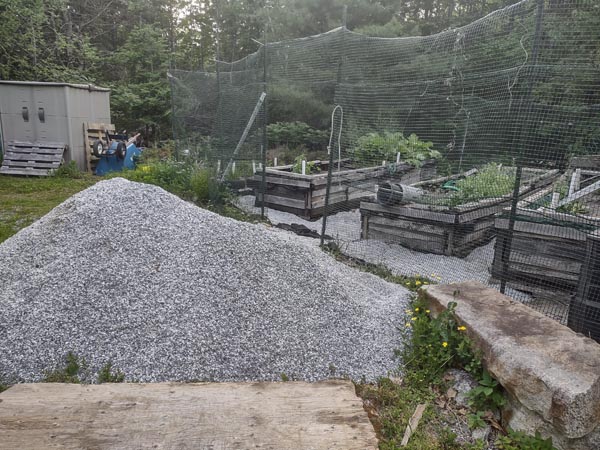
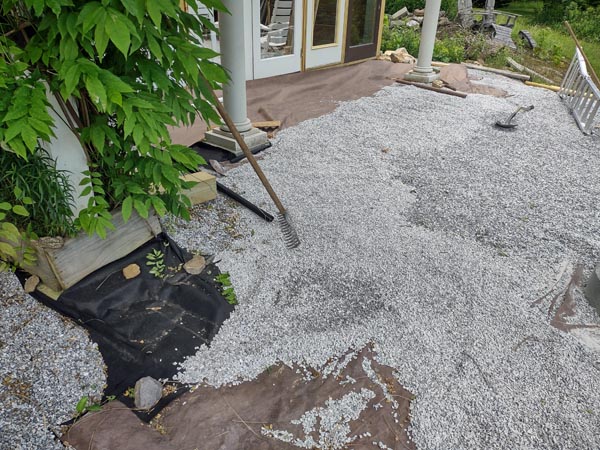
Gee...this is SUCH FUN! I had a local
helper for part of three days, but he didn't think so either and went on
to find lighter work! Just an FYI, there are about 18-20 shovels
full of gravel in a wheelbarrow load and 20 wheelbarrow loads to a yard
of gravel. I ended up moving and placing 16 yards of gravel...you can do
the math...OK, it's 6400 shovels full of gravel...and each shovel full
had to be shoveled into the wheelbarrow and then out again, to be spread
around! My biceps are strong now, but my back wasn't happy during this
project!
|
 |
 |
|
|
 |
 |
|
|
|
|
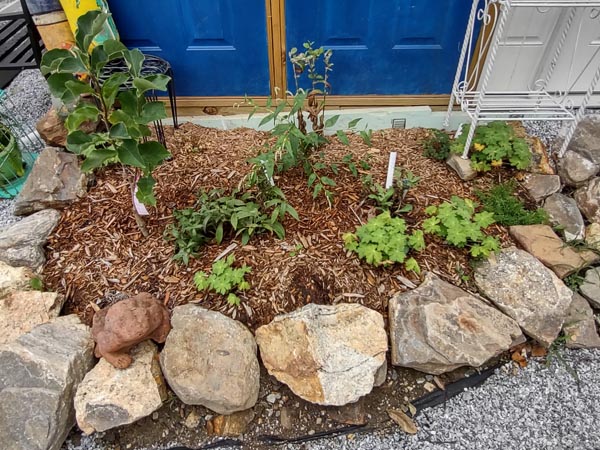
GARDENS |
One must, of course, surround a greenhouse with gardens, but first, I
had to dig a runoff for the rivulets that come coursing down this
driveway when it rains hard. Once that was done, I could cover the new
pathway with fabric and gravel...then the first of the plants...
|
 |
 |
 |
 |
|
|
|
|
 |
|
|
 |
|
|
|
Hmmm...there wasn't
quite enough gravel to cover the front apron...but guess what? A local,
under-staffed business delivered an unexpected additional 7 yards of
gravel...so I decided to use the same size gravel for the raised bed
garden and other projects...and just had to carry it about 300 feet
farther to finish the greenhouse area. Oh joy!!
|
|
 |
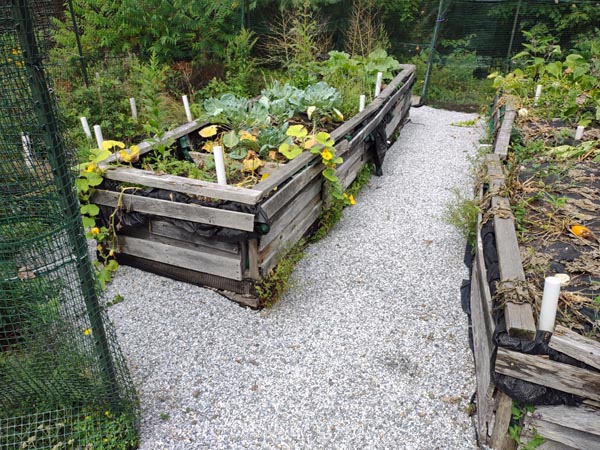
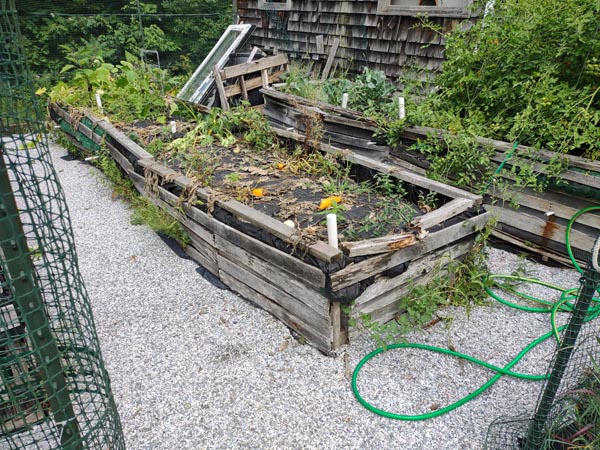
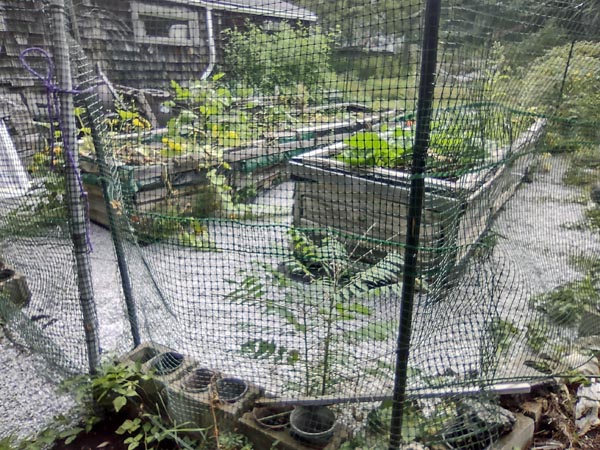
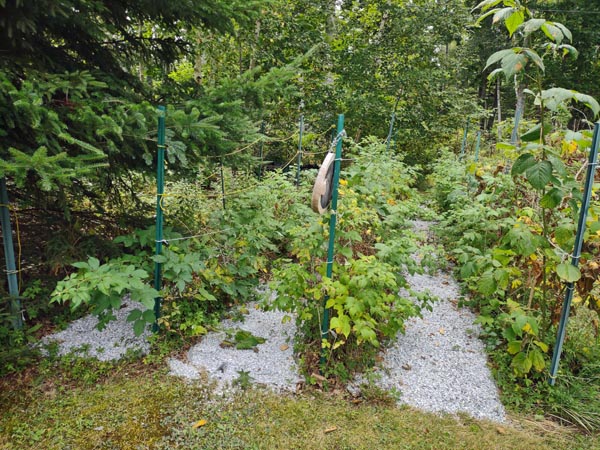
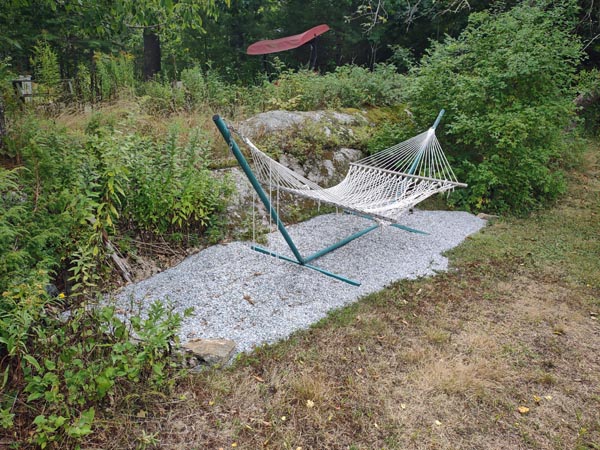
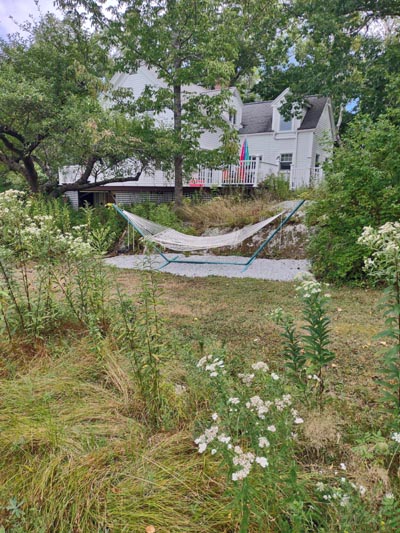
And before I was all done, I transported another 2 yards with my own
truck! Here are the other projects that benefited from the extra load of
gravel, once I had transported enough to finish the greenhouse area...the raised bed gardens...the compost
corner...the berry garden...and the hammock near the Cape house.
|
 |
 |
|
|
 |
 |
|
 |
|
|
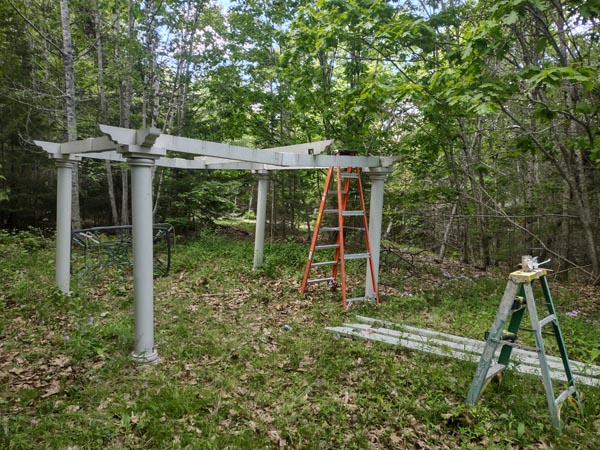
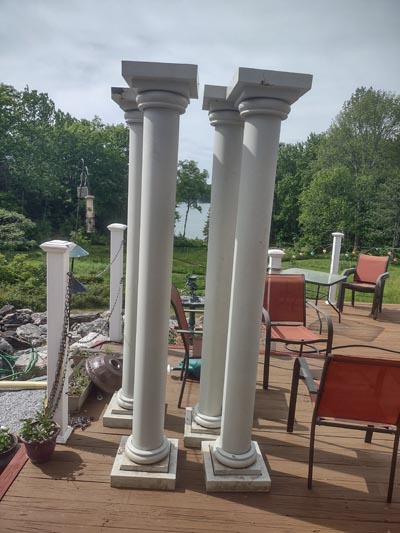
MOVING THE GAZEBO AND
REBUILDING IT TO STAND BY THE GREENHOUSE |
JUNE 5, 2022
I
finally decided that it was time that the lovely gazebo (that I bought
when I first moved to Maine, and which had been erected in the former
paddock area, but which has never been enjoyed by any guest group in
fourteen years!) was to be moved to add a shaded component to the new
greenhouse. The greenhouse itself is going to be piping hot in the
summer months, so to hang out there, we'll need a shady spot...and this
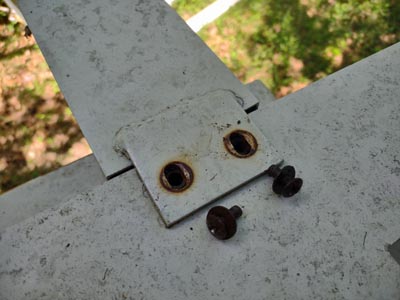
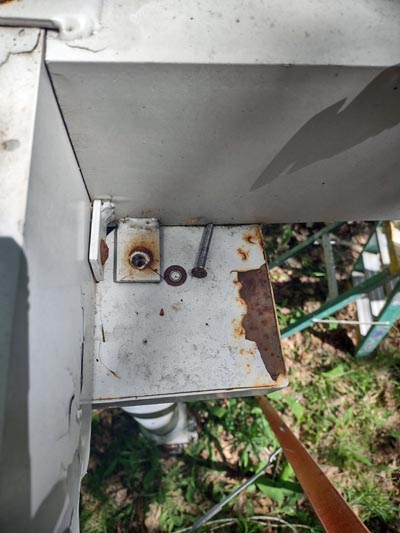
was going to be IT!!I
managed to take most of the rusting bolts off...with lots of help from
my long-time friend WD4o....and began to strip down the gazebo in the
paddock... |
|
 |
  |
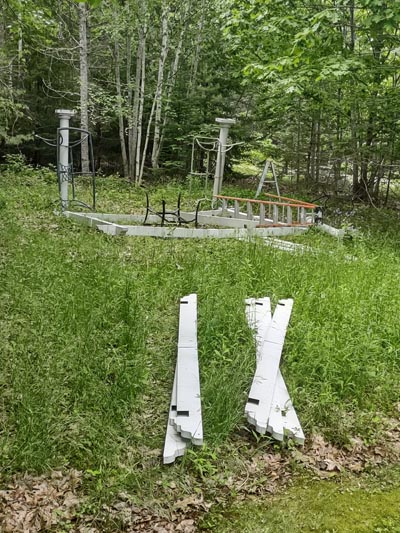
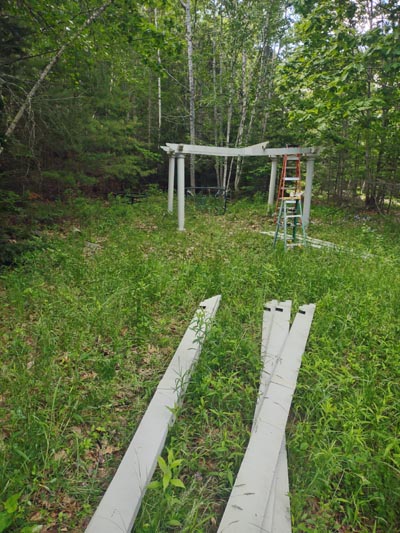
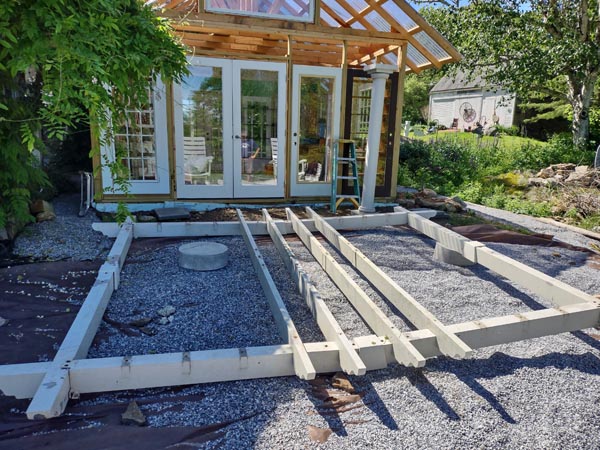
Then I very carefully
lowered the top parts and succeeded in getting it to the ground...then
carried it over to the area north of the greenhouse...
|
|
|
 |
 |
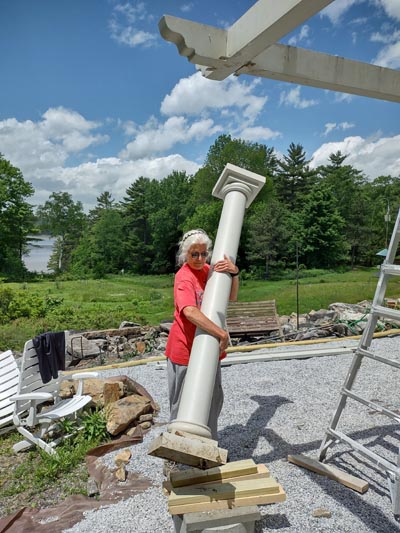 |
| and placed the columns
on the piles of support that would make them level... |
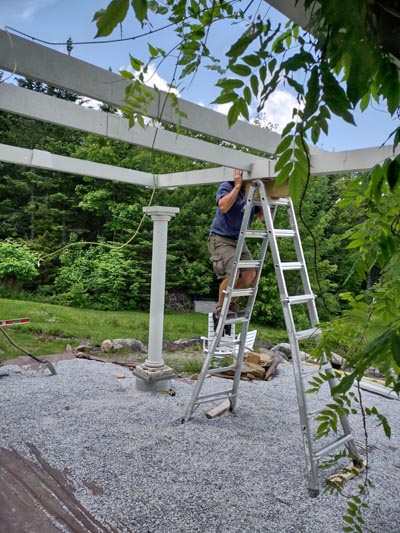
JUNE 10, 2022...then I needed 4
hands and some extra muscle, so called my trusty 'builder mate' Rick to
help me lift the top framework onto the columns...
|
 |
|
|
The next day I put the top pieces on and bolted them into place...then
searched out some strong metal braces to hold the crosspieces upright
without our temporary wooden posts...and to allow the french doors to open...the
crosspieces were tired out after all those years of
holding firm despite weather and snow pack! But the gazebo was taking
shape and it was exciting.
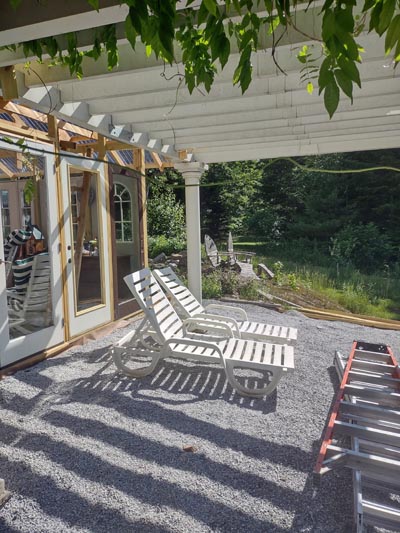
Next, I wheel-barrowed gravel over and spread it around...and it began
to look so promising that I brought over the two chaise lounge chairs
that had also been completely ignored by the guest groups.
|
 |
 |
|
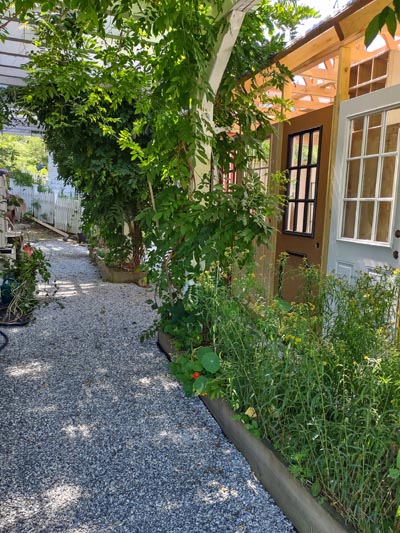
And I trained the part of the wisteria I had left on the northern end of
the pergola to begin growing onto the gazebo to give us future shade as
we enjoy the river views....(two months later, it was already halfway
across the 12 foot wide gazebo!)
|
|
|
 |
 |
|
It's beginning to
look good as the gazebo peeks out in front of the pergola and wisteria!
And that's especially good because the season has begun, and the
vacation rental guests will be enjoying views of a lovely
greenhouse-in-the-making and not a construction zone.
No noisy projects
will be attempted until the end of the season, as 'peace and serenity'
are part of the amenities for the guests. |
|
QUIET PROJECTS: |
|
INTERIOR DESIGN |
JUNE through AUGUST,
2022
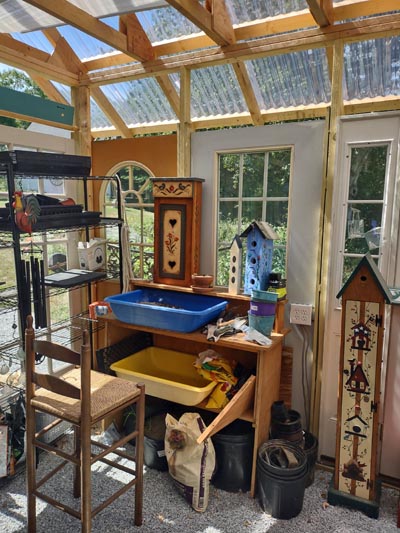
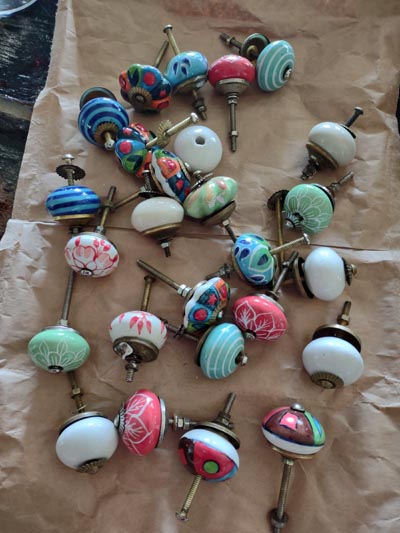
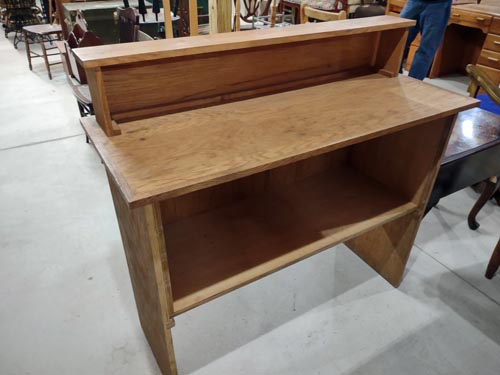
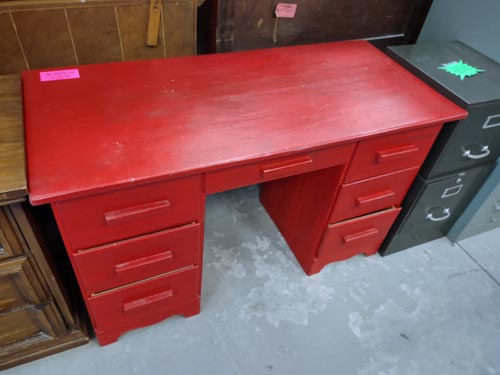
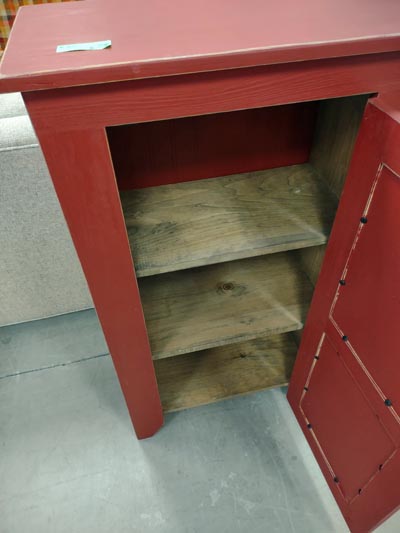
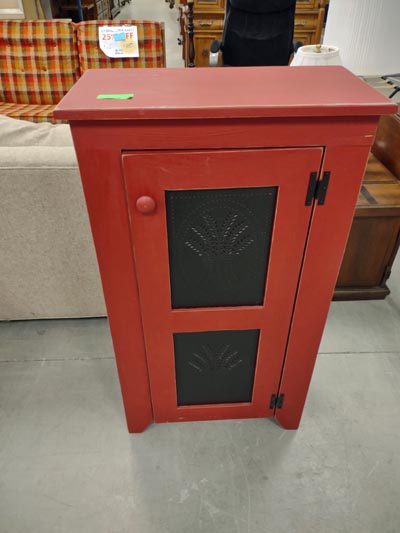
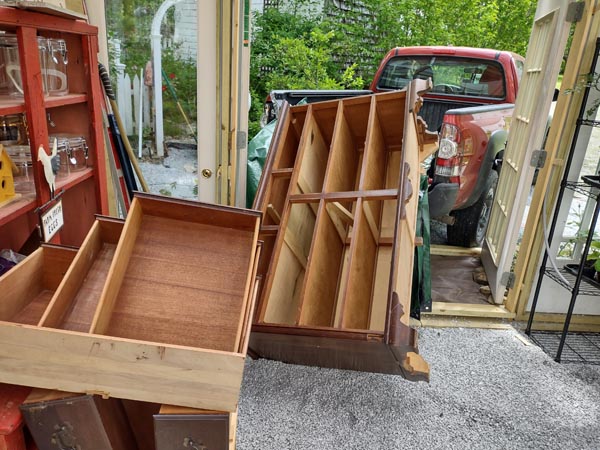
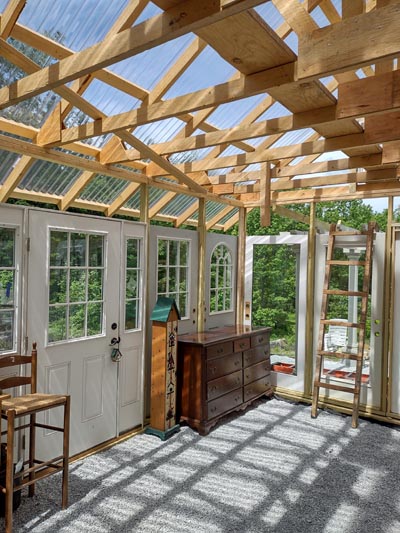
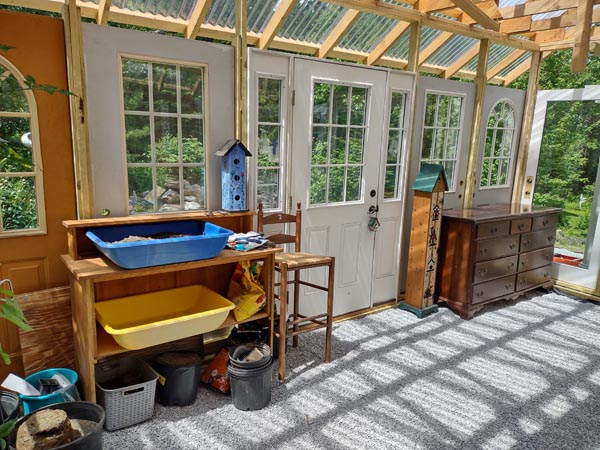
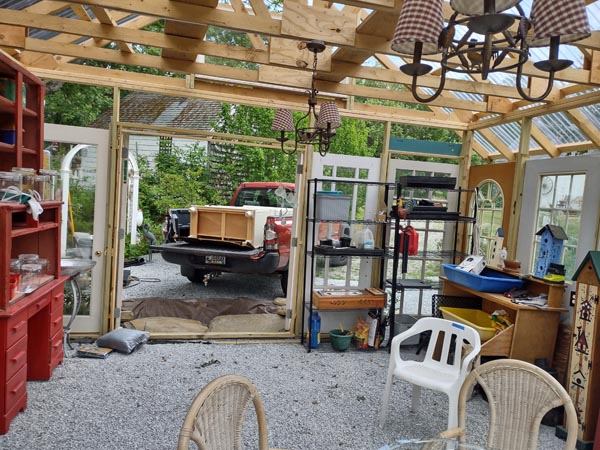
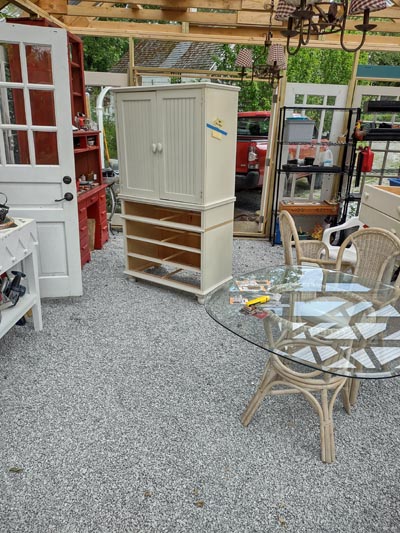
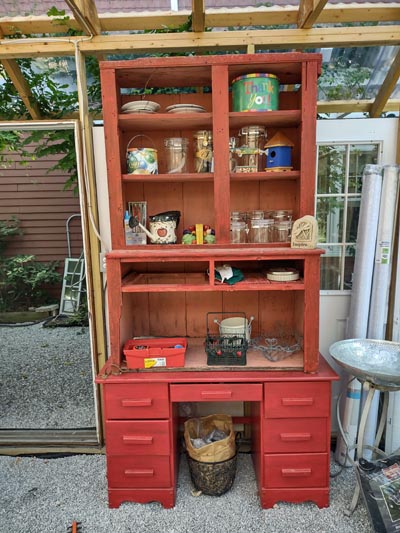
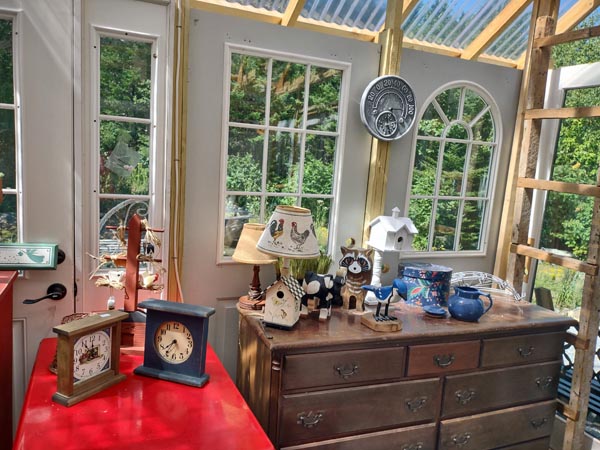
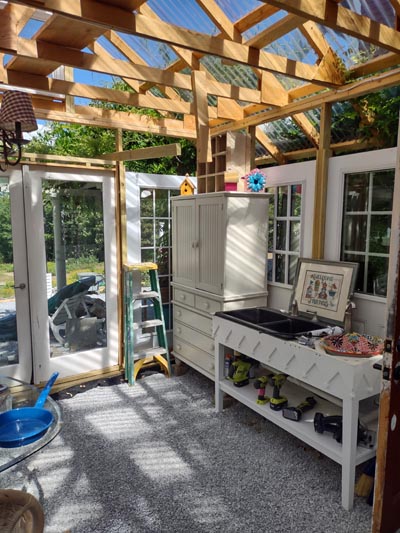
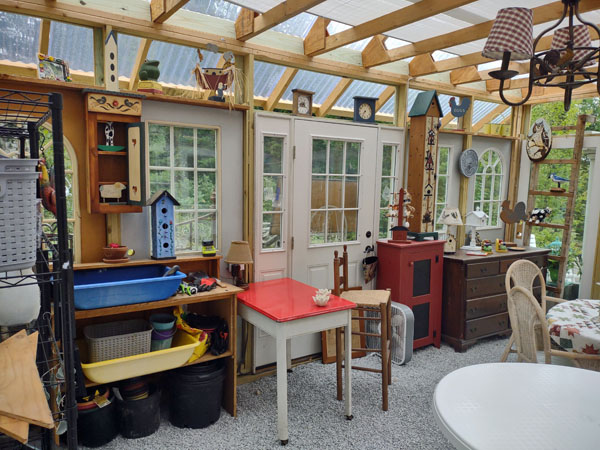
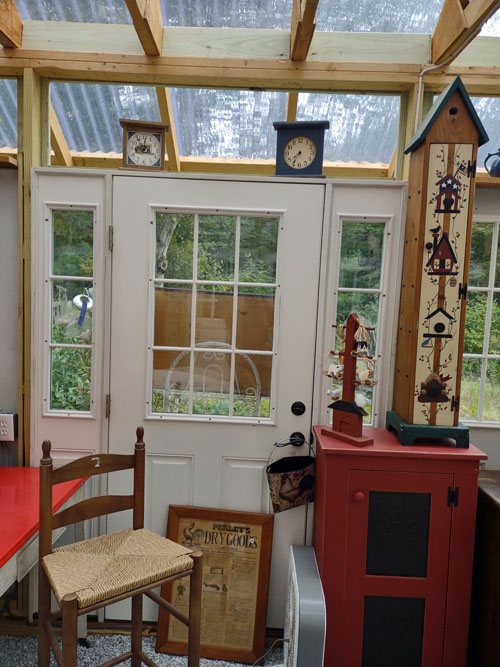
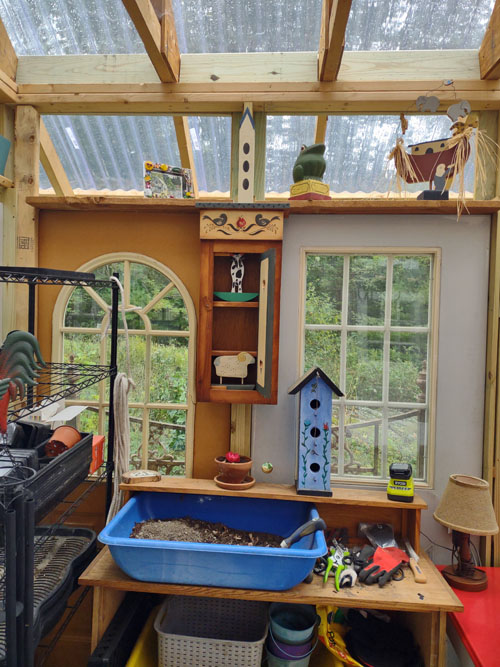
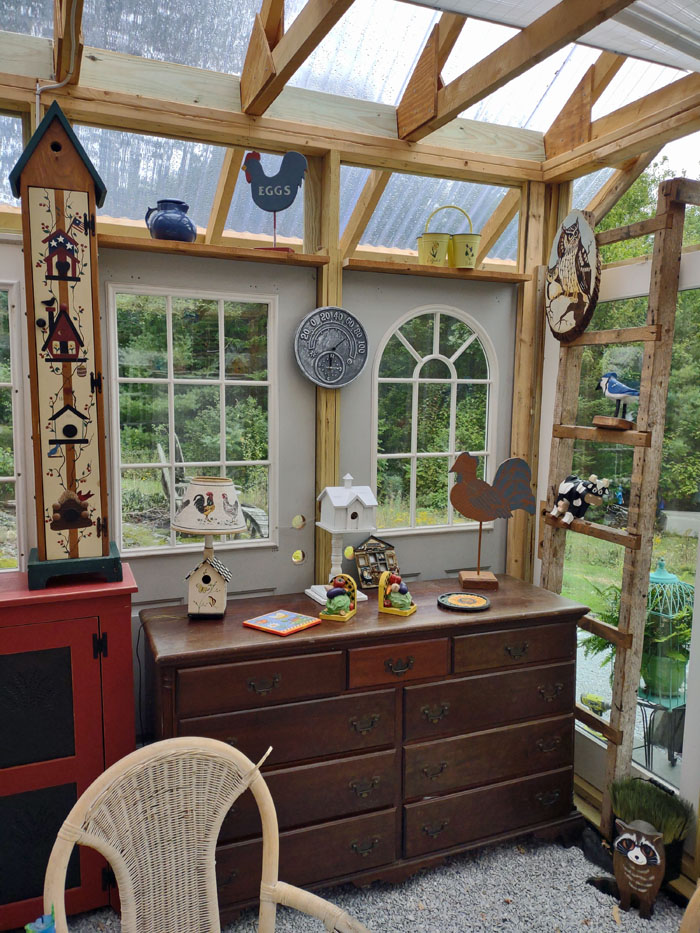
I have given myself full freedom to be as whimsical as I like in this
greenhouse area. It's not part of the guest area, so I can go nuts with
color and whimsy, as well as furnish it so that it serves my vision--to
be an area for gathering, cultivating and creating. Here are some of the
tchotchkes I'm gathering...and some furnishings. Gathering
furnishings and tchotchkes is a perfect, off-site and therefore very
quiet activity!
Nothing's finalized
yet, but I like all the pieces...
|
 |
 |
|

|
 |
 |
  |
 |
|
|
|
 |
|
|
 |
 |
|
|
 |
|
|
 |
 |
 |
|
ENTRIES |
|
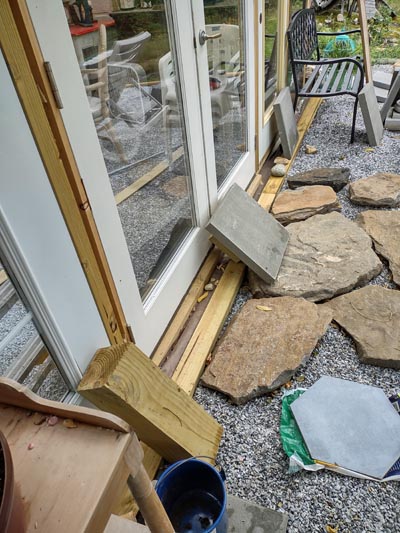
JUNE 14, 2022 |
|
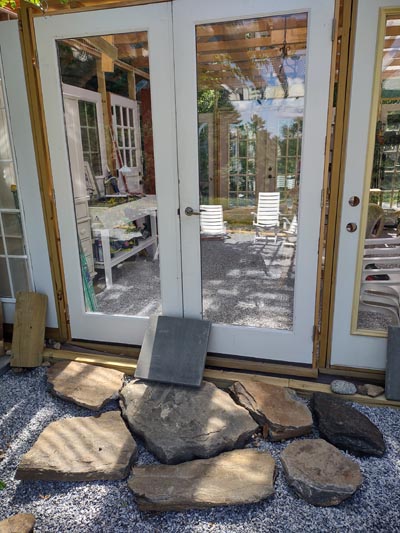
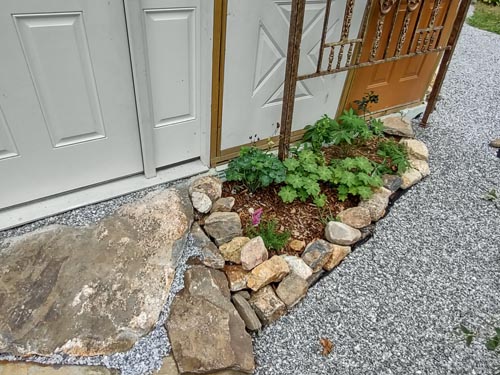
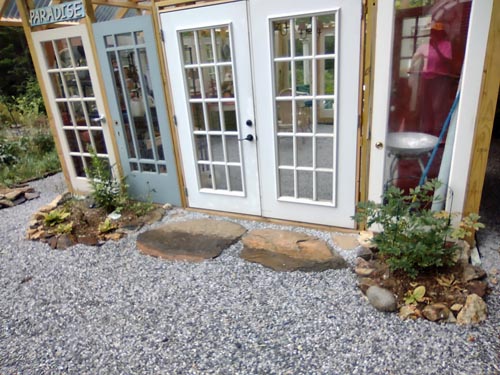
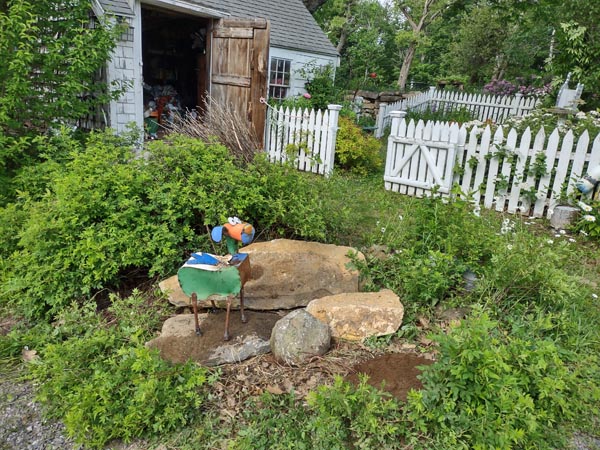
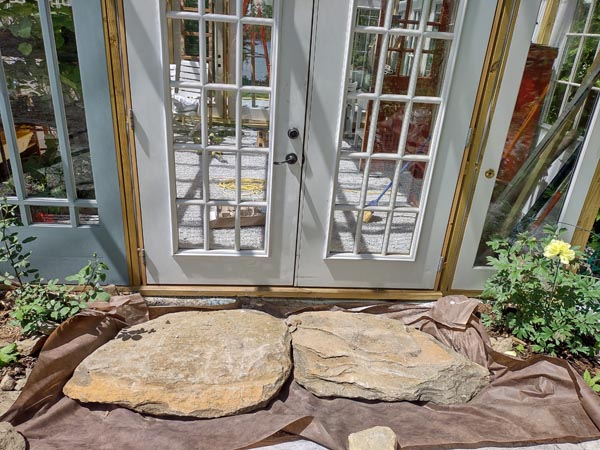
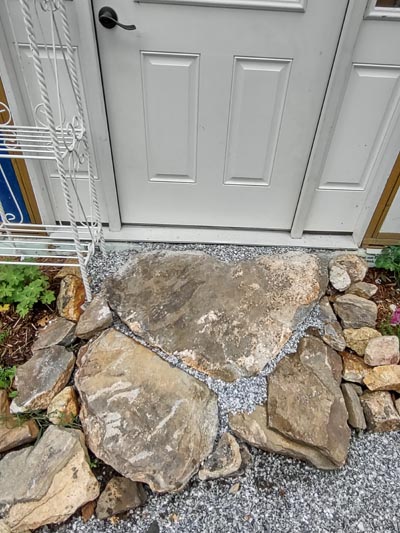
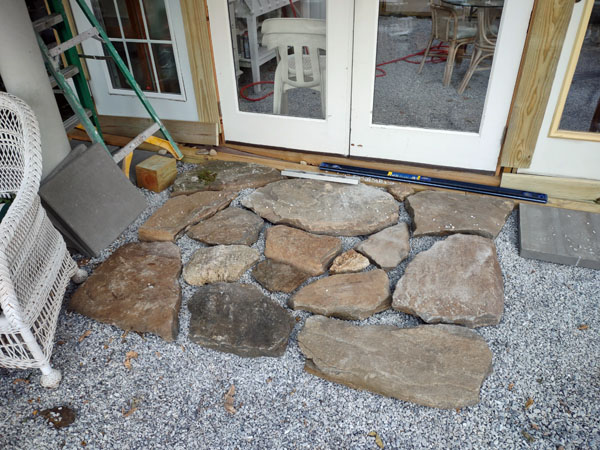
And I found lovely stones on site which would work well as entry steps.
When I had the tractor in December, we moved
them close to the garden shed and then wrestled them into their places this spring...leaving
a small pile behind.
|
|
|
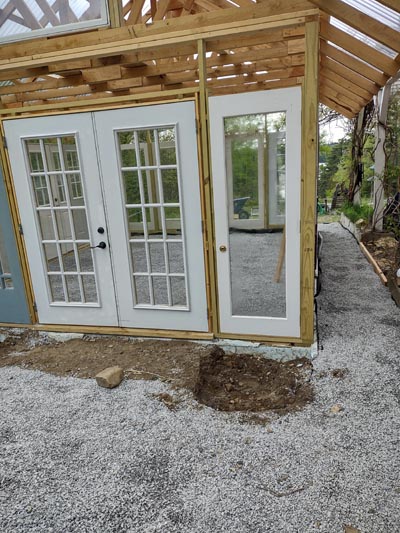
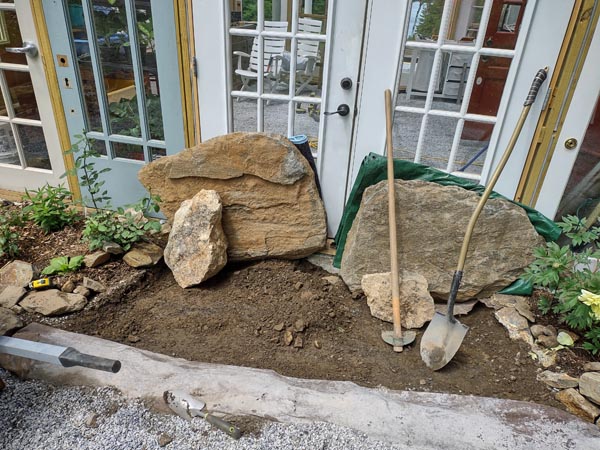
When we placed these
huge stones, we found that the doors couldn't open over them and Rick
was about to go off on a trip, so we placed them upright. The next day, I wrestled
the landscape paper beneath them without breaking a door, a hand or the
stones. Hurrah!
|
|
|
 |
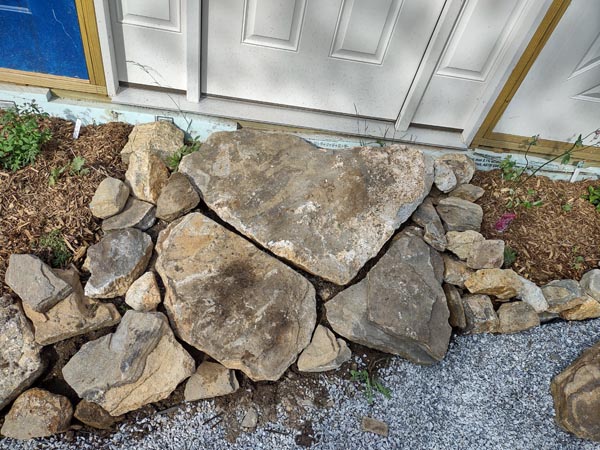
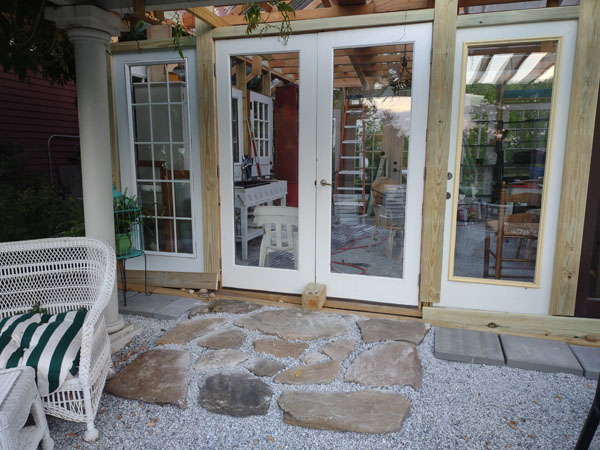
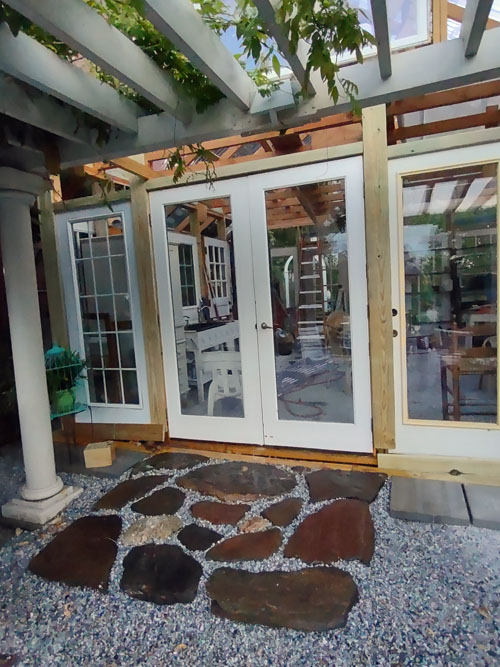
I filled in the gravel after we leveled the large stones with small
stones...and after I raised the front with a berm that keeps the water
heading towards the runoff to the river. And the North entry is still a
project in process as I gather more stones from the property.
|
|
|
|
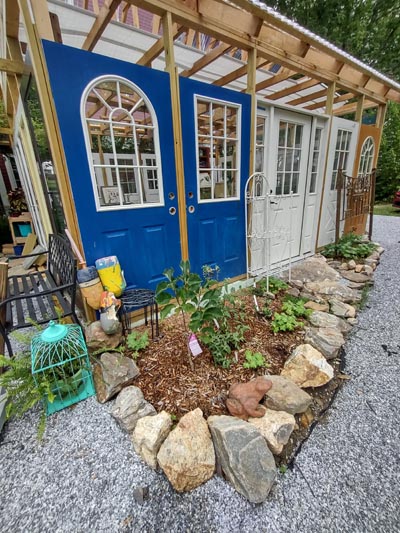
| And the
gardens began to bloom!
|
|
|
 |
|
 |
The west entry got some attention...but will probably get some more
during my rock gathering.
|
|
|
|
|
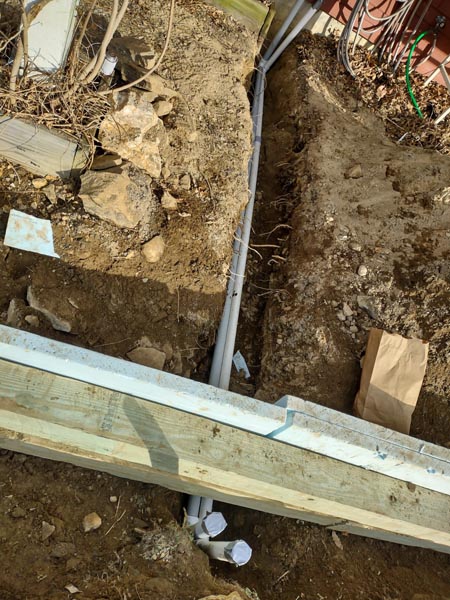
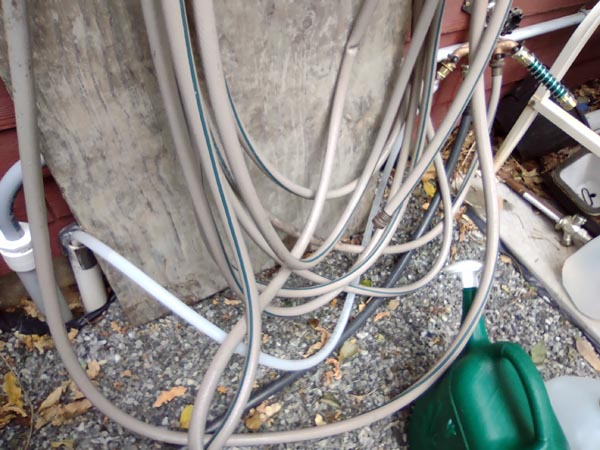
INSIDE PLUMBING |
JUNE 24, 2022
The 'outside sill cock to inside sinks' plumbing project began on June 24th. The pex was installed,
the PVC attached to the two sinks and a trial run showed that the water
flowed successfully through the pipe I installed underground last
December. I extended the PVC pipe to reach the walkway runoff and then
built a chase to protect it from the gravel and big stones. Unfortunately, there are several steps still to be completed
before the sinks will have 'on demand' water. Stay tuned!
|
|
|
 |
 |
|
|
WIRING ELECTRICITY |
|
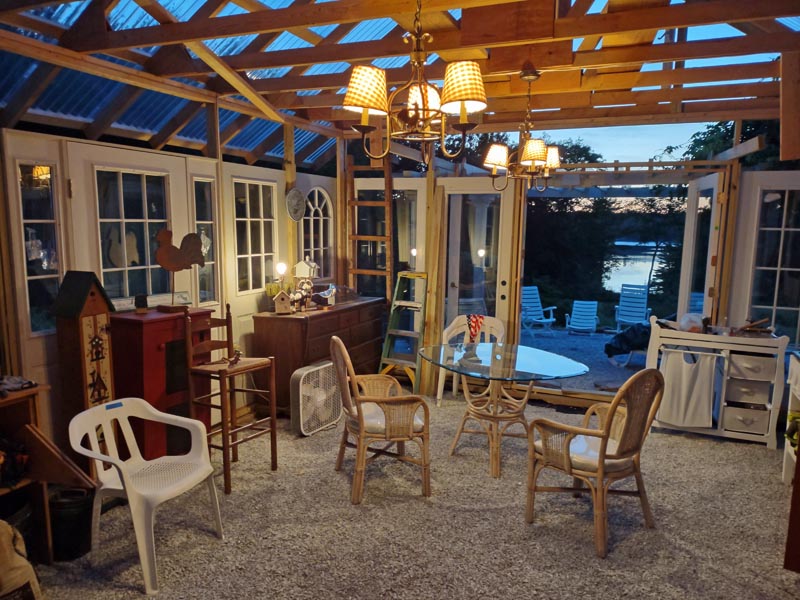
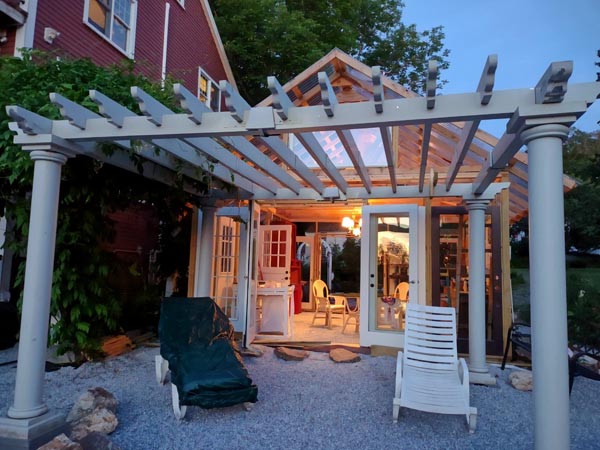
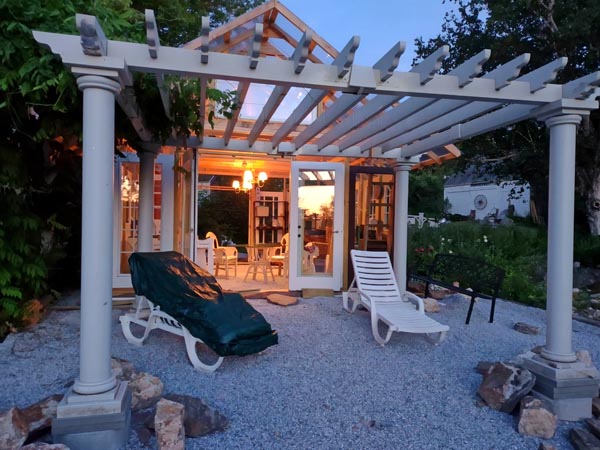
JULY 18, 2022 |
Two friends and I wired
the greenhouse with plugs and switches for lights, etc. It's very
fetching-looking at dusk and after dark...from the South...looking
toward the river...
|
|
|
|
 |
|
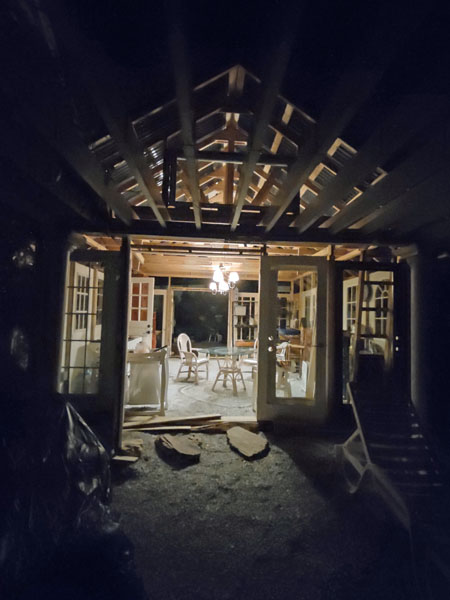
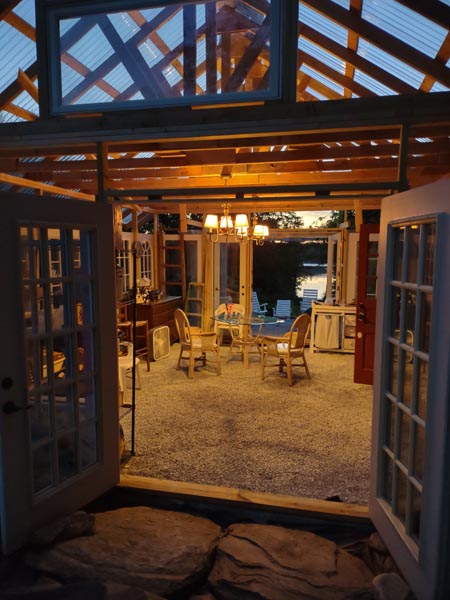
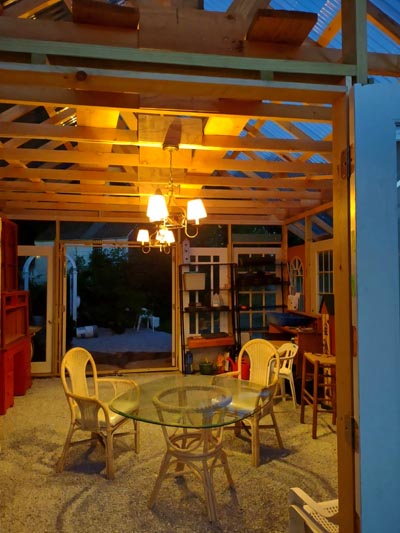
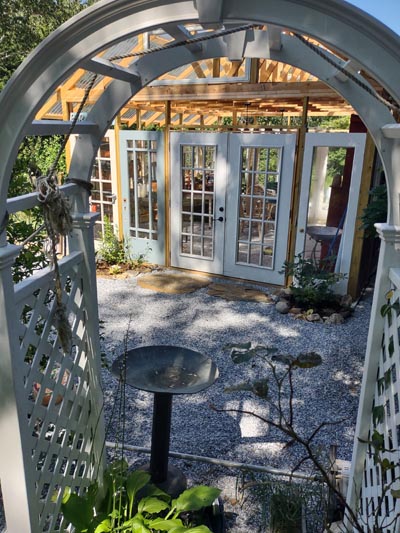
...and from the
North...looking through the attached gazebo... |
|
|
 |
|
|
|
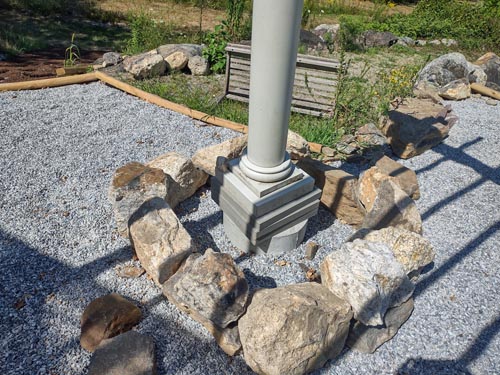
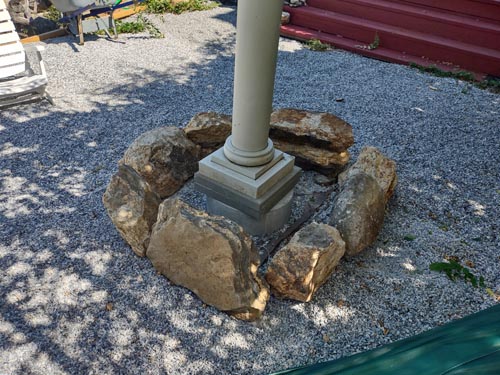
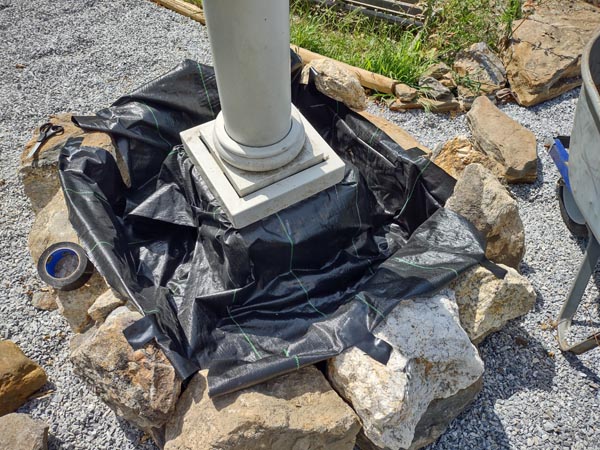
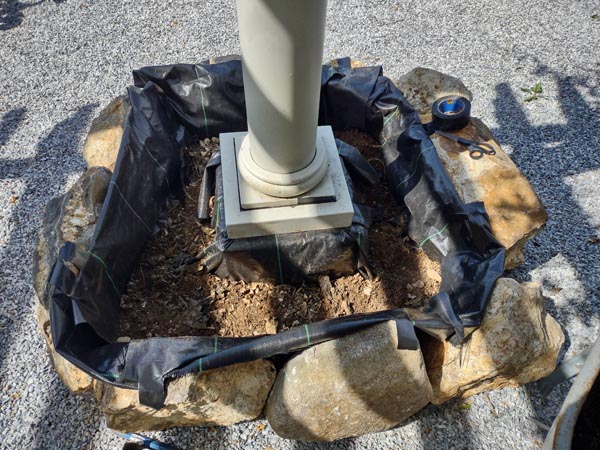
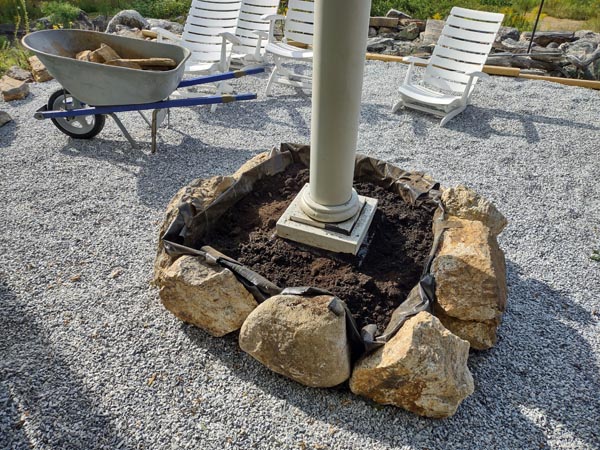
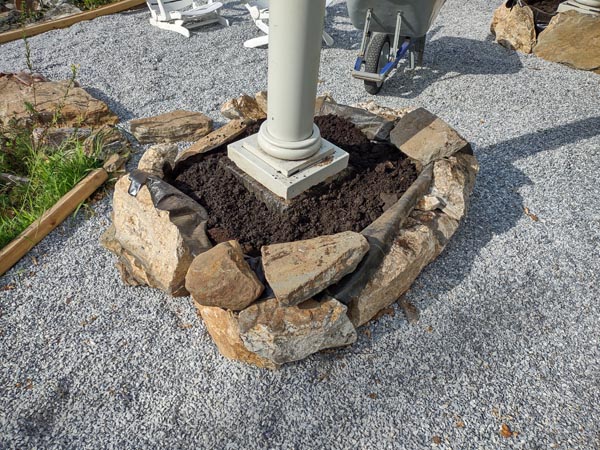
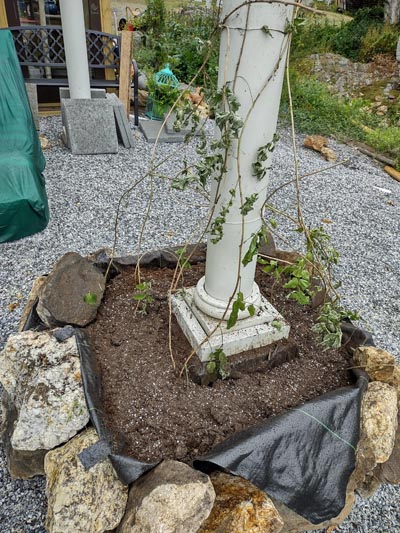
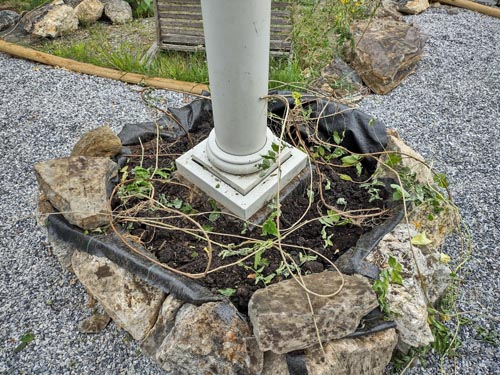
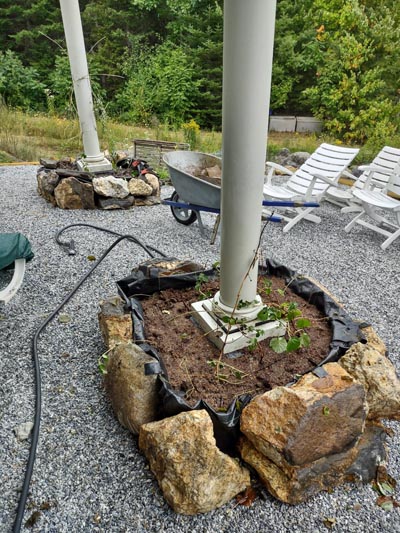
RAISED GARDEN BEDS TO
HIDE THE COLUMN BASES |
AUGUST 17, 2022
While trimming the wisteria and a climbing hydrangea plant--both of
which were entirely OUT of control--I saved some slips with good roots
and have kept them in water for a month. They seem to be strong enough
to make a new start while hiding the ugly stacked column bases. I
dragged these ancient stones into place...sort of...and installed strong
landscape fabric, then layered soil, manure and potting soil to serve as
the organic structure for growth...and raced to finish before
yesterday's rain started...almost made it, but we all got a little
soaked...happily!
|
 |
 |
|
|
|
 |
 |
|
|
 |
|
|
| AUGUST 18, 2022 |
|
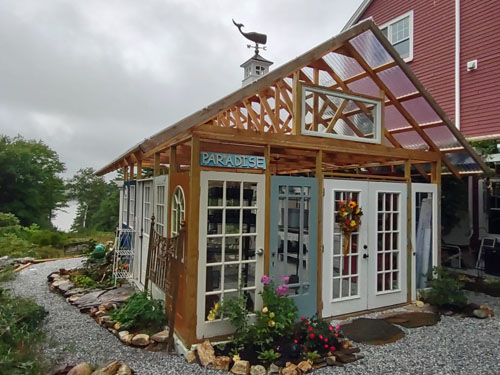
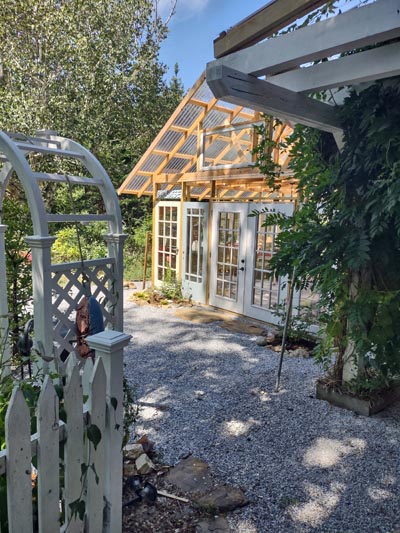
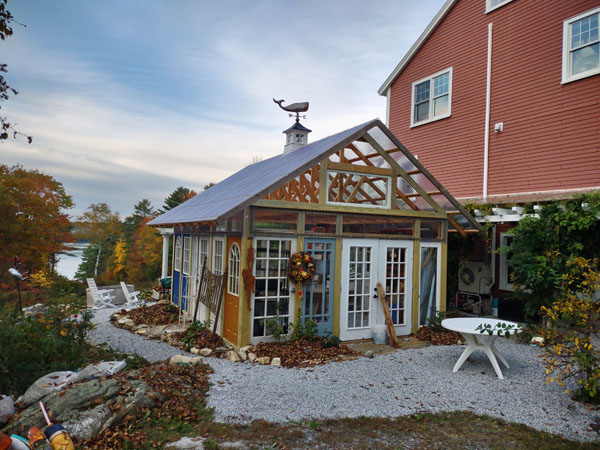
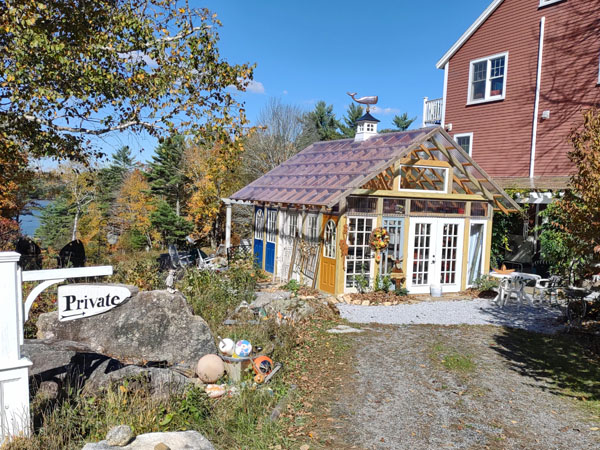
THE GREENHOUSE AT
THIS STAGE...AUGUST...SOUTH END |
|
|
|
 |
|
|
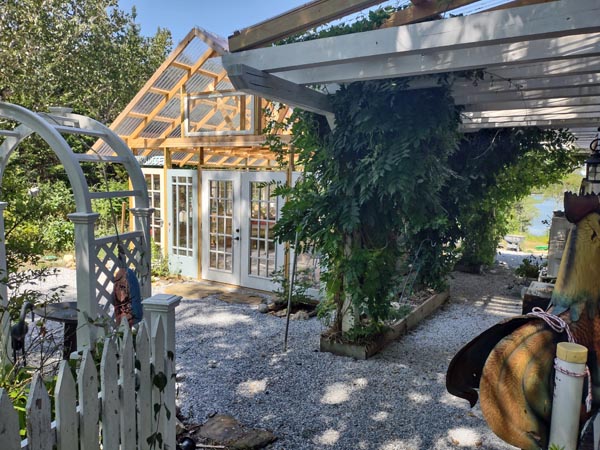
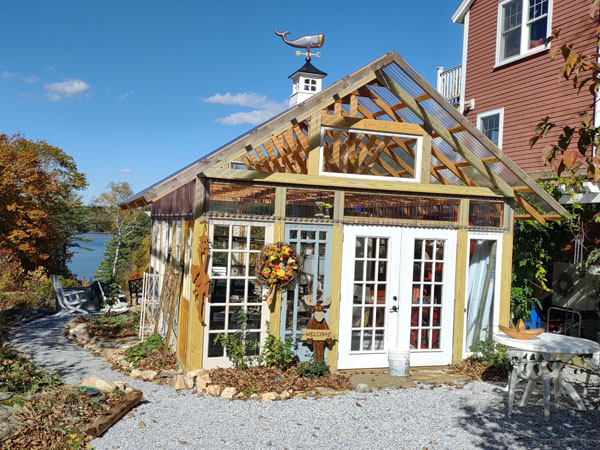
THE GREENHOUSE AT
THIS STAGE...AUGUST...NORTH END |
 |
 |
|
What's next? When the season is over in early September, it's time to
organize the interior, paint the outside of the doors, weatherproof the greenhouse, fill in and insulate all the gaps,
including the gable ends, install the outside casing, the 'chicken
house' fans...and the last, but not least, install the STAINED GLASS!
But some of these projects will have to wait until spring. The
pressure-treated casing is SO wet, it will take all winter to dry and
then I can paint it and choose the door colors to set it all off. And
the chicken house fan(s) will be installed only when it gets really hot,
so likely next June.
So please do check back in the
Spring and follow our journey. Thanks!
|
|
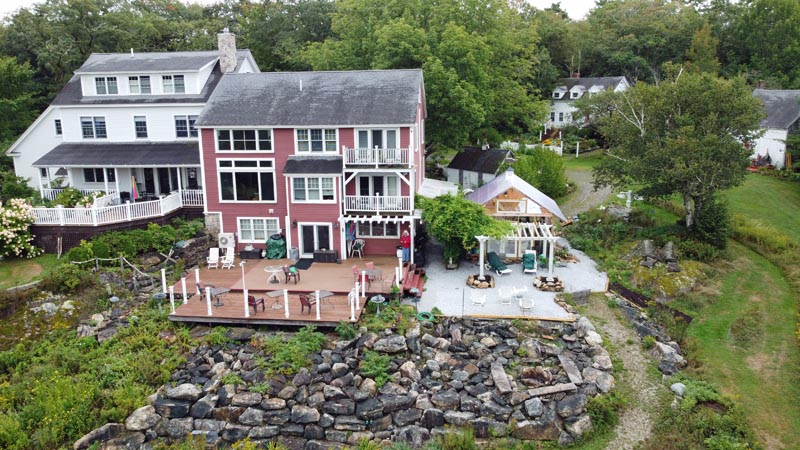
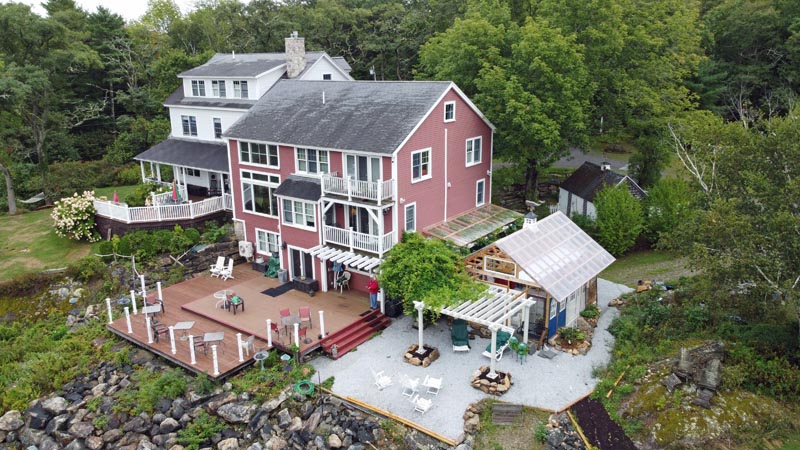
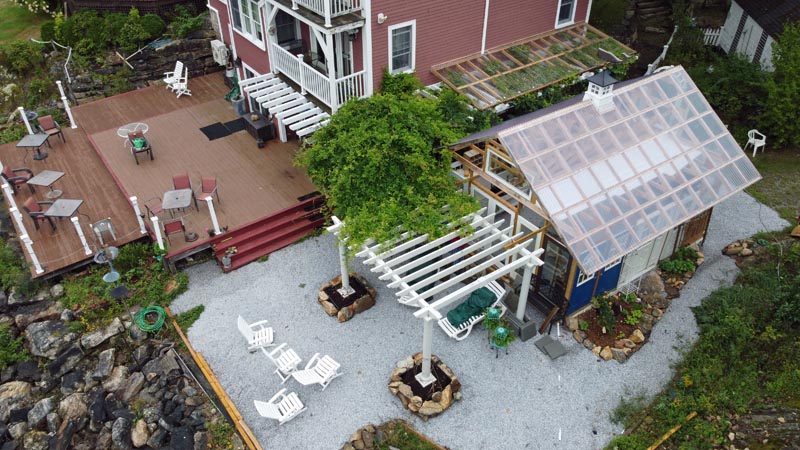
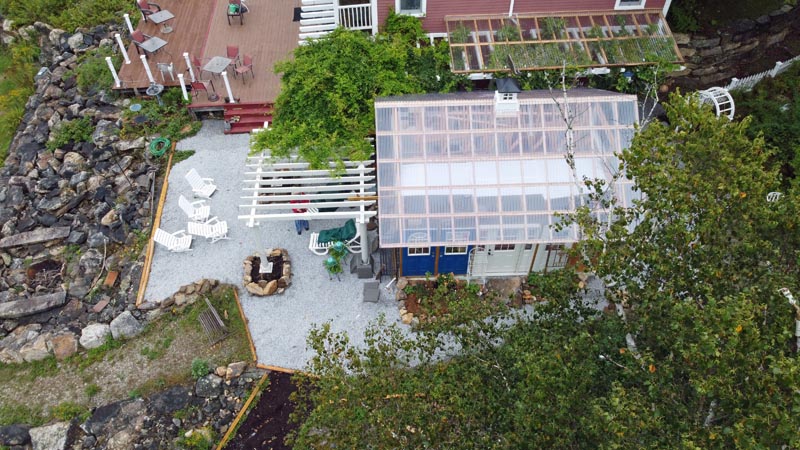
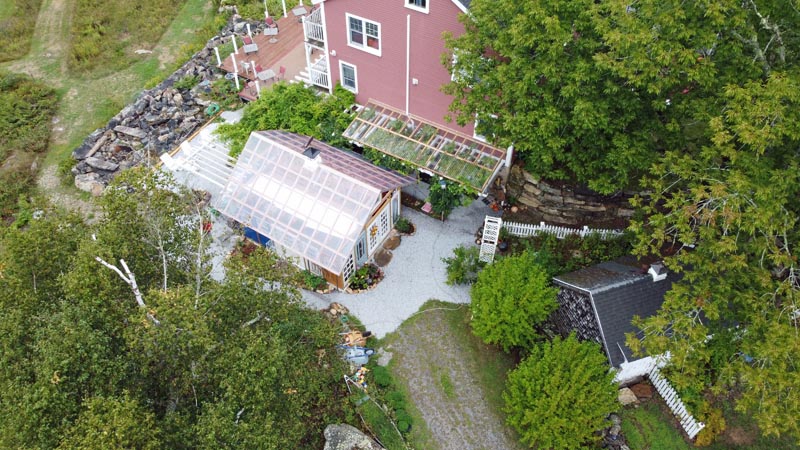
THE GREENHOUSE AT
THIS STAGE...AUGUST...from the air!
|
|
SEPTEMBER 6th, 2022
A gorgeous Fall day...I sent the drone up
to take some updated greenhouse pictures...so satisfying to see the
progress!
|
 |
 |
|
|
|
|
|
|
SEPTEMBER 16th, 2022
Next, the 'casing' of the exterior walls.
The doors are only held together, as a wall structure, with studs and
jack studs...and so they need to be 'cased' for strength and against the
wild winter weather. I was going to use 200 year old barn boards, which
would look ancient and wonderful, and which I have from purchasing the
'Homer Jones barn' from North Waldoboro in 2008. But they would be
vulnerable to the weather, so I opted for pressure-treated 5/4 by 6"
decking material and screwed them into place, so that I could move
forward with closing in the 'transoms' by attaching the same roofing material as
weather-guard above the doors.
Once the upright casings were in place, I got a chance to comb the property for
additional large flat stones, and was able to complete the north entry
area, so there's a firm, safe walkway. My wrists aren't happy with me,
but that's just a natural consequence!
|
|
|
|
|
|
 |
|
 |
 |
|
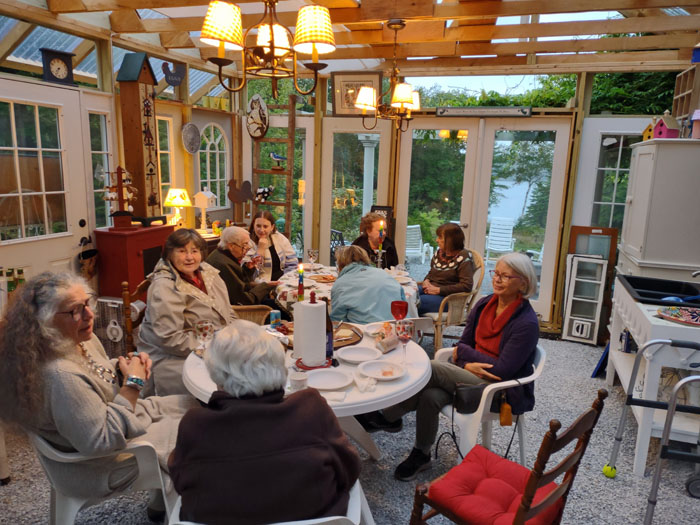
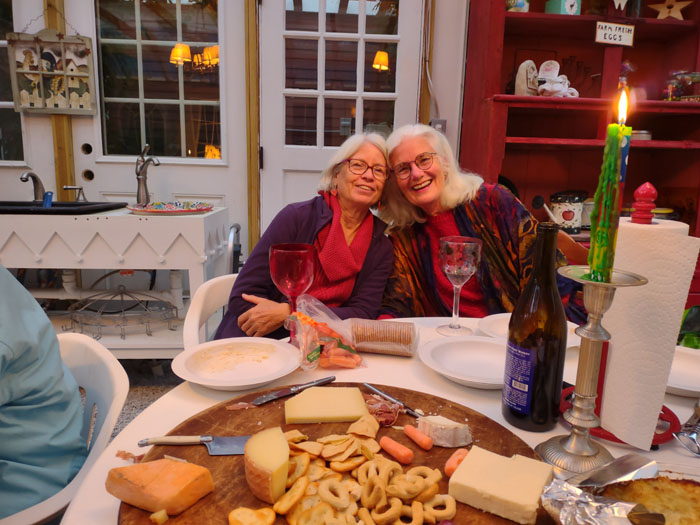
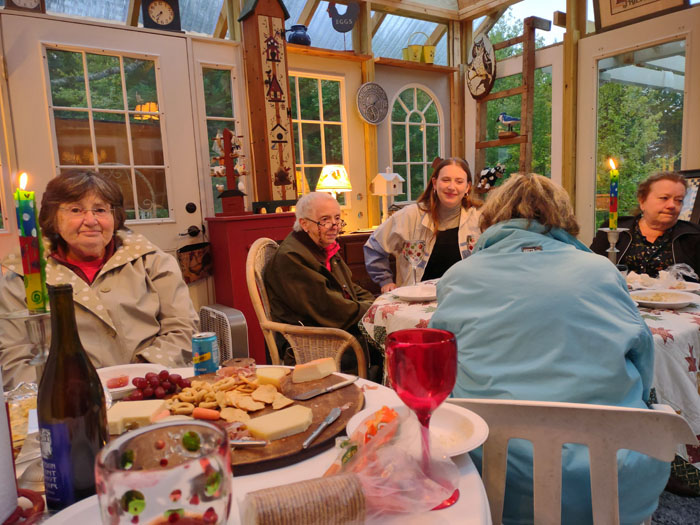
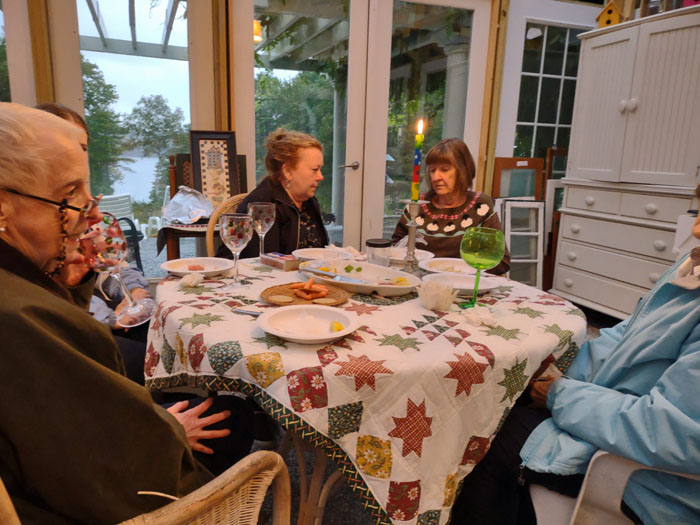
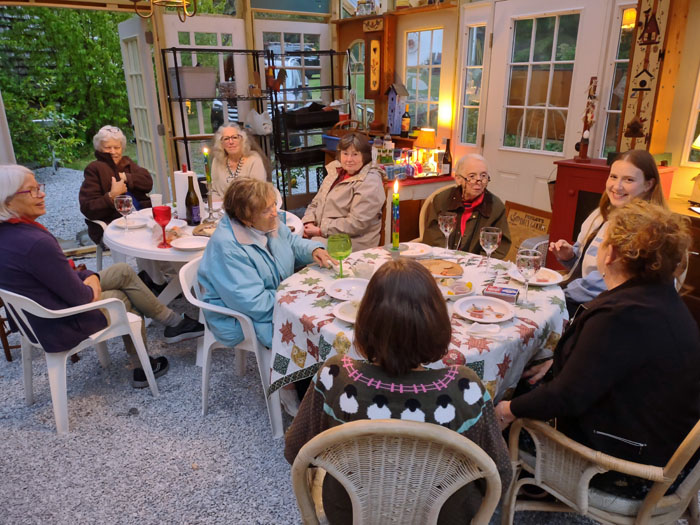
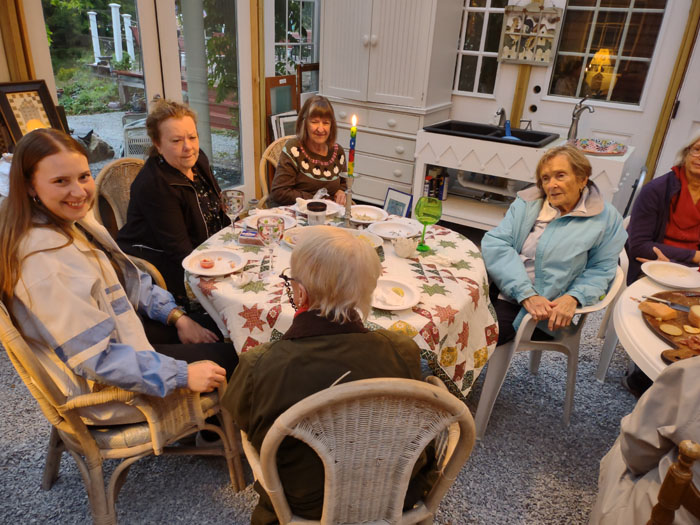
SEPTEMBER 19th, 2022
Just hours before my first greenhouse event
(with my beloved Boothbay Region Gourmet Book Club) was to occur,
I found a way to use the 200 year-old barn boards as shelving, above the
doors, to hold the various whimsical, colorful tzchachkis I've been
collecting. The transoms were only begun, and the gable ends had
wide-open and empty window areas, but it was warm enough for us to have
cocktails and appetizers in the greenhouse before moving into the
Farmhouse dining room for dinner and book discussion. Such a delight!
|
|
 |
|
|
 |
 |
 |
|
|
|
 |
 |
|
SEPTEMBER 20th, 2022 |
|
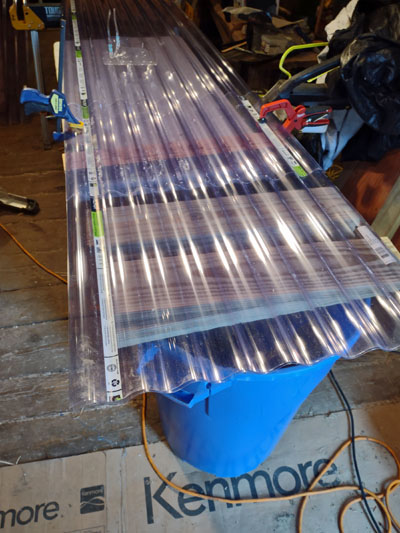
Then it was on to finish the
transom installation. The Suntek engineers did NOT plan for their
polycarbonate panels to be used in this manner, but I wanted as much
light as possible in this area, so I decided to explore the
possibilities.
The challenges included the fact
that the polycarbonate DID NOT cut well when I was installing the roof
and cupola, so it took some creative thinking to come up with a way to
cut 24 pieces of twelve foot long roofing to become 22" covers for the
transom openings. Here's what my cutting table looked like....and
miracle of miracles, after a couple of trials, all of them came out
well!
|
|
 |
|
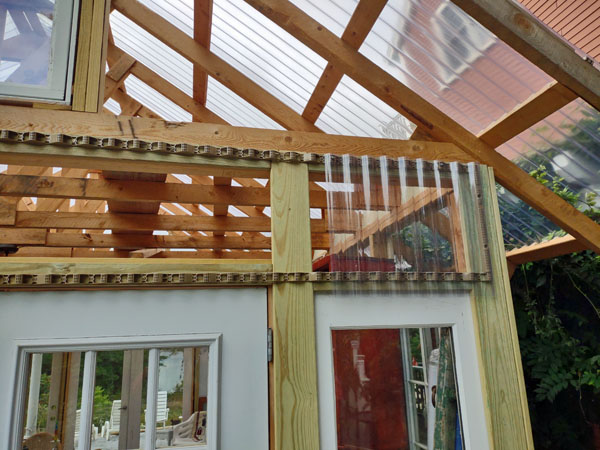
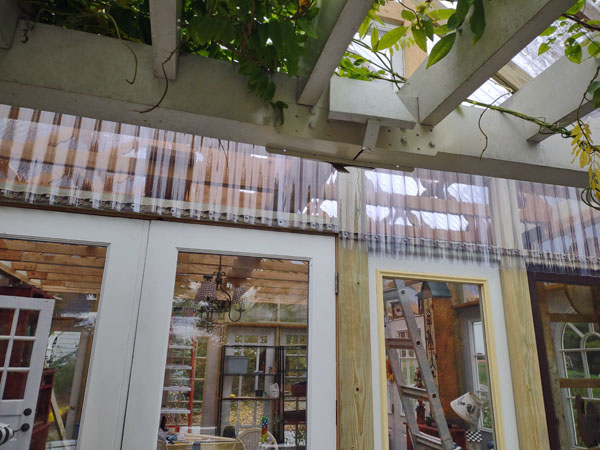
SEPTEMBER 22, 2022 AND 23, 2022
First, I screwed the
horizontal closures on the top plate and bottom plate, similar to
screwing them to each purlin, as on the roof.
Then I screwed the roofing pieces over the plates...MUCH more difficult
on the perpendicular than on a nicely sloping roof...lots of slippage
while I balanced on the ladder!
|
|
|
 |
|
|
|
SEPTEMBER 29th, 2022-October 10, 2022
Then, after a failed attempt to install
Lexan in the gable end window openings, I took off for a spontaneous
getaway to check out the leaf colors in Quebec province....see my trip
pictures here...and back to Maine for a day...and then on to CT for
birthday parties and more leaf colors. Ahhhhh....so visually
satisfying!!
|
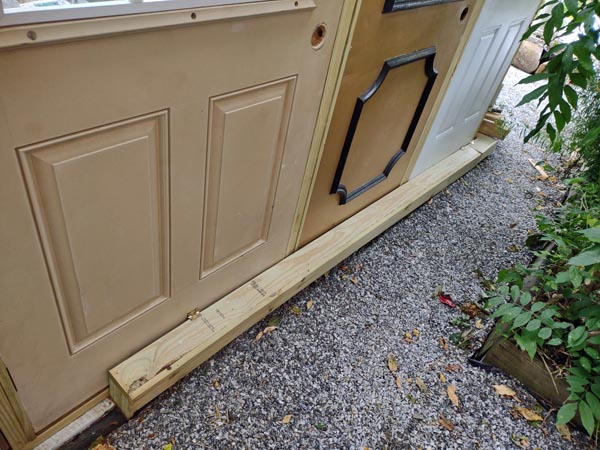
OCTOBER 16th, 2022
Next it was time to install the bottom casing...a dreaded project that I
put off until the season was about to close in. I had to dig out much of
the gravel, dirt and insulation to make each casing fit...then refill
with gravel on the North and South walls to effect runoff. Finally, they
all were complete. Phew!! All the casings will dry out over the winter
and hopefully be ready for paint in the spring. And I was able to rake
the multitude of leaves over the new garden plants to hold in water and
nutrients and protect them over the long Maine winter.
|
|
 |
 |
|
OCTOBER 16th, 2022
The final challenge for this year
was finding something clear and strong to insert into the 3 irregular
window openings on either gable end of the building. In between other
work appointments and projects, I spent two weeks researching lexan,
plexiglass, acrylic, and even glass...though I was leery of single-paned
glass since it has little insulation value. The plexiglass won out, but
the cost was prohibitive...$2400 to have a company fit it in
place...$1400 to buy 6 pieces of 36" by 72"and install it myself.
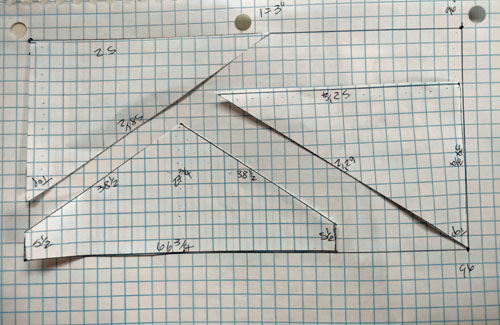
So I thought and thought and
finally, one early morning, I went upstairs, searched out a pad of graph
paper and, fingers crossed, tried to fit the pieces on 2 larger pieces
of plexiglass, which seemed to be easier to find and didn't require the
company to cut them. YES YES YES!! I found that three pieces would fit
on each 48"x96" piece. WOO HOO!!
Then I sourced the best price for
those large sheets...at a wonderful little Ace Hardware store in
Waldoboro, RZR, and went to pick them up, with 2 identical sized pieces
of luan wood. Total cost of material: $500.00!!
|
|
|
OCTOBER 17th, 2022Rick
and I measured and cut the luan and corrected each piece until we got it
right as a pattern...then copied it onto the plexiglass and cut it with
a 140 tooth saw blade. I'd heard all sorts of horror stories about the
plexiglass cracking, splintering, breaking, etc. but we were careful,
worked together, kept it solidly immovable and every piece came out
really well...and they all fit into their slot. Another miracle!!
You cannot see the plexiglass in
this picture...held in by the 5/4 x 6 inch casing on the outside.
|
|

|
And you can't see it on the left here as I screw in the 2" x 2" molding
on the inside. But you can see it in the picture on the right. It is SO
clear and beautiful, it gives me a thrill each time I look at/through
it. A really great outcome to a long, difficult challenge.
|
|
|
 |
|
And this completes the closure
of the greenhouse. It is now ready for the weather, with lots of smaller
projects to do during the winter and spring, but usable and enjoyable.
I'll install an interior and an
exterior thermostat so I can track how much warmer the greenhouse is
than the outside weather, but I can feel a difference already.
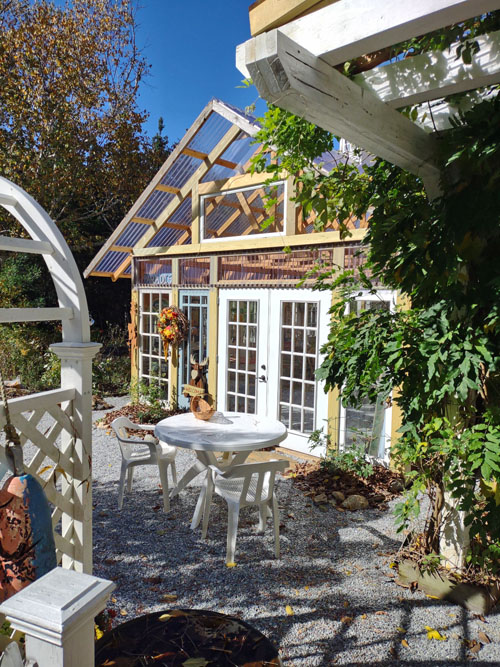
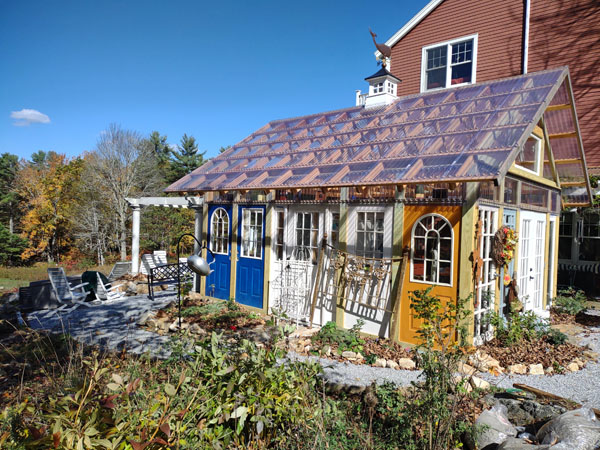
JUST LOOK AT THIS
MARVELOUS SPACE!!
|
|
FROM THE SOUTH |
 |
 |
|
|
 |
 |
 |
|
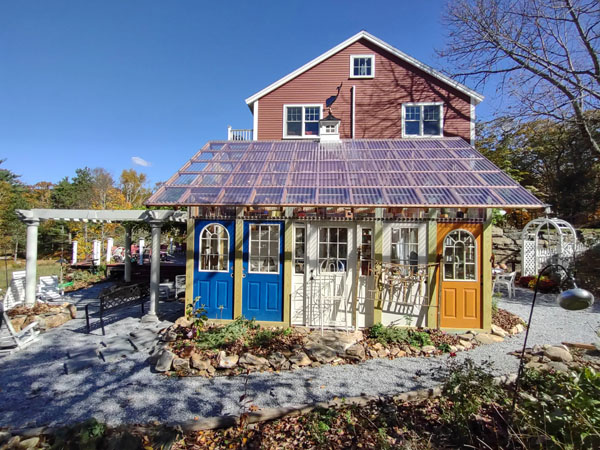
FROM THE WEST |
|
|
|
|
FROM THE NORTH |
|
|
 |
|
 |
|
FROM THE AIR
|
|
|
|
|
AND....RELATED
PROJECTS THAT GREW OUT OF THIS ONE
|
|
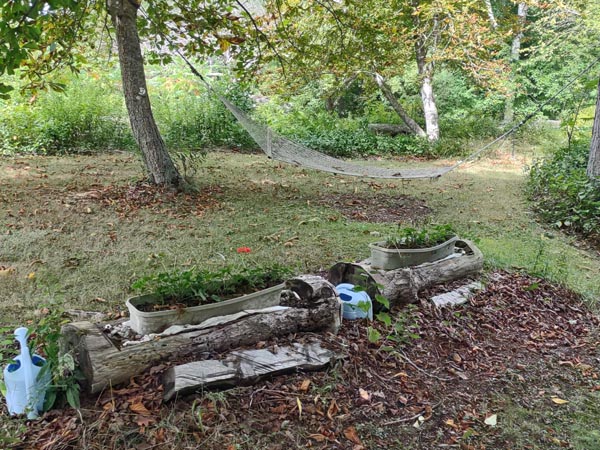
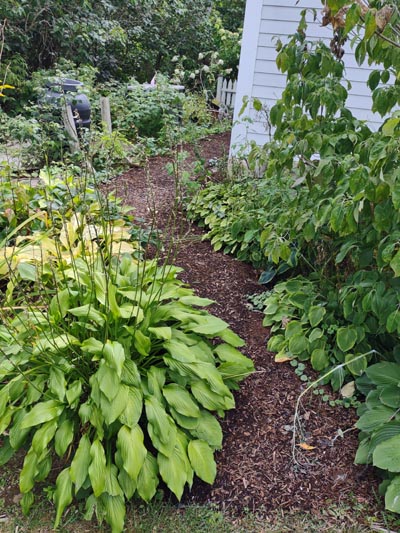
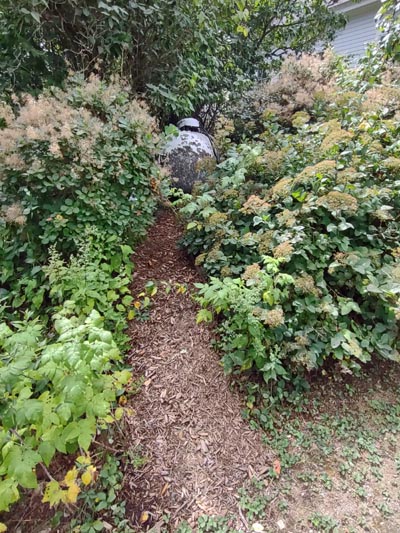
I don't enjoy weed whacking so was very
happy to put down lots of landscape fabric under gravel to ensure that I
won't be weed whacking this area for a long time to come. And that
generated the idea that I could also avoid much weed whacking by
installing landscape fabric with mulch over it on the various walkways
around the 15 acres.
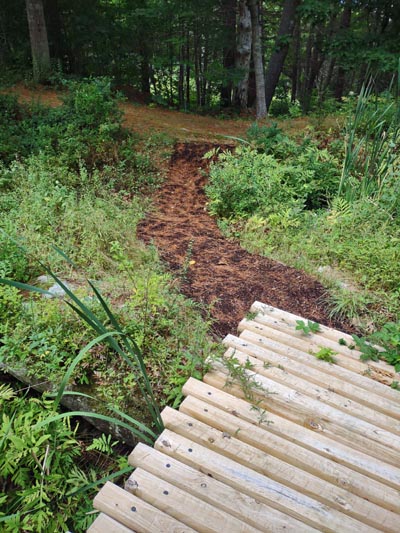
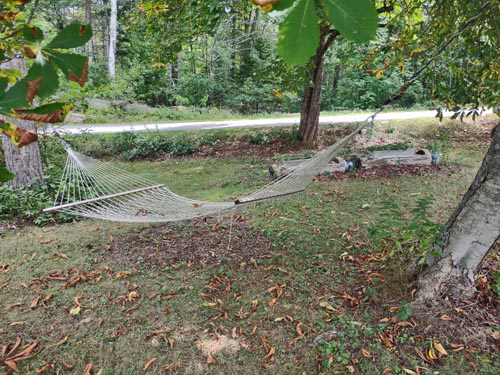
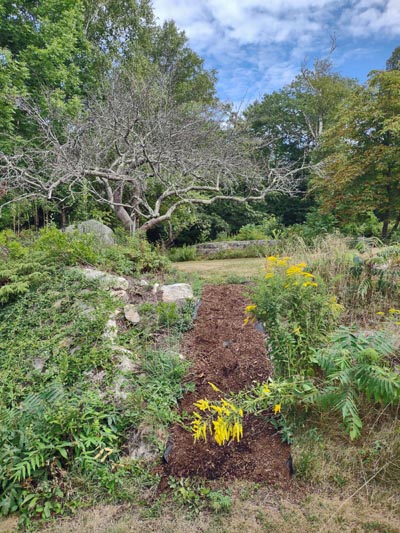
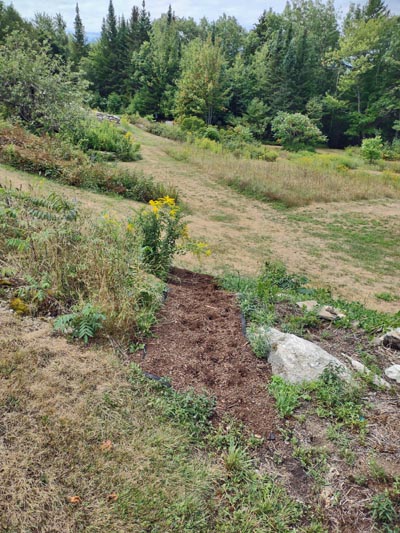
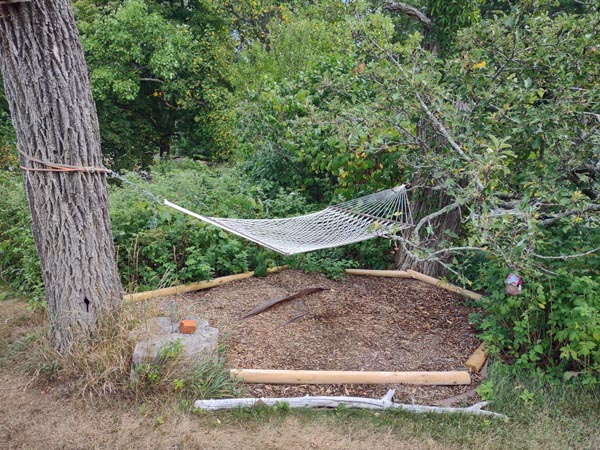
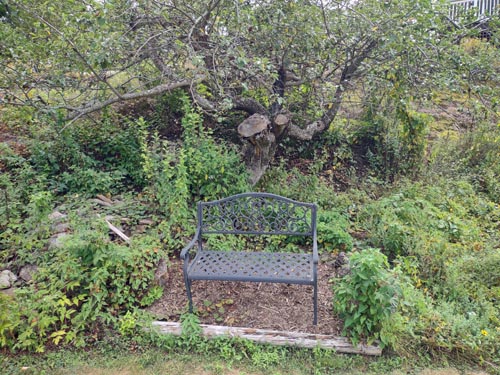
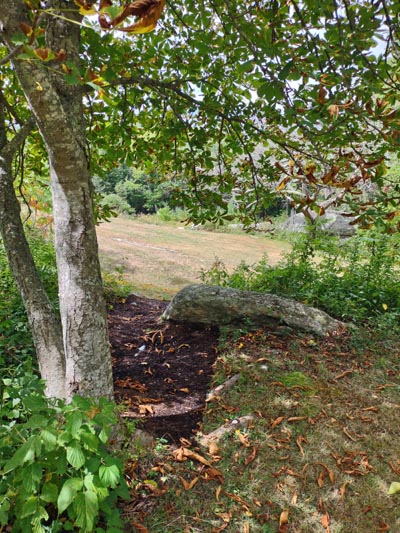
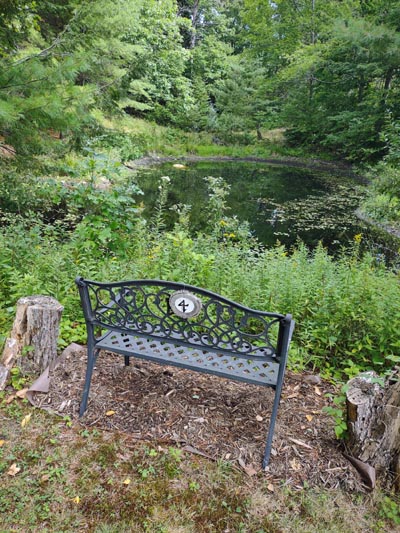
Here are the 'landscape fabric plus
mulch' projects that evolved from the 'landscape fabric plus gravel'
project...walkways |
|

walkways to the
raised garden... |
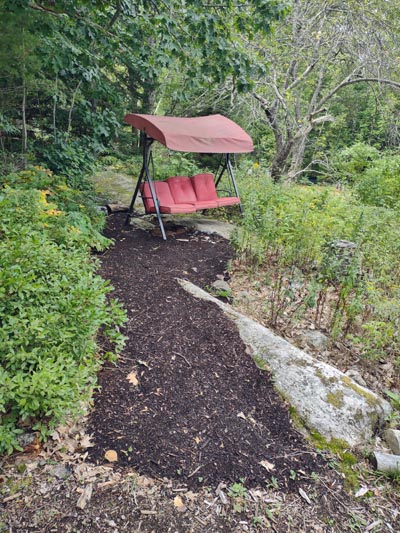
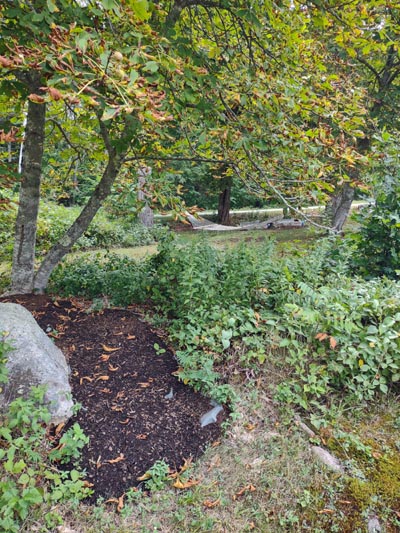
to the Cape swing...
|
|
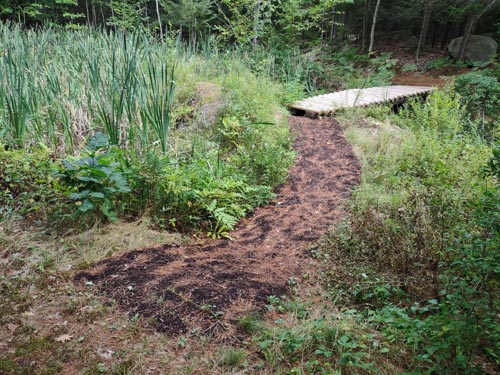
to the bridge... |
|
|
 |
|
|
between lawn areas... |
|
|
|
 |
|
 |
|
|
|
 |
|
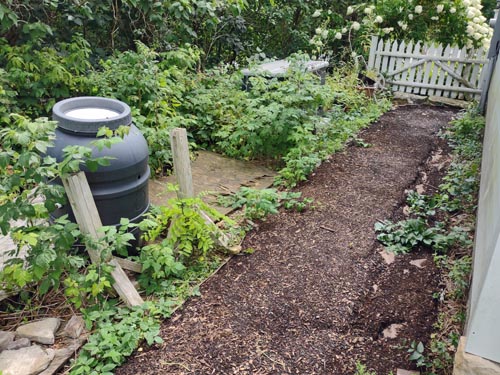 } }
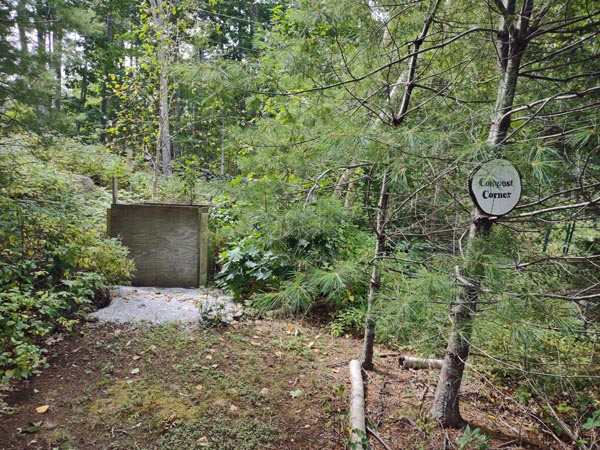
to the Farmhouse compost area, to the
propane tank... |
|
 |
 |